Some may be celebrating all the new iOS 11 features, but others may already regret updating their iPhone. A new iOS version can mean incompatibility issues with older apps, or may lead to battery life issues — and have you wondering how to downgrade from iOS 11.
Whatever the reason, we’re glad you’re here now. There’s still time for you to go back to the previous version of iOS, which was iOS 10.3.3. The way it works is that Apple signs iOS software for a while until newer versions are released. Because iOS 11 was just released, Apple is still signing iOS 10.3.3, so that means you can roll back to that version of iOS. If you want to do this, you’ve picked the perfect time, because when newer versions of iOS 11 come out, Apple will stop signing iOS 10.3.3 and then you will no longer be able to roll back to iOS 10.
So, how do you do it? How can you go back to a previous version of iOS? The process isn’t very difficult, but you have to keep two things in mind. The first thing is that you’ll have to download iOS 10.3.3 manually, but don’t worry because we’ll show you how in the steps below. Secondly, if you need to restore a backup, you’ll only be able to restore backups made under iOS 10.3.3 or restore your iPhone or iPad as a new device.
With that out of the way, let’s get into it. Follow the steps below to downgrade from iOS 11 to iOS 10.3.3
How to downgrade from iOS 11
Step 1: Make sure that you have the latest version of iTunes installed. Go to Help > Check for Updates.

Step 2: You will have to download the iOS 10.3.3 IPSW file for your particular device manually. Download it to your desktop or somewhere easy to find.
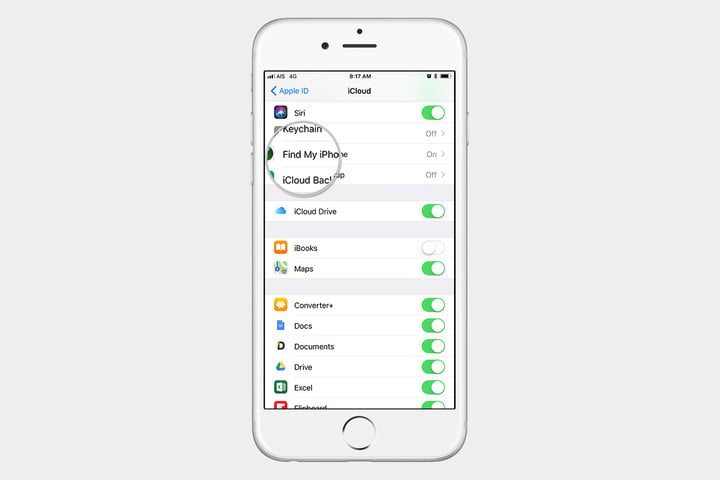
Step 3: Before you perform a restore you have to turn off Find My iPhone. To do this, go to Settings > [Your Name] > iCloud. Scroll down to Find My iPhone and make sure that it is turned off.
Step 4: Connect your iOS device to your computer and make sure that iTunes is open.
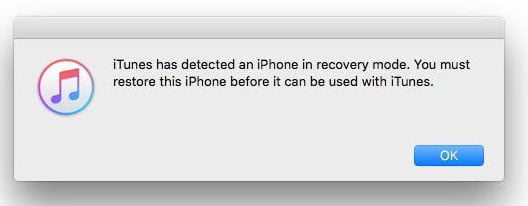
Step 5: Let’s put your iOS device into DFU recovery mode. If you don’t know how to do this, please follow our guide on how to reset your iPhone. Once you enter DFU mode, iTunes will let you know that it detected an iPhone in recovery mode. You can click OK on this message and begin the recovery process.
Step 6: Hold down the SHIFT key if you’re on Windows, or the Option key if you’re on a Mac, and at the same time click on Restore iPhone in iTunes.
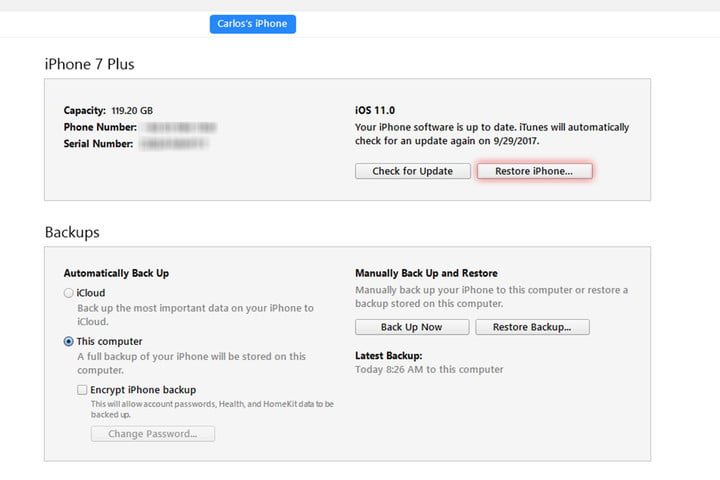
Step 7: A window will come up asking you to browse for the iOS IPSW file. In this case, you want to select the iOS 10.3.3 IPSW file that you downloaded in step 2. For example, if you have an iPhone 7 Plus the file name will be “iPhone_7Plus_10.3.3_14G60_Restore.ipsw.”
Step 8: At this point, iTunes begins the process of restoring your device.
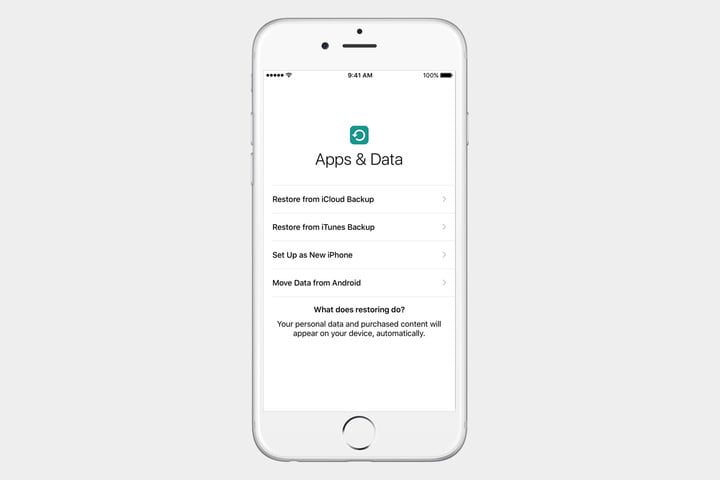
Once finished, iOS will ask you if you want to restore a backup or if you want to set up as a new device. Note that you’ll only be able to restore backups made with iOS 10.3.3.
Source: DigitalTrends
No comments:
Post a Comment