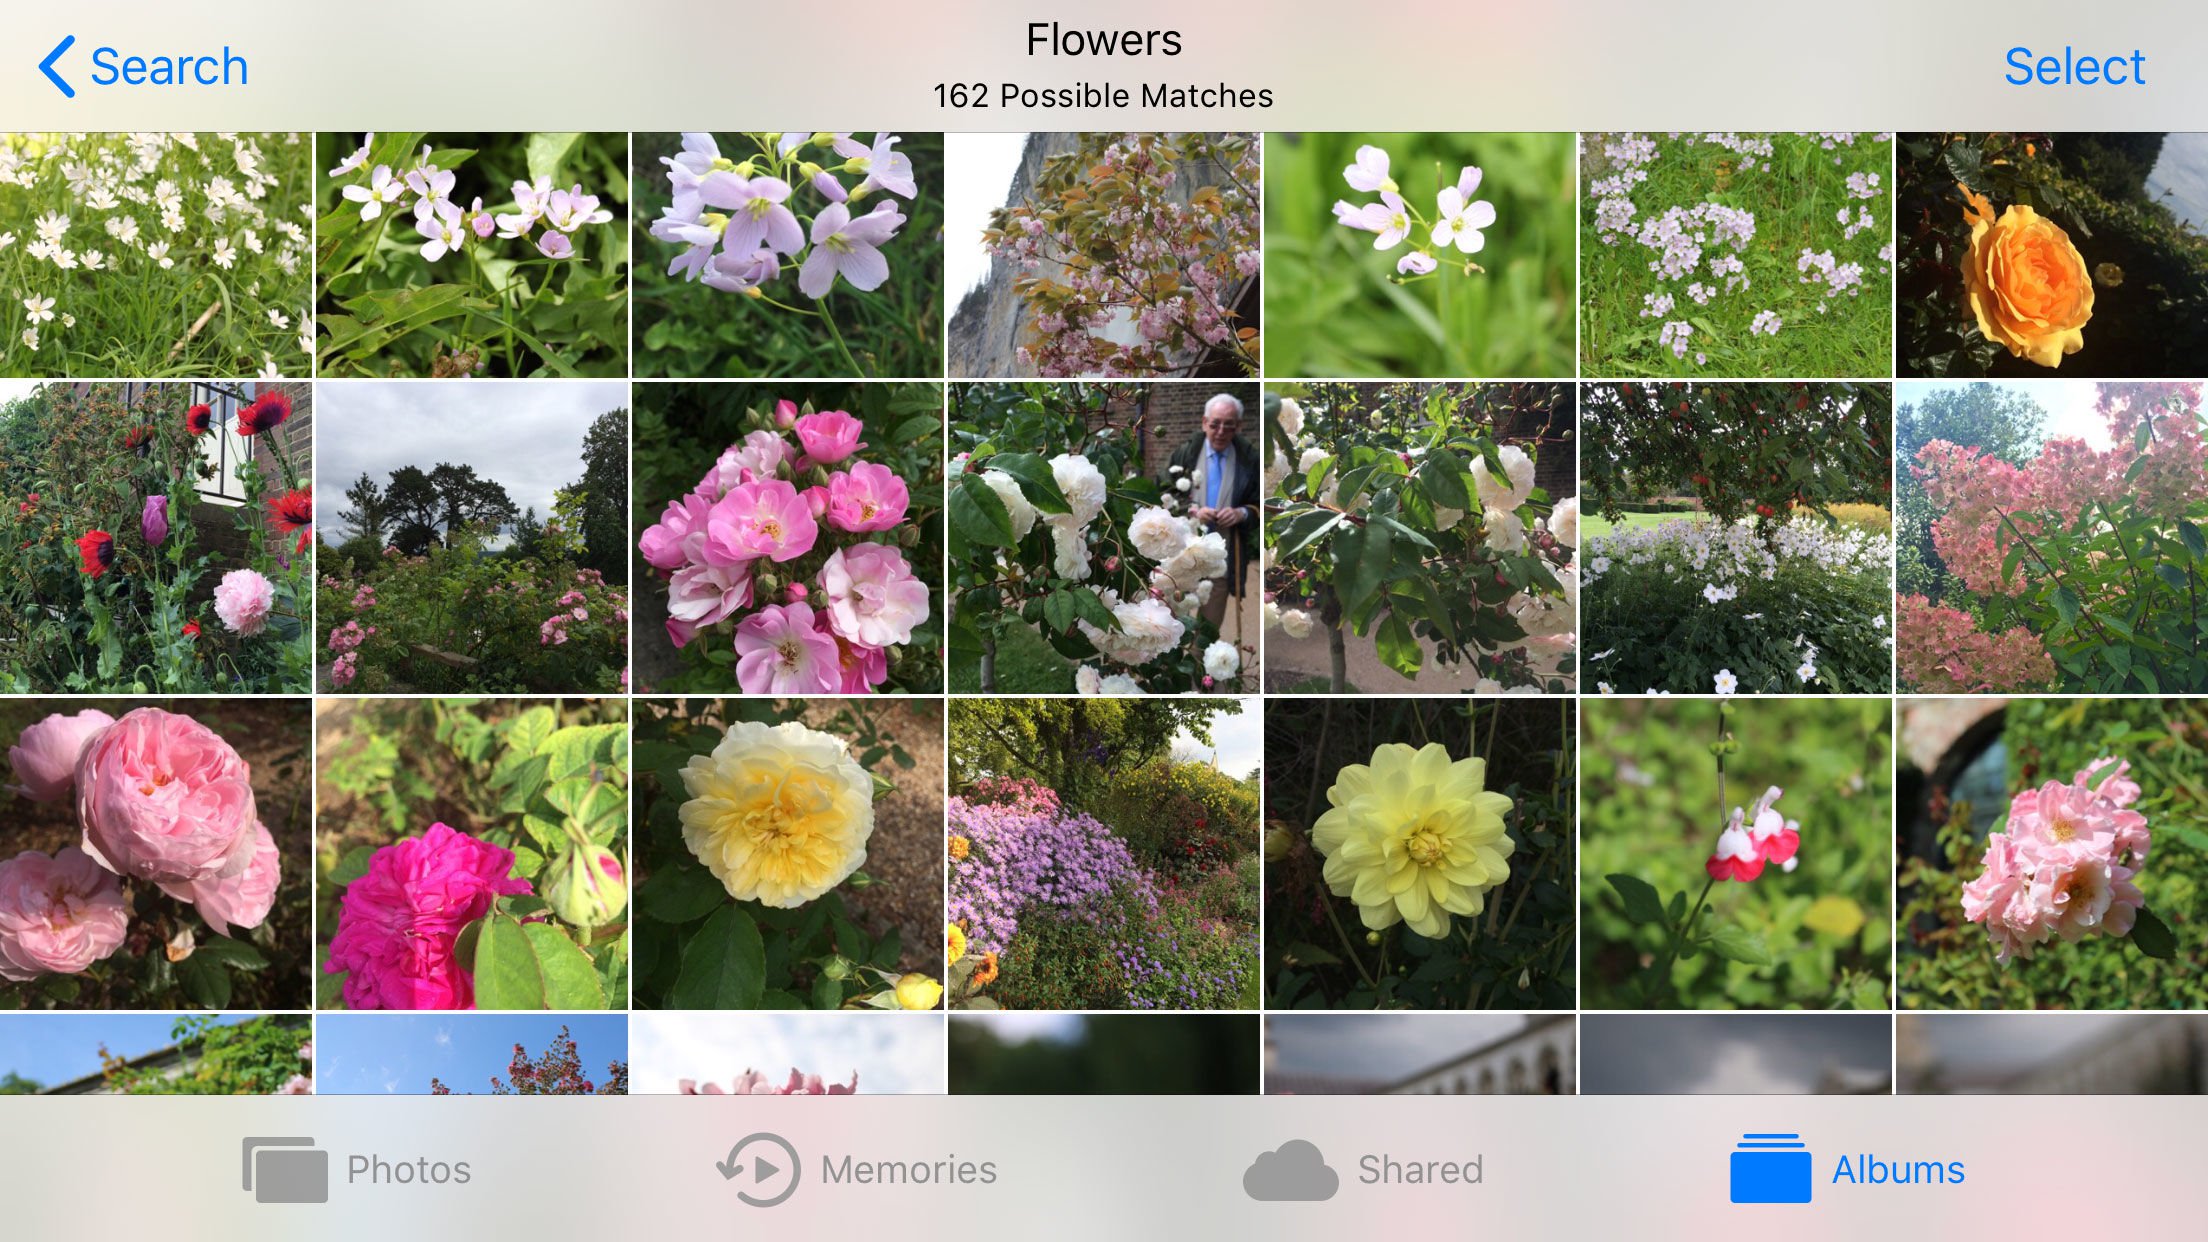
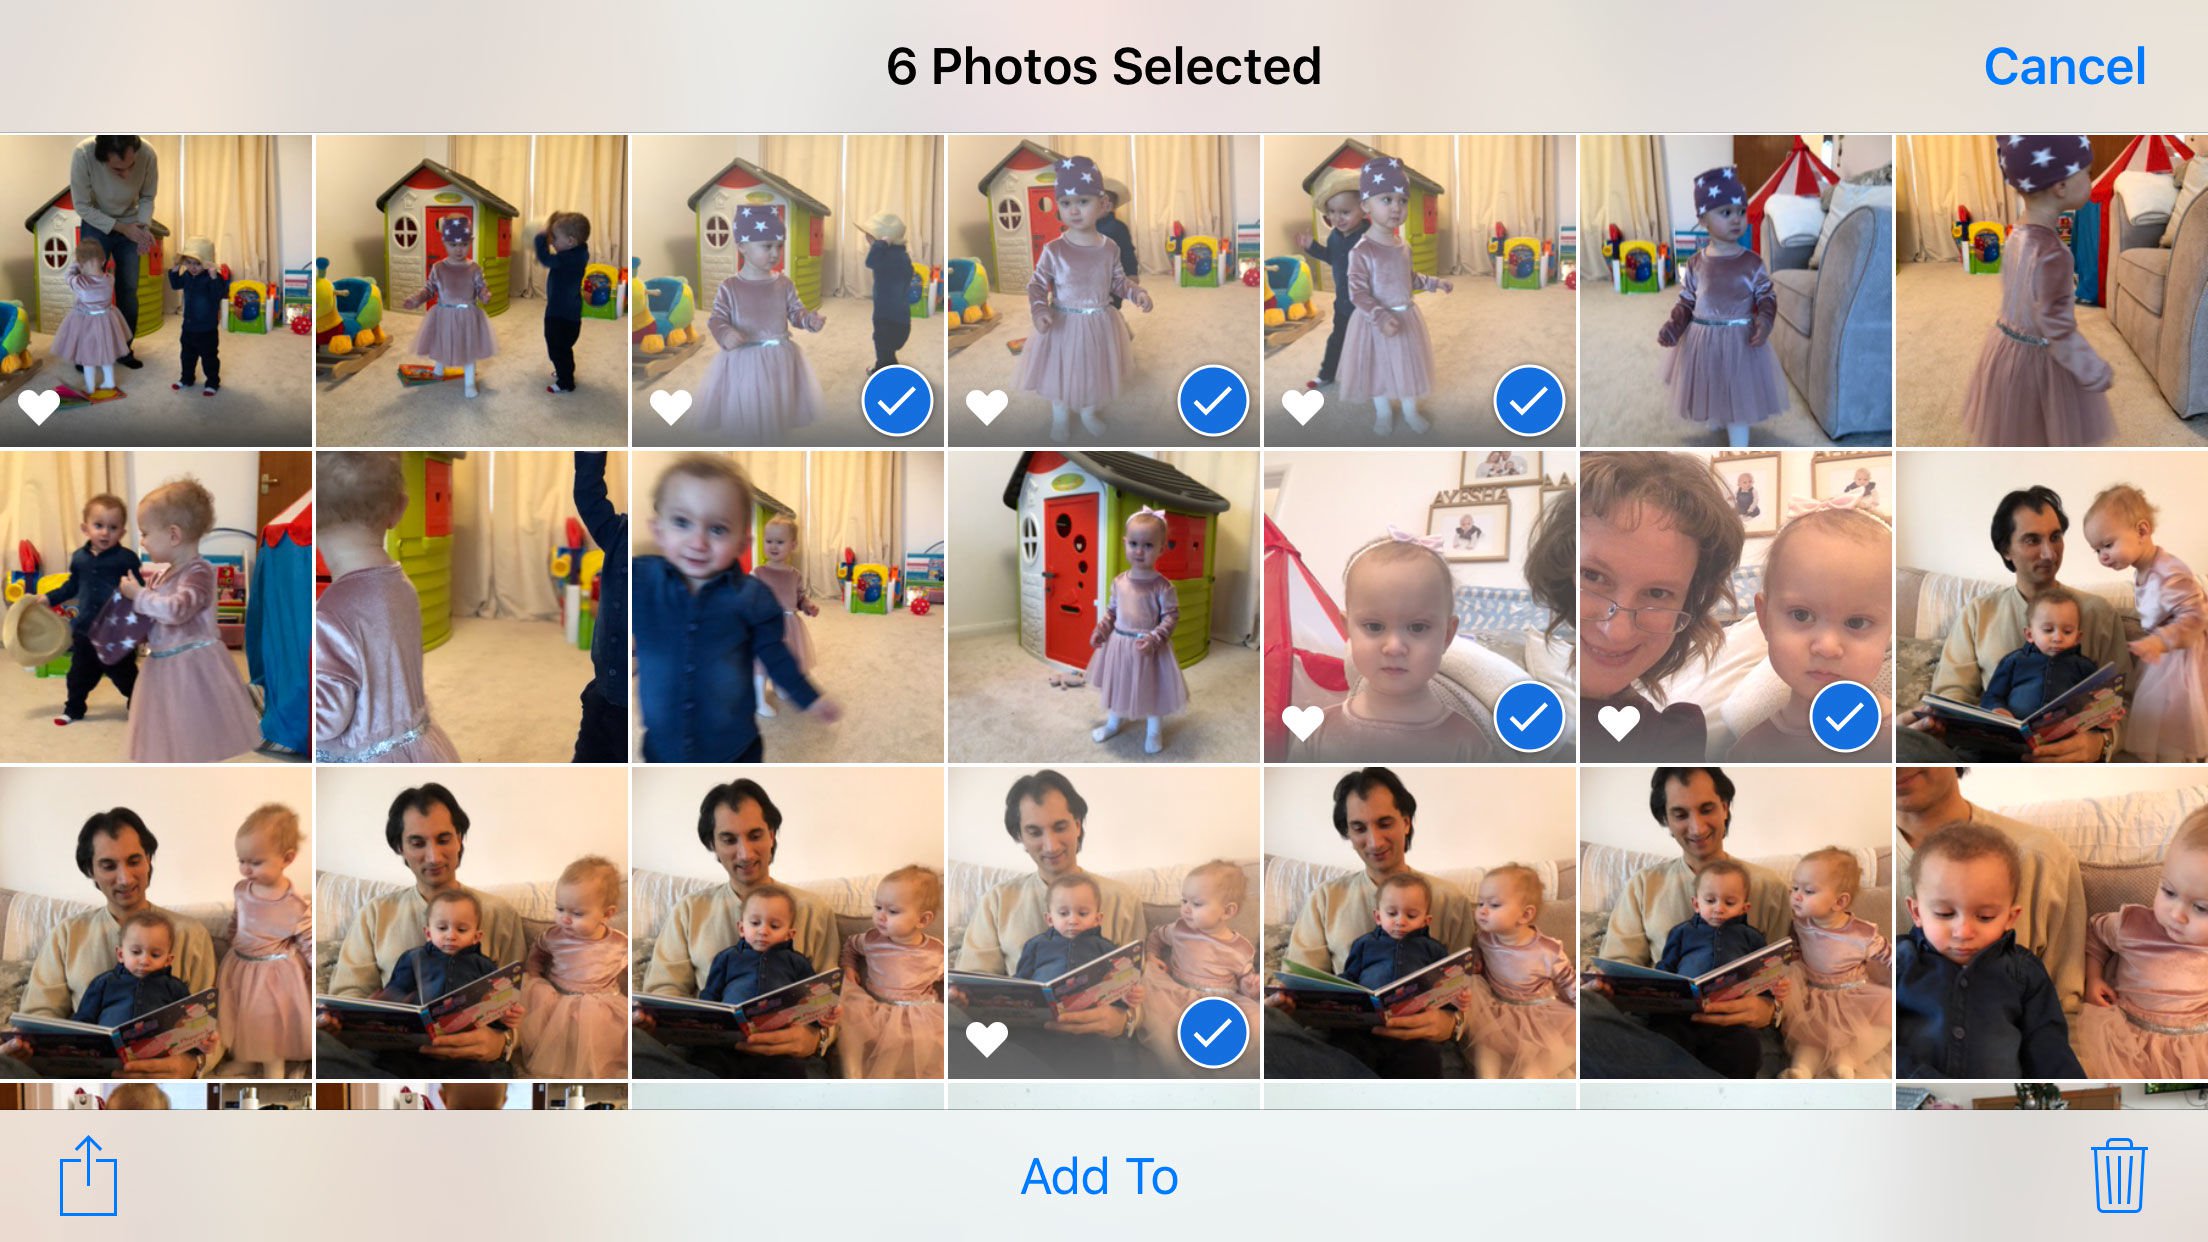
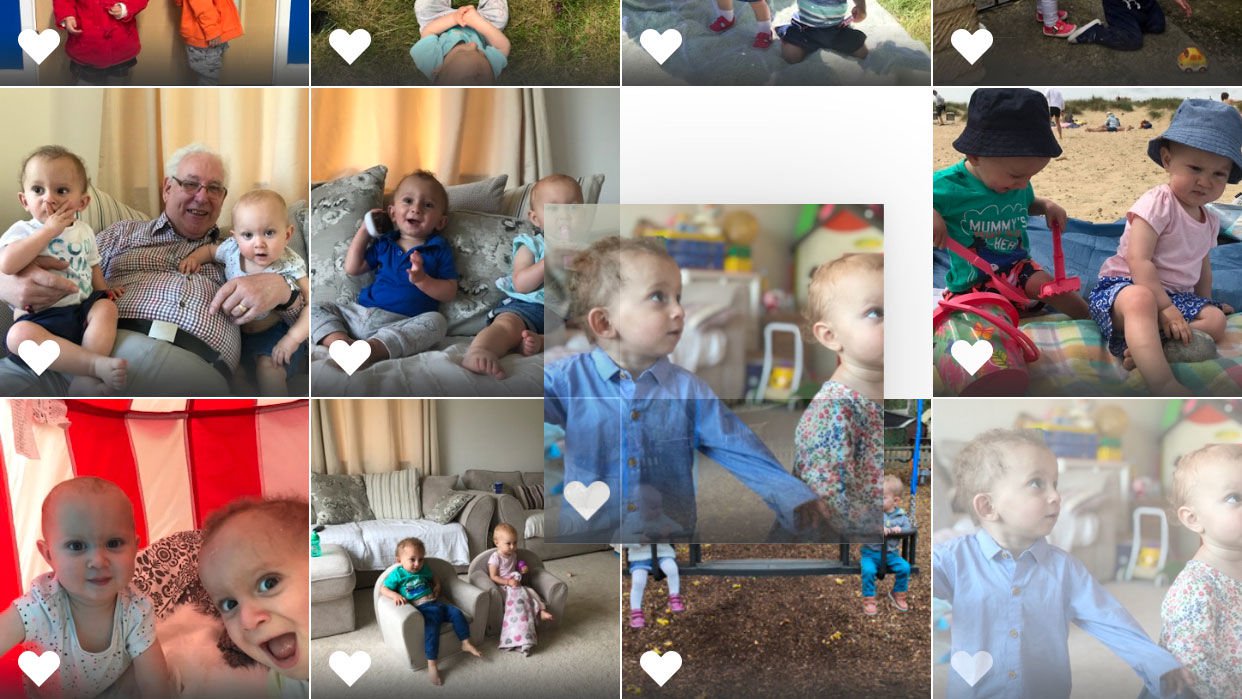
Welcome to our complete guide to setting up and using Photos on the Mac. In this feature we cover all elements of Photos for Mac, including: converting from iPhoto and Aperture to Photos; iCloud Photo Library; Shared Photos; building Books, Calendar, Card, Slideshow and Prints; Edit mode and non-destructive edits; the People feature and Memories.
We also have the lowdown on all the new features in Photos in macOS High Sierra, including the updated interface and editing Live Photos. Additional reporting by Keir Thomas and Karen Haslam
What is Photos for Mac?
The goal of the Photos app is twofold:
1. To bring to your Mac the same simple yet powerful photo management experience that we"re all used to on the iPhone, iPad or iPod Touch, not only in functionality but also in terminology - Photos understands HDR, for example, and applies an icon label to each to the HDR versions of your snapshots. And to bring to your Mac iCloud Photo Library, which syncs your snapshots harmoniously and invisibly via the cloud.
2. When Apple launched Photos, it stopped developing iPhoto and Aperture. They will still run on your Mac but they are no longer available on the App Store and won"t be updated. However, if you need to re-download them, they are still listed in the Purchases tab on the Mac App Store (though if you installed Aperture from a DVD, rather than buying it on the App Store, it won"t be there).
Photos uses the same sharing and extensions system as iOS and other modern Mac apps. So you"ll see the familiar Share Sheet icon in the toolbar. From here you can share the selected photo or photos on Facebook, Twitter, in Messages or in any app you"ve enabled in the Internet Accounts section of System Preferences.
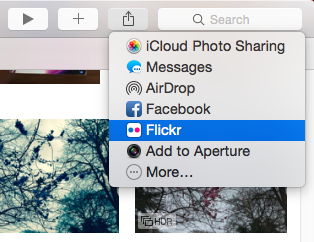
Photos lets you share your photos and albums using the same built-in OS X technology by which you can share files or snippets of text
How to convert your library
If you use only iPhoto and have only one library, when you launch Photos for the first time, it will automatically import that library and you"ll be able to view, edit, organise and share the photos in it. Photos uses the same library file, rather than creating a new one, so doesn"t need more hard drive space to store photos.
If you have more than one iPhoto Library, or if you use iPhoto and Aperture, or just Aperture, Photos will give you the option to import a library the first time you launch it. You"ll see the libraries Photos has identified listed in a window. Click on the one you want and click "Choose Library" to import it.
If you don"t see the library you want to import, click "Other Library…" and navigate to the library you want to import. (Pro tip: Photos expects your iPhoto and Aperture libraries to be inside your Pictures folder in your Home folder. If you store them somewhere else, you"ll need to use the manual option).
If you want to add more than one library, close Photos after importing the first one and re-open it while holding down the Alt key, then choose the library you want to import from the list, as before. You can also drag an iPhoto or Aperture library file onto the Photos icon in the Dock to open it.
Once you"ve imported a library from iPhoto or Aperture, you"ll still be able to use iPhoto or Aperture, but any changes you make in those apps won"t be reflected in Photos, and vice versa.
When you import a library from iPhoto, iPhoto Events, including Photo Streams, are turned into albums in Photos and are stored in an album, visible in the Albums section of the sidebar, called iPhoto Events. Click on the arrow next to iPhoto Events to see them.
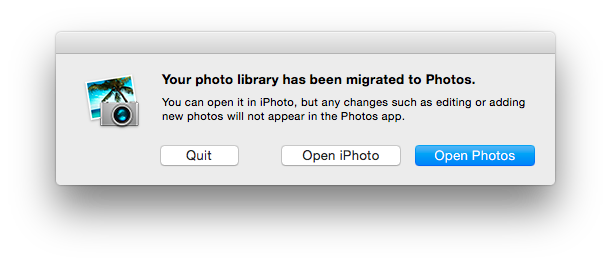
It"s best to avoid using iPhoto or Aperture once you"ve upgraded to Photos because edits or changes won"t be synced
Designate a System Photo Library
If you import multiple libraries, you"ll need to designate one as a System Photo Library. This library has special status because it"s the one that iMovie, Pages, Keynote and other apps are able to access.
To specify a System Photo Library, first quit Photos. Re-open it with the Alt key held down. You"ll see a list of your imported photo libraries and one of them will have the words System Photo Library in brackets after it. Click on the one you want to designate and click Choose Library.
When Photos opens, go to Photos>Preferences and click General. At the top of the window, you"ll see the library location displayed. Click "Use as System Photo Library" underneath. Now that library will be accessible from other applications.
(If you"d like to edit together your best photos and videos to make a Home Movie here"s how to do it in Memories).
iCloud Photo Library
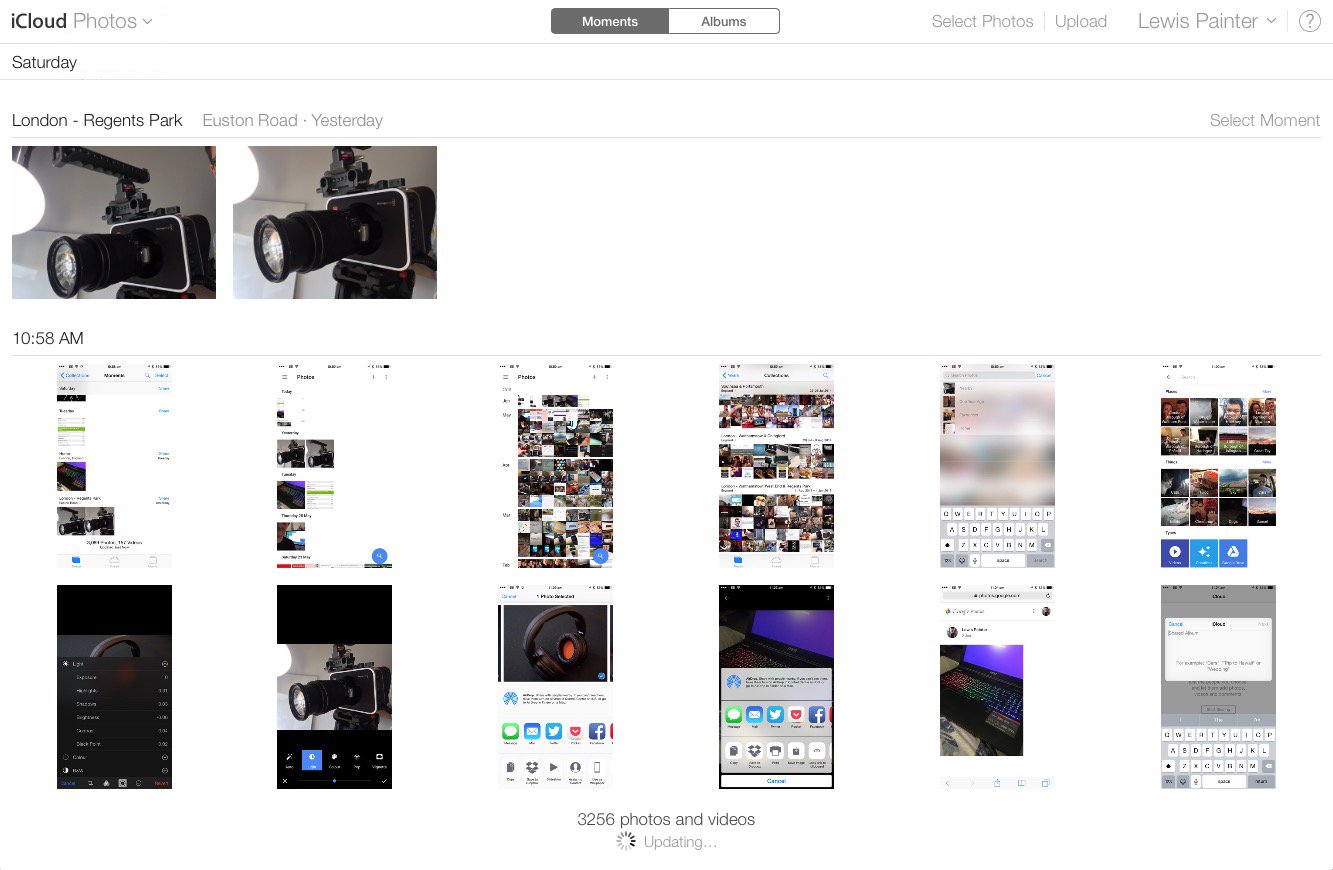
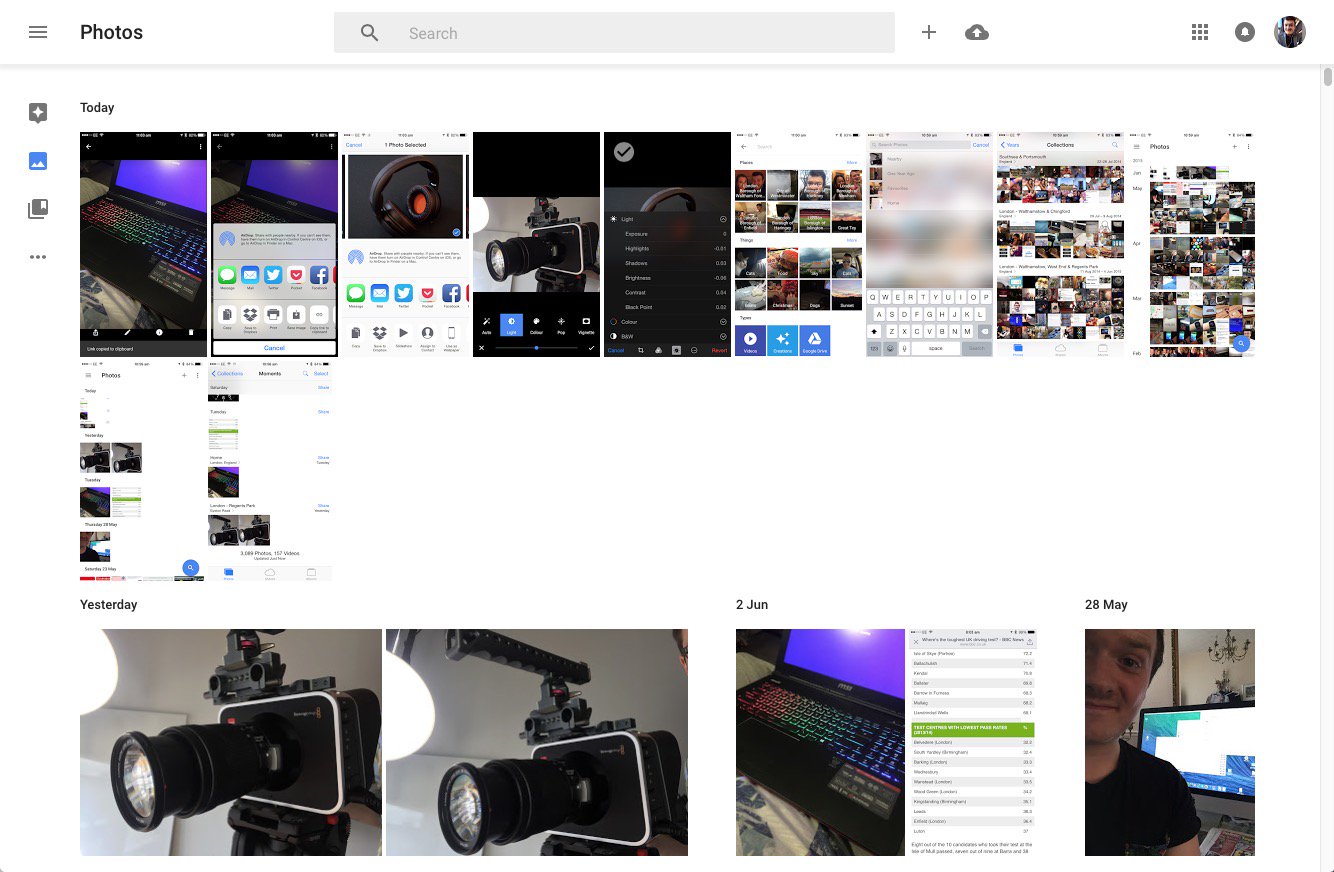
Although Photo Streams still stick around, Photos will next ask if you want to also use iCloud Photo Library. If you decide to make the switch you may need to enable the identical option within the Photos & Camera section of the Settings app of your iOS devices too. Pro tip: You can access your iCloud Photo Library via the iCloud website - just click the Photos icon.
iCloud Photo Library simply stores all your photos online, regardless of how you come about them. They might be new pics you take with your iPhone, or photos you import from a dedicated camera via the Photos app on your Mac. It"s kind of like a backup of your entire photo library, combined with ease of access from any of your Apple hardware.
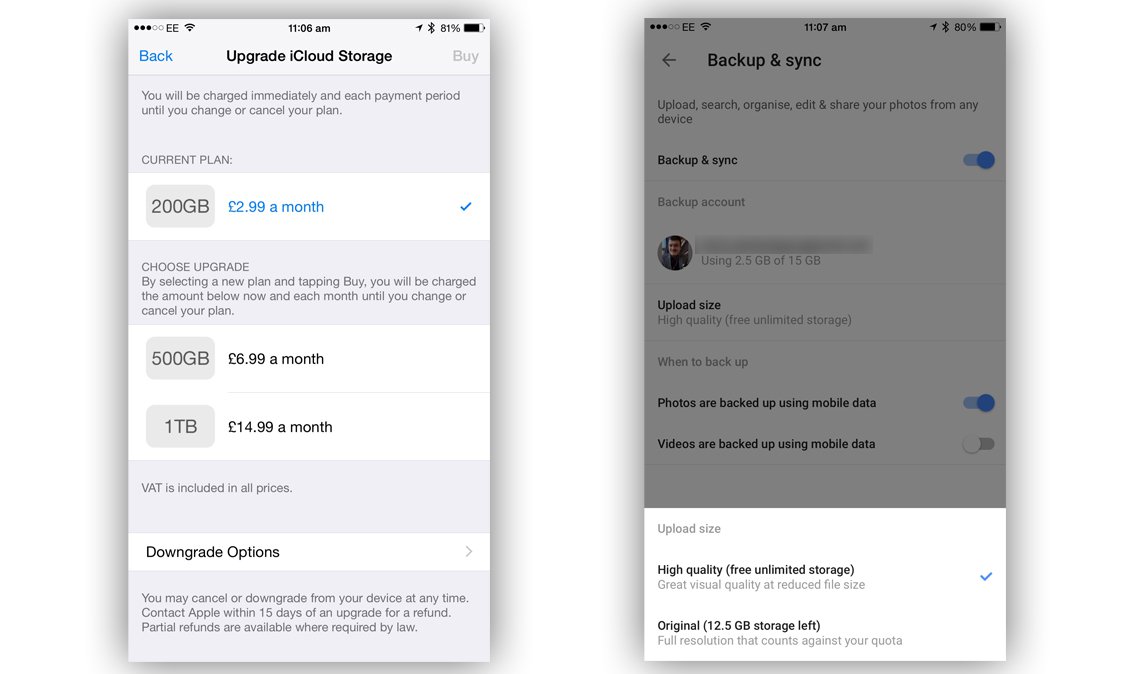
Should you select to use iCloud Photo Library, Photos will attempt to sync all the photos in your existing library. Unless you only ever take photos at birthdays and weddings you"re probably going to have to upgrade your iCloud storage to make space, and Photos will very kindly prompt you to do so if needed. On our test setup we had to upgrade to the £2.99 per month 200GB option, for example. This is only the cost of a cup of coffee every month but, whatever your needs, it"s extremely unlikely you"ll be able to use iCloud Photo Library without paying Apple a monthly subscription.
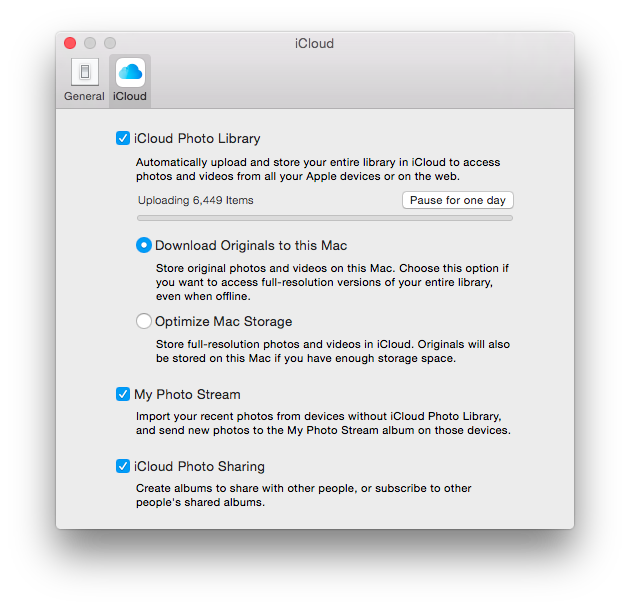
Uploading your existing snapshots to iCloud Photo Library is likely to take a very long time!
Note that syncing your entire library with iCloud Photo Library when you set up Photos is likely to take a very long time, especially considering nearly all UK users have slow upload speeds as part of their broadband packages. Put it this way: we used Photos for the first time a week ago and it"s still syncing.
Additionally, on our test MacBook Pro setup the machine frequently got hot enough for the fans to spin wildly. The iCloud section of Photos" preferences dialog offers an syncing progress display, as well as the option to pause uploading for a day if you have to do other urgent things via your Internet connection. When the Photos tab is selected you"ll also see an upload count at the bottom of the photos listing.
For related advice, read: How to use iCloud Photo sharing and iCloud Photo Library.
Learning the interface
So, assuming Photos has converted your existing photos library and you"ve configured iCloud Photo Library, let"s take an eagle"s eye view of Photo"s main interface.
Running along the top is a thin toolbar that always stays put, although its options might change depending on which of the tabs you have selected, as follows.
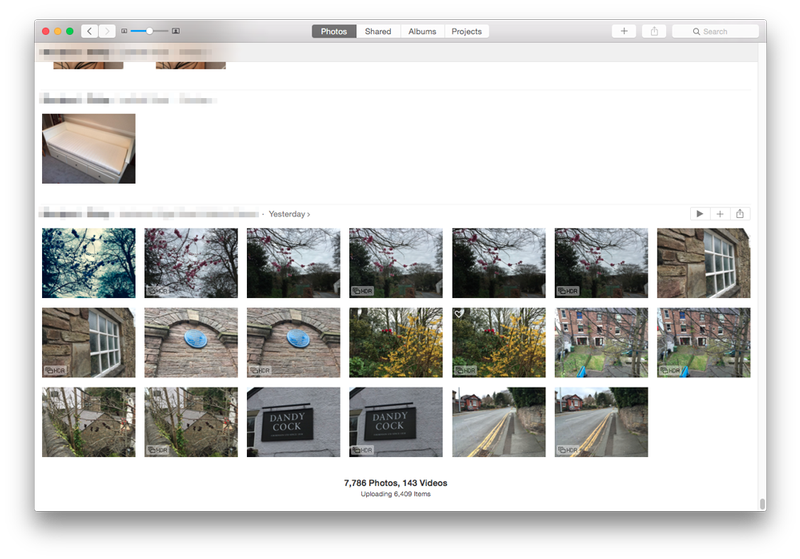
Photos interface is simple and splits into four main views: Photos, Shared, Albums and Projects
Photos: This lists your photos by the time they were taken, with the newest at the bottom of the list. They"re further organised by location: if you took some photos across an afternoon within the same general location then Photos will likely bunch them together in one group.
Shared: Here you can view any photo streams you"ve shared or that have been shared with you. However, creating a new shared album or adding photos to an existing stream isn"t handled here. Instead, you must select the photos in either Album or Photos view, then click the Share button at the top right of the program window, before selecting iCloud Photo Sharing.
Albums: You can create your own private albums in which to organise photos, including Smart Albums that automatically contain photos based on certain criteria such as the camera used, or location. Just click the plus button on the toolbar when this tab is selected. However, Photos also comes with several readymade albums that organise photos according certain characteristics. Of particular interest is the All Photos album, that lets you see all your photos listed from old to new, without any kind of organisation, as with the Photos tab.
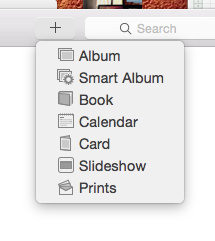
New albums can be created by clicking the plus icon on the toolbar and selecting from the menu that appears
Projects: Here you can view any photobooks, calendars, cards or collections of prints you"ve created, all of which can be ordered direct from Apple by clicking the plus icon on the toolbar and selecting from the menu. Any slideshows you create also appear here, although you can create impromptu slideshows of pictures by selecting them and clicking the Play button on the toolbar.
The Photos tab
The Photos tab gives an eagle"s eye view of your entire library split into the same Years, Collections, and Moments groupings as with the iOS Photos app. There"s no mention of these terms anywhere within Photos on the Mac, however, and that"s perhaps for a good reason because they can be confusing. However, the concept behind them isn"t.
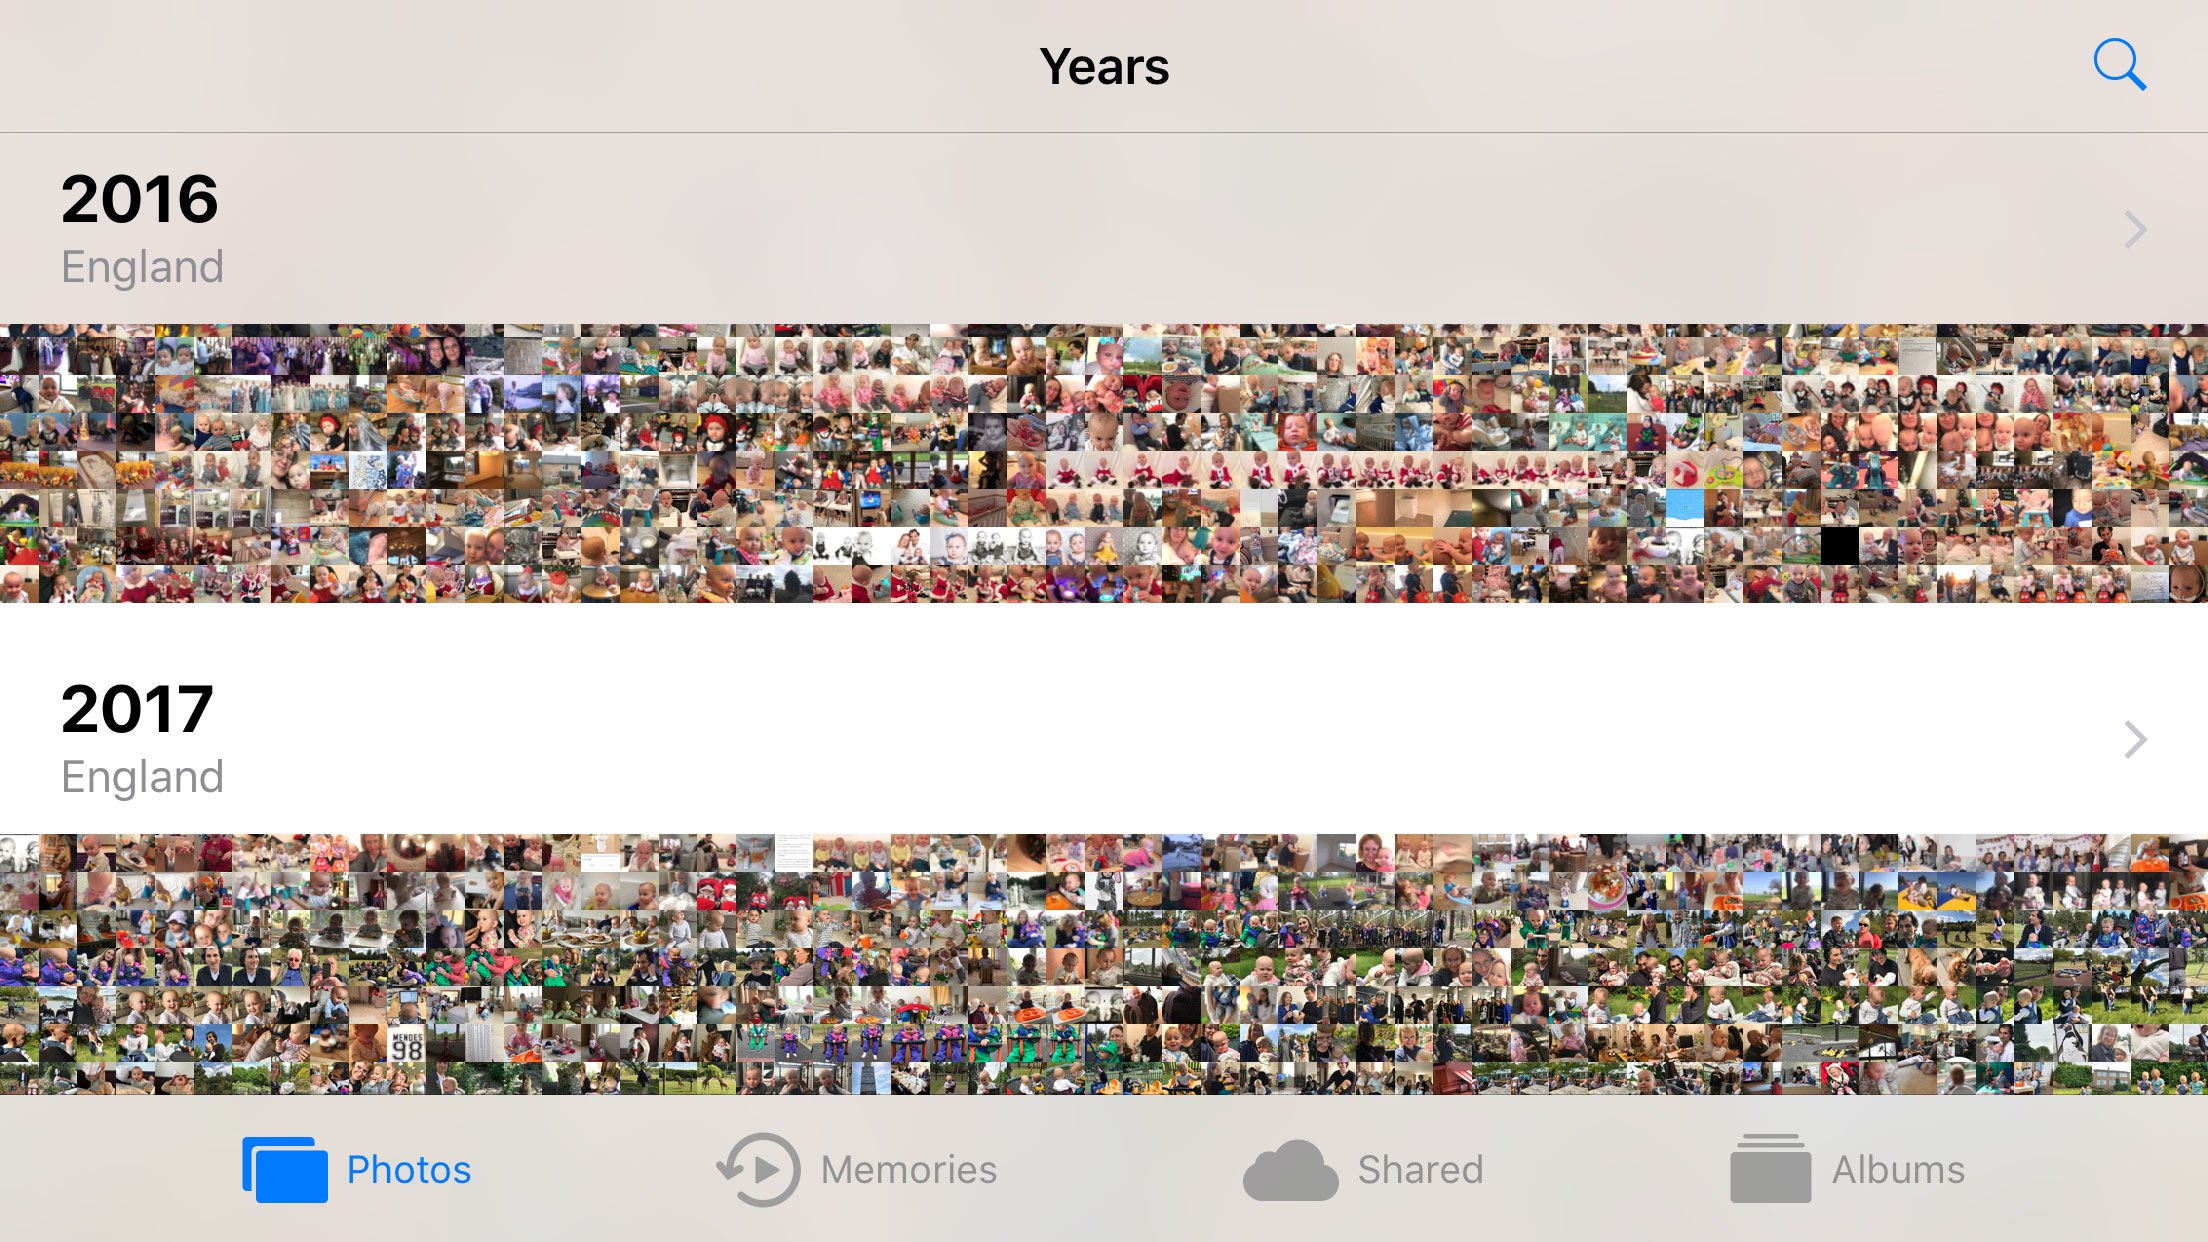
The Years view provides the big picture and arranges your photos into yearly timelines, including a label indicating broadly where they were taken - England, for example, and/or perhaps Portugal if you took photos on holiday.
If you aren"t in the Year view already, click the back button at the top left of the toolbar until it greys out to switch to viewing Years.
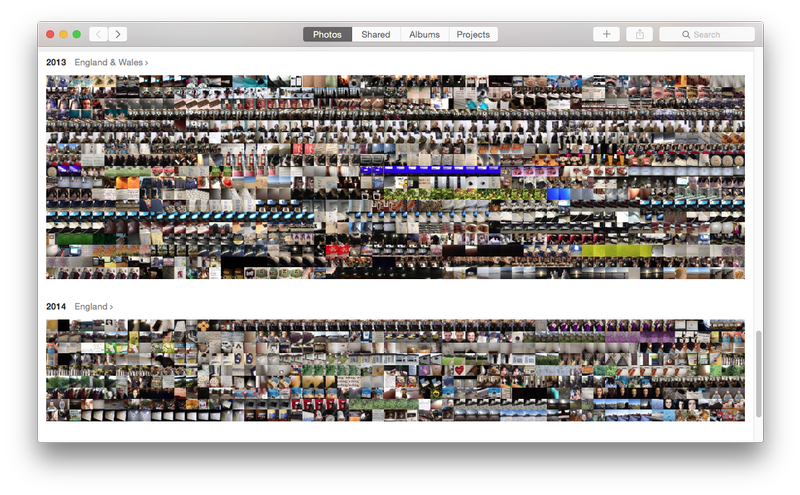
Navigating between Year, Collection and Moment views is done via the back/forward buttons at the left of the toolbar
Click anywhere on a Year and you"ll zoom into one of many Collections, which cluster your photos by much smaller timelines, and also places. A Collection might group together a series of photographs taken during one week in which you visited Cornwall. The Collection will be labelled by date and location.
Click anyway on a Collection and you"ll zoom into one of many Moments. These split out photos into smaller groups according to individual dates, split further by location. A single Moment might show the evening you spent at a particular restaurant near Lands End, for example, and again the date will be shown along with GPS details, such as the street the restaurant was on. A Moment might contain multiple photographs, or just one.
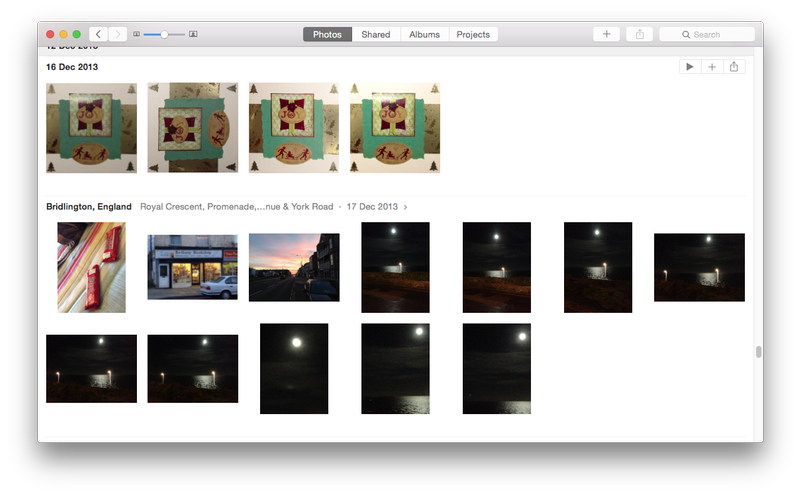
The Moment view of your photos breaks them down into groups according to individual dates and the location where the photos were taken
How to view a photo in Photos on Mac
When viewing a Moment you can double-click on any photo to open it for full-screen viewing (and editing, of course), or click the heart icon at the top left of the thumbnail to mark it as one of your favourites. This simply means it gets added to the Favourites album under the Albums view. Hitting Space also opens the currently selected photo for viewing.
When viewing a moment you can click the toolbar button at the right of the back/forward buttons to show a side panel thumbnail view showing other photos in that Moment. This is referred to as Split View, and it can be resized by dragging the bar alongside the thumbnails.
Pro tip: Click and hold the mouse cursor on a thumbnail in Years or Collection view and it"ll expand slightly for ease of viewing.
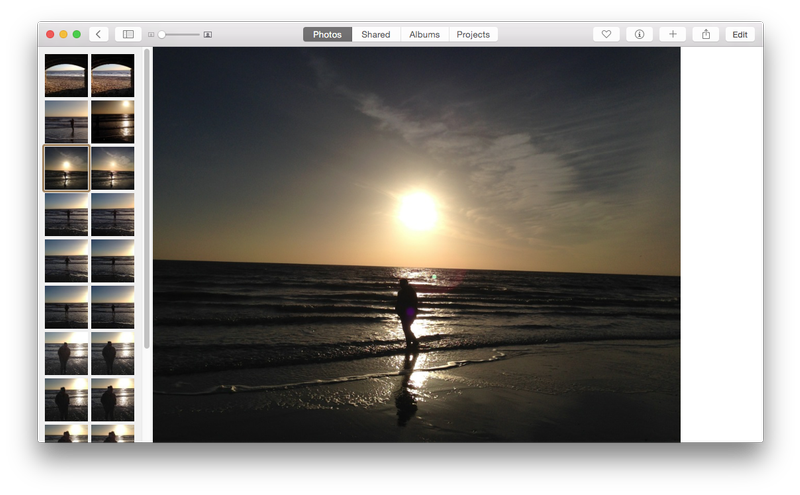
Clicking the Split View button lets you view thumbnails at the left, and a full-screen photo display at the right
Shared Albums
The Shared tab lets you tune into any Photo Streams you"ve created on your iPhone or iPad, or any Photo Streams that you"ve joined that were created by somebody else. You can also create them within Photos on the Mac.
Double-clicking any Shared Album will open it for viewing, and double-clicking any image will open it for full-screen viewing. However, you won"t be able to edit it until you import it into your library. Photos will offer to do so if you try, or if it"s already been imported then you"ll be prompted to switch to the imported version.
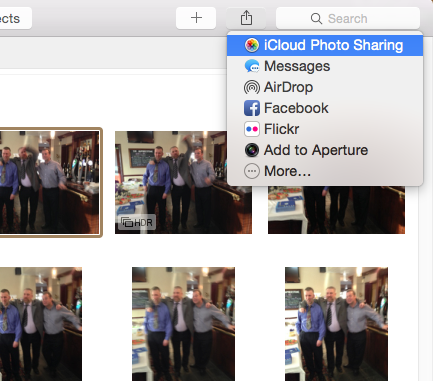
Photos for Mac drops the Photo Stream nomenclature, instead referring to Shared Albums, although they"re functionally exactly the same
This means you will have to re-import the edited version into the Shared Album after you"ve finished your work if you want it to be seen by others. How this is done is again a little clumsy - after clicking the Done button when you"ve finished editing, click the Share button button at the right of the toolbar. Then select iCloud Photo Stream, and select the Shared Album.
This is also how you create a new Shared Album from scratch - select the photos in one of Photos" view modes in the usual way by elastic-band selecting, or using Shift/Cmd to select multiple items, and then click the Share button and iCloud Photo Sharing > New Shared Album. You"ll then be invited to fill-in details, including invitees.
To add photos to an existing Shared Album, again select them and either click the Share button and follow the instructions earlier, or switch to the Shared Album in question and click the Add Photos and Videos link.
Pro tip: To put a Shared Album online via a web link, select the Shared Album icon at the top right (it"s that of a face in a circle), and then click Public Website. You can only do this with Shared Albums you"ve created.
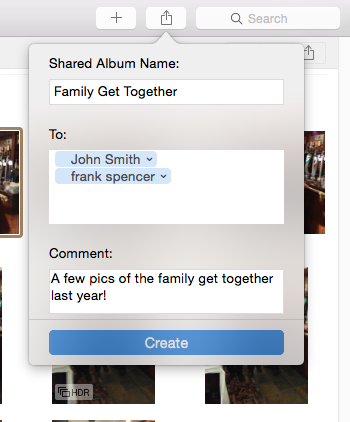
Creating a Shared Album means filling in the same details as you might be used to on iOS, such as inviting people by email address
Take part in our poll
Organising Albums
To organise your photos outside of the date/location ordering of the main Photos view, you can create an album. These are viewed by selecting the Albums tab.
Notably, albums are virtual. In other words, it"s not like copying a file from one place to another. It"s more like creating an alias. This means a photo can be used in several albums, for example, and deleting an album won"t delete the photos in it.
To create an album, select the photos in either Photos or Shared views, and click the Add button, before selecting Album from the dropdown list.
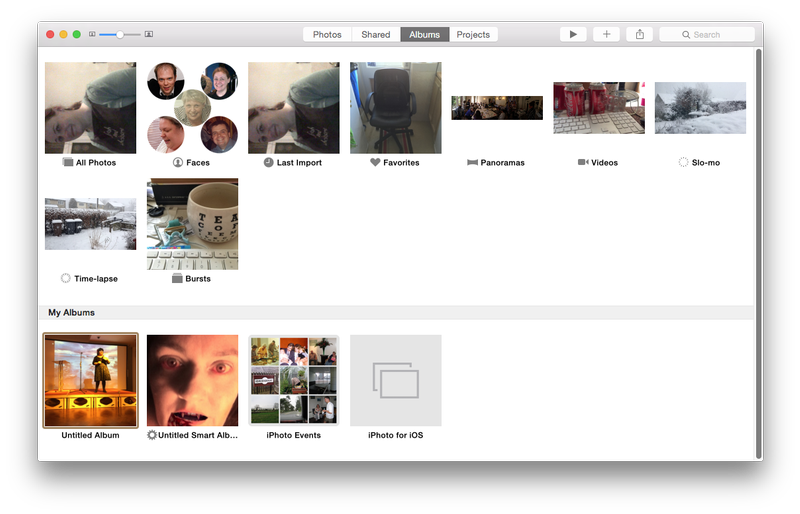
The Albums view includes not only albums you create yourself and also several automatic albums containing pictures of a certain type
Photos contains a handful of ready-made albums managed by the app itself. As you might expect, All Photos lists all your photos, from oldest to newest, in order but without the location ordering present in the Photos view.
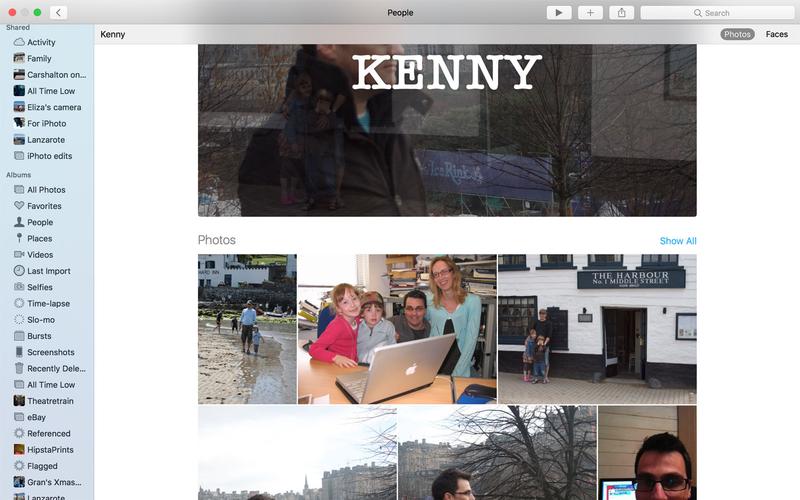
People splits photos into groupings according to facial recognition. While Photos and iPhoto have long had facial recognition, People is new in macOS Sierra and changes the way facial identification works - more about that below. Places groups photos according to the location information in their metadata, we"ll show how to use that later, too.
Last Import shows which photos were imported last (but not including those automatically added to your library via iCloud Photo Library). Favorites shows any photos you"ve marked as being favourites by clicking the heart icon at the top left of their thumbnails.
Panoramas, Videos, Slo-Mo, Time Lapse and Bursts show any photos in your library taken using the iPhone or iPad Camera app with those picture modes selected. Selfies shows photos taken with the front-facing camera.
Folders can be created to hold multiple Albums but this option is only found on the File menu. Albums can be placed in folders (and removed from them) by dragging and dropping.
Smart Albums can also be created via the Add dropdown list, and let you create albums from photos in your library that match certain criteria, such as focal length, or camera used to take them. This feature is virtually identical to the same feature in the older iPhoto.
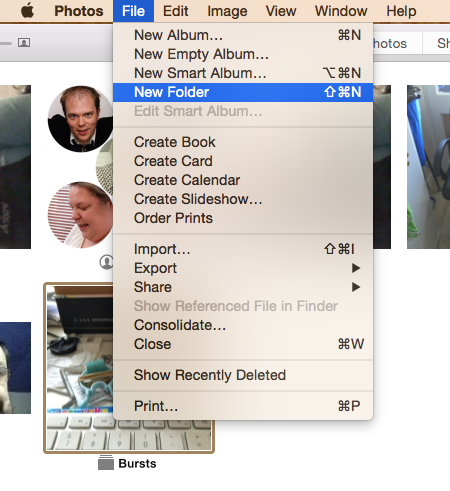
Albums can be organised into folders but that option"s only available on the File menu
Photos for Mac projects
The Add dropdown list also includes options to create a Book, Calendar, Card, Slideshow and Prints. All but the Slideshow option involve ordering a physical artefact direct from Apple, and the process is similar to that of creating an Album as mentioned earlier - first select the photos you wish to be included via Photos or Album views, and then click the option you want from the Add menu. You"ll then be walked through the process of creating the item, including agreeing to the price (orders are charged to your Apple ID in the same way as iTunes or App Store purchases).
Slideshows can in fact be created ad hoc and at any time by selecting photos and clicking the Play button either on the toolbar if viewing an Album, or at the right of a Collection. However, creating a slideshow from the Add menu allows you to not only create a slideshow for later playback, but also output it as a movie file in up to 1080p HD resolution - just click the Export button at the top right of the program window.
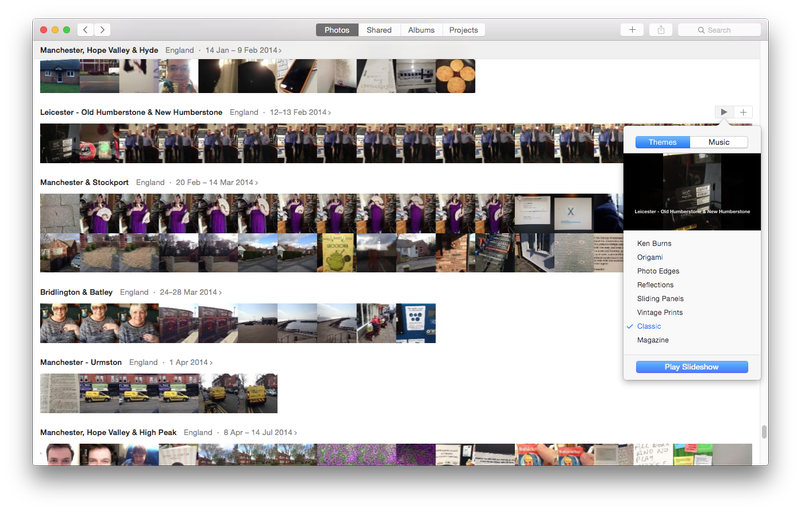
Ad hoc slideshows can be created from Moments by clicking the play button on the floating toolbar at the right of each
How to navigate through photos
When using Photos view, the back and forward buttons on the toolbar don"t always work like those in a browser. If you"re viewing a Moment then clicking the back button takes you to your Collections, and clicking it again will take you to the Years view. Similarly, clicking the Forward button will move you to your Collection, and clicking again will move to your Moments.
If other tabs are selected the back/forward buttons work more like traditional browser buttons - select to view a shared photo stream, for example, and clicking back will take you to the complete listing of streams.
Note too the zoom button at the top left of the window, which makes the thumbnails larger or smaller, such as those in a Moment or album - but not when viewing Collections or Years, for reasons known best to Apple. If viewing a photo full-screen this will also let you zoom in and out.
Pro tip: If you"re using a MacBook or have a Magic Trackpad, the pinch-expand gesture will zoom in and out to and from Years, Collections, Moments and individual photo views.
Edit mode
To edit a photo you"ll first need to double-click its thumbnail to open it for viewing, and then click the Edit button at the top right. Note that if you open for editing a photo in a Shared Album you"ll be told it needs to be imported into your photo library first, and that imported photo will be the one you"ll edit rather than the shared version.
Because every inch of screen space matters when you"re editing photos, switching to full screen mode makes sense (click View > Full Screen, or the green blob). Pro tip: You might notice the toolbar slides off the top of the screen along with the menu. To fix this, click View > Always Show Toolbar in Full Screen.
The screen goes black to indicate Edit mode is activated and the toolkit appears at the right of the program window, while a zoom control appears at the top left. When zoomed you can navigate around the image by clicking and dragging, or via a two-fingered scroll if using a trackpad. Pro tip: Holding down Cmd while tapping plus and minus on the keyboard lets you zoom in and out without using the mouse/trackpad.
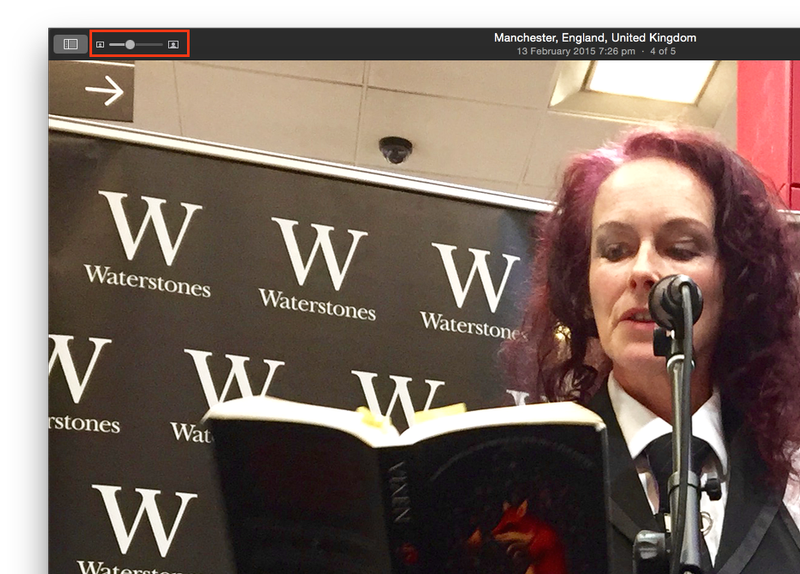
The zoom control at the top left lets you look closely at an image, and clicking and dragging will scroll around
Non-destructive editing of photos
Photos uses non-destructive editing, which means the original is always stored alongside your edits, no matter how extensive these are - or even if you quit the app after making them. Just open the photo for editing at any time and click Revert to Original.
Warning: Undoing individual actions in Photos via Ctrl+Z, or Edit > Undo, isn"t quite the same as other apps. Undos when editing an image are limited to the current tool you"re working in. For example, if you alter the brightness and then switch to the Retouch tool, you won"t be able to undo the brightness alterations you just made other than reverting to the original image as described above.
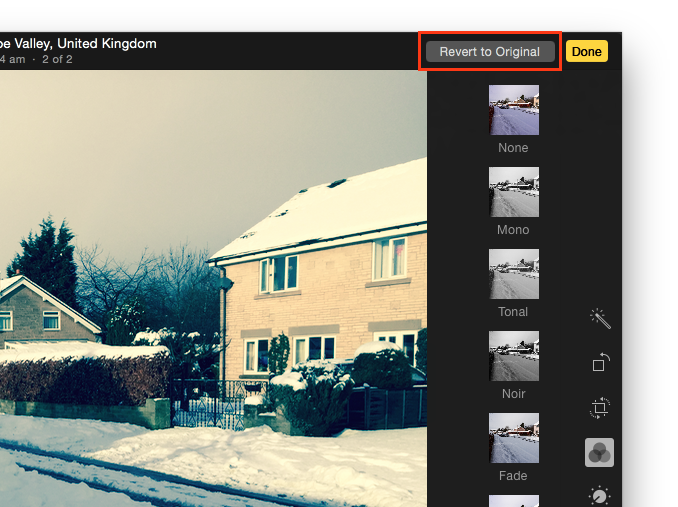
If you find you"re unhappy with any edits you can click Revert to Original at any time - even after you"ve finished editing, or even restarted your Mac
Editing tools
The Photos interface saw some welcome changes in the High Sierra update, from a new selection counter, batch rotation and favouriting within the library views, to some pro-level photo editing features worthy of Aperture. To reach them click on Edit then Adjust.
In previous versions you had options to Enhance, Rotate, Crop, Filters, Adjust, Retouch, and Extensions. Now you"ll find Levels, Curves, Definition, Sharpen, Noise Reduction, Vignette and two new editing tools: Curves and Selective Colour.
To view the editing options within each tool, click on the disclosure triangles beside them.
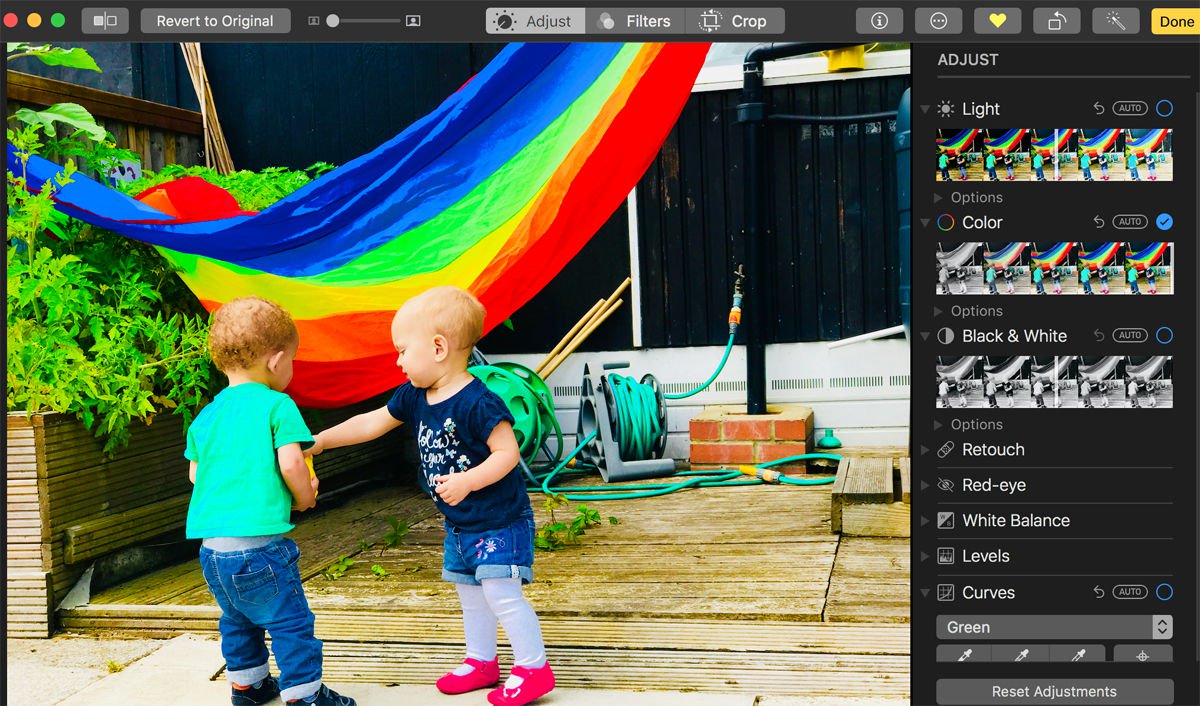
Colour Curves
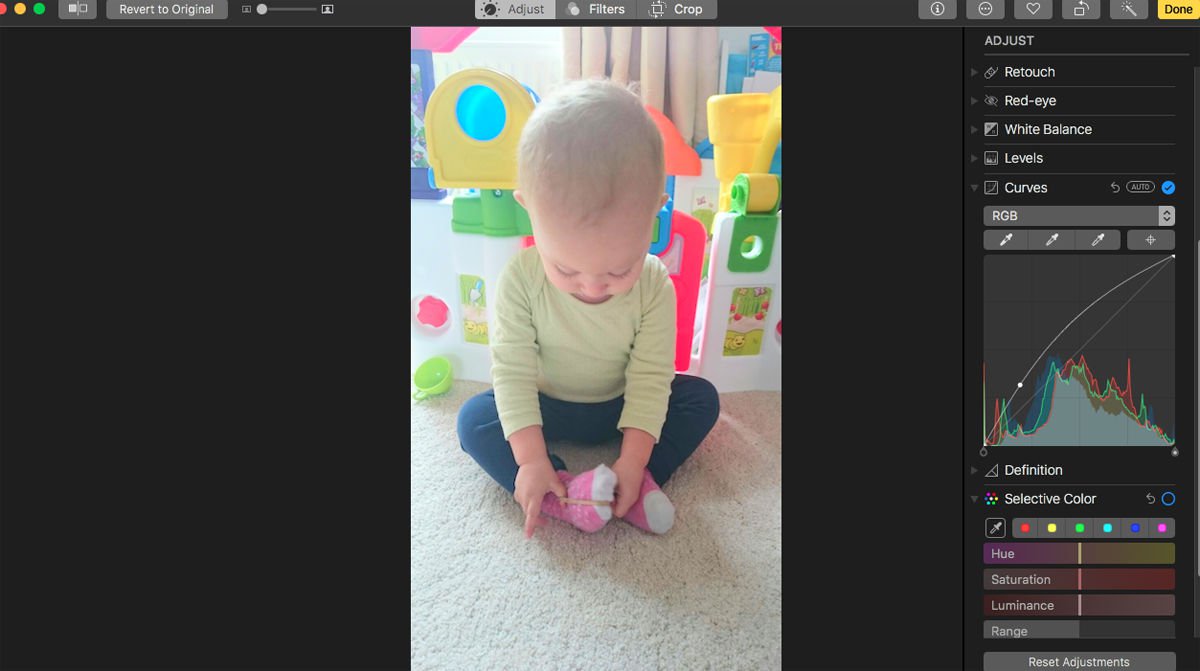
With the Colour Curves adjustment you can adjust the tonal range of your image. It"s a little more complicated to use than some of the other tools, but you could use it to lighten a dark scene, boost contrast and colour, or make colour shifts.
To use Curves, scroll down the list and click on its disclosure triangle to reveal the tools and a graph. The images tonality is represented by the line, the highlights of the image are found in the top right section of the graph, the low lights are found in the bottom left segment.
You can choose RGB, or focus on Red, Green and Blue separately, dragging the anchor points on the graph until you get the affect you are after.
For example, to brighten up the image, click on the line in the bottom left and drag it upwards until you see a curve form. The image will change in real time so you can decide when you have achieved the designed effect.
You could also create an S-curve, dragging one anchor point up in the highlights, and another anchor point down in the shadows. This would boost contrast and the colour saturation.
You can also use the pipets to pick a colour to set as a black point, grey point, and white point, just as in Photoshop. You can also choose a colour in the image to set as a point on the curve.
Filters
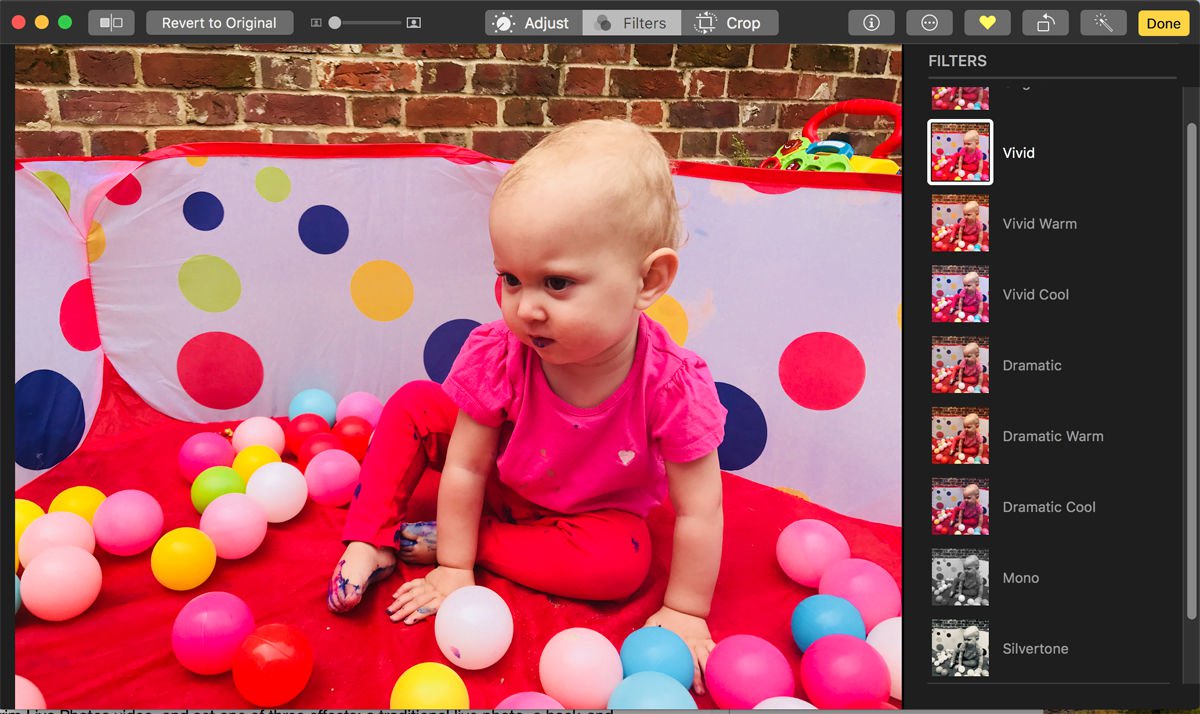
Photos in High Sierra also brings with it nine new pre-built image filter presets.
Where previously Photos offered Instagram inspired filters, such as Fade, Chrome, Process, Transfer, and Instant, now the filters are variations of three different styles: Vivid, Dramatic, and black and white, with warm and cool options.
To access these filters click Edit > Filters and click through the options until you find one you like.
When you have selected your filter you can continue to edit it using the Curves and other editing tools until you have the style you are after.
Open a Photo and edit in Photoshop
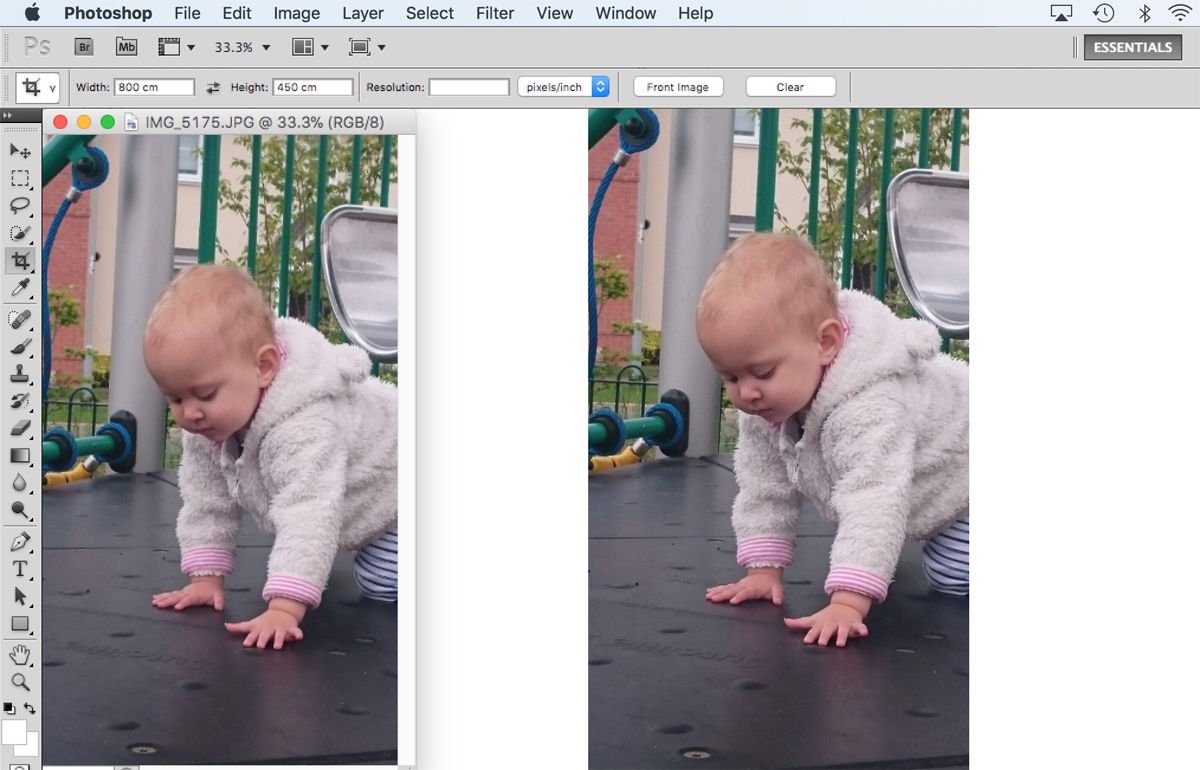
As of High Sierra, the Photos app lets you make edits using Photoshop and other third-party editors.
From Photos right click on the image you wish to edit and choose Edit With > Other, and then select Photoshop from your applications (or any other photo editor you might prefer).
The image will open in the third-party photo editing app and you will be able to use all the features of that app to edit it. For example, you could choose a Photoshop filter and apply that to your image.
Any edits you make will automatically be saved to your Photos library.
Editing in macOS Sierra and earlier
If you"re on an older version of the software you won"t have the above editing options. Instead, you"ll see six icons in the toolkit at the right of the screen; you can see what they are by hovering the mouse cursor over each. Some work via a single click, while others open an additional set of tools. All are pretty simple to use, though.
Enhance: Auto-adjusts the colour balance, brightness and contrast of your image. You"re not given control over this. To control brightness, contrast, colour etc you"ll need the Adjust tool, discussed below.
Rotate: Turns the image counter-clockwise 90 degrees. Holding down the Alt key (Option on some keyboards) switches it so it rotates clockwise 90 degrees. It"s not possible to flip the image vertically or horizontally here, although these options are available on the Image main menu and in the Crop tool, described below.
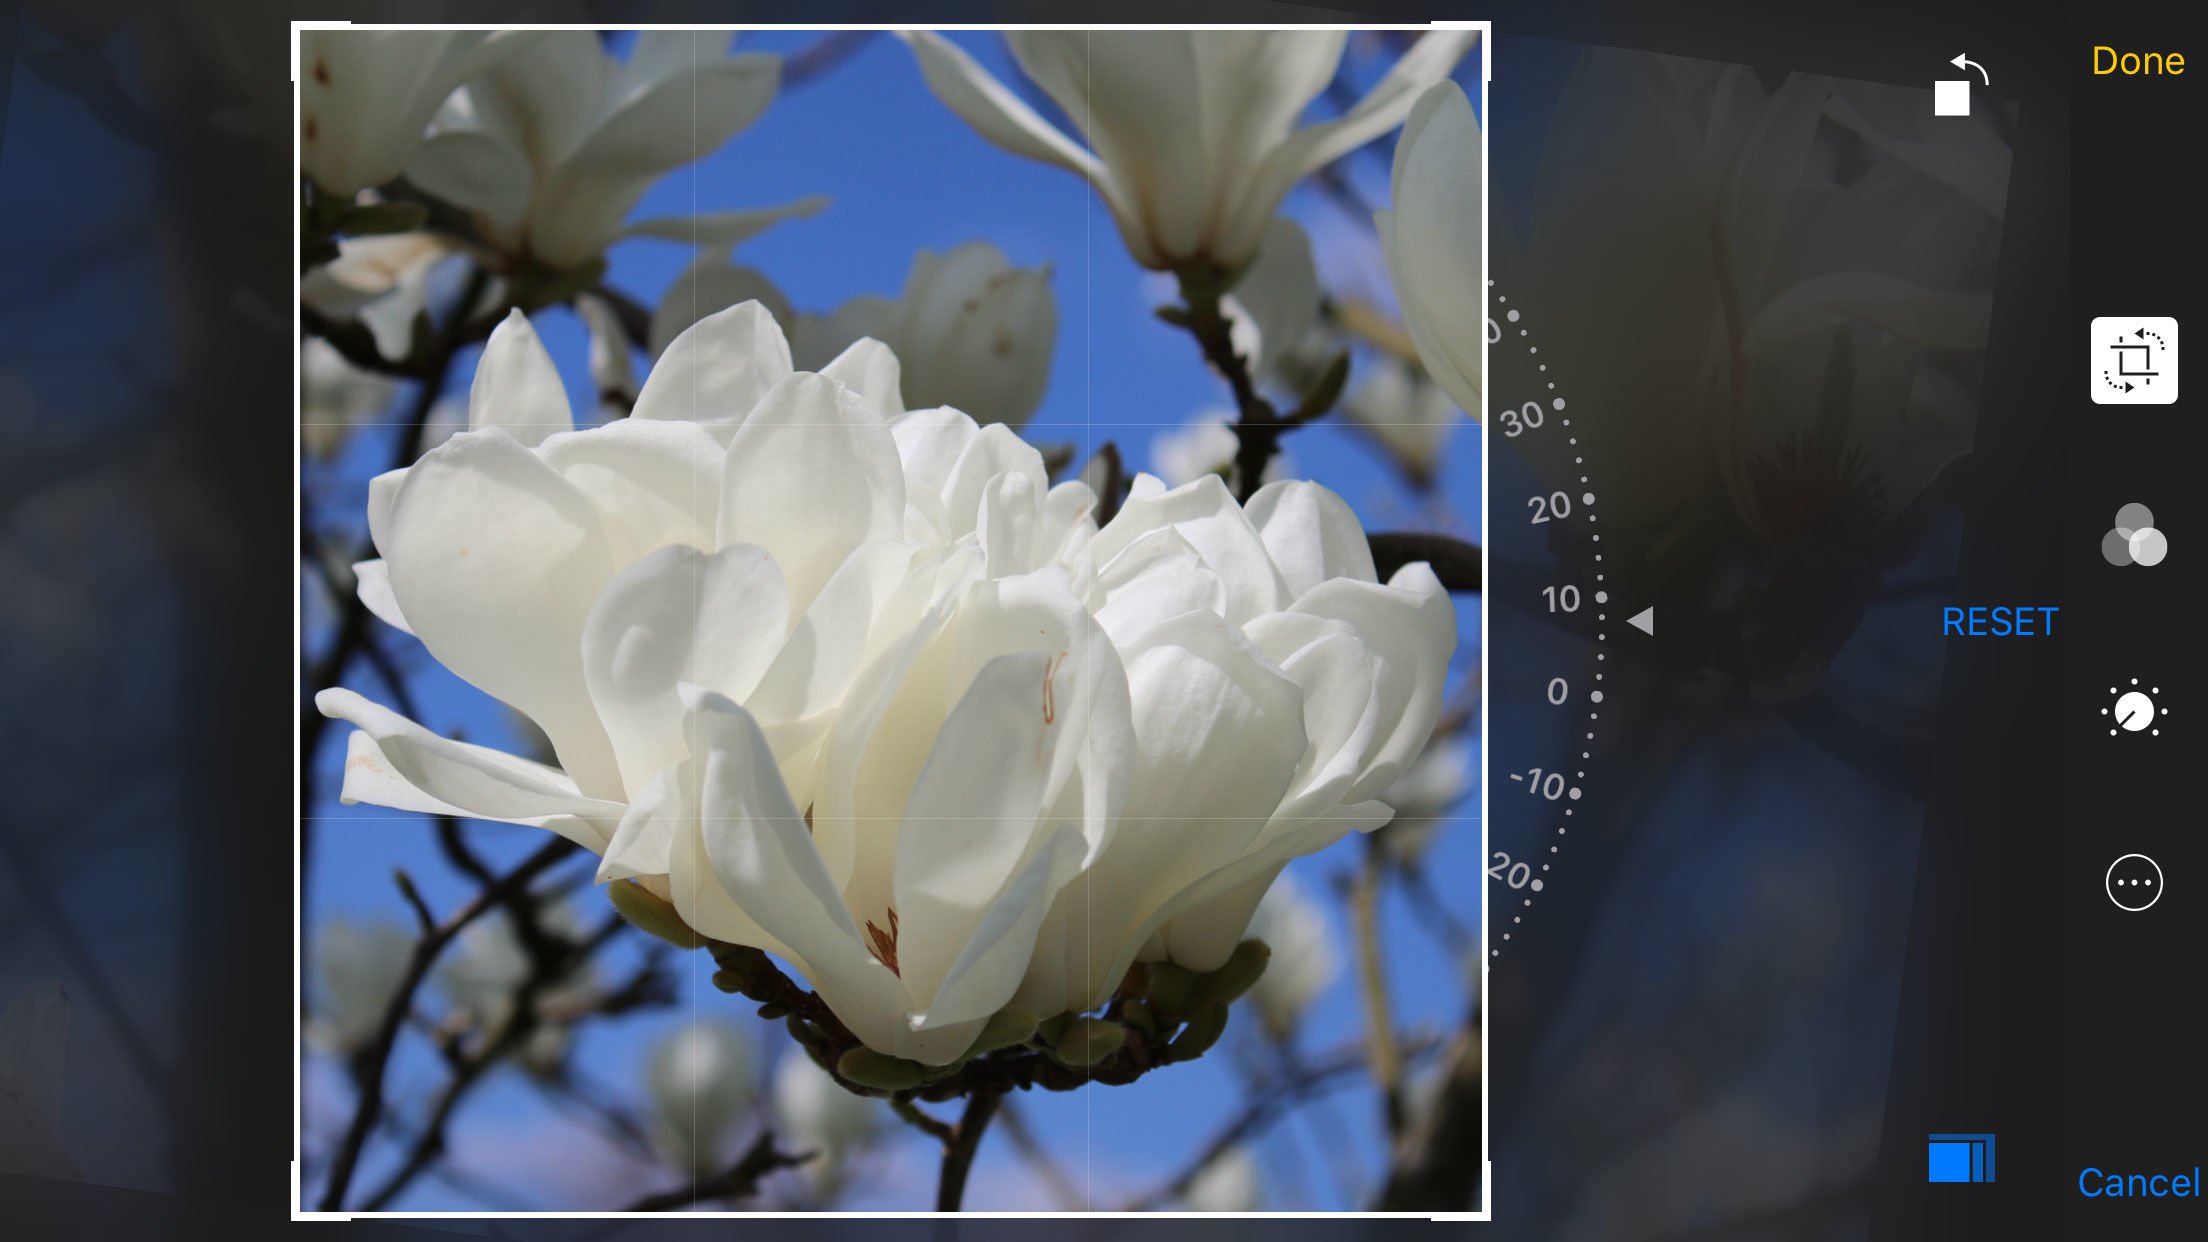
Crop: The least-accurately named of all the tools because, as well as dragging the frame to crop the image, this tool also lets you rotate the image to various small degrees - just click and drag the dial at the right of the image. You can also flip it and adjust it to fit particular aspect ratios such as 3:2 or simply "square" by clicking the Flip or Aspect buttons at the bottom right. Adjusting the aspect ratio can help crop a photo slightly for printing via commercial photo printing outfits - the popular 6x4in print size is 3:2 ratio, for example, while a standard iPhone image is slightly larger at 16:9. The Auto button will attempt to automatically rotate and crop the image so lines within it (horizons, poles, walls etc) look straight. On other types of images, such as portraits, it has no effect.
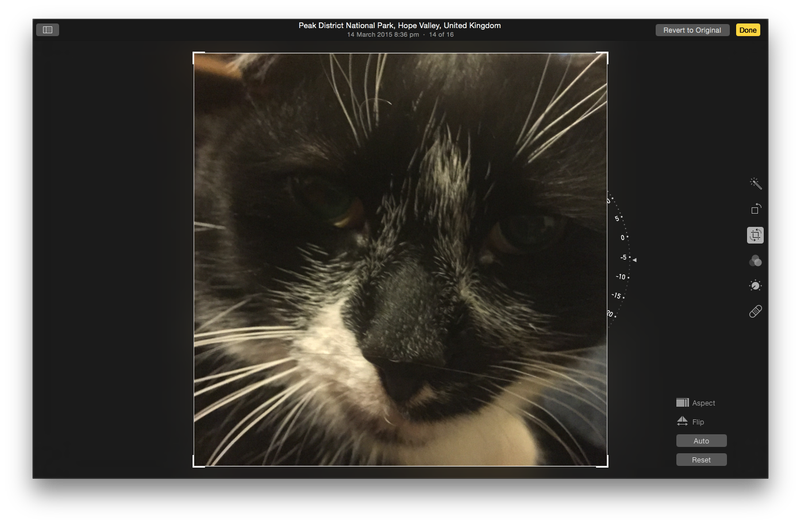
The Crop tool also lets you rotate an image by small degrees, as well as flip it and adjust its aspect ratio
Filters: Various readymade one-click filters that apply visual styles to your image, such as Mono, Instant, Chrome, and so on. Again, you have no control over any of them.
Adjust: The meat of the editing tools, and discussed in more depth below.
Retouch: Known as the "heal tool" in image editors like Photoshop, this lets you click (or click and drag over a wider area) to remove elements from an image such as skin blemishes. How it works is magical, as are the results, which are usually extremely impressive. However if you find it doesn"t work quite as it should then holding down Alt (Option on some keyboards) and selecting a nearby point in the image for a sample will improve accuracy. Clicking the Reset button at the bottom of the screen undoes any edits you"ve made using the Retouch tool.
Making adjustments to your image using Light, Colour & Black & White
Clicking the Adjust tool opens a new set of controls alongside the image. By default three are shown: Light (combined brightness and contrast control), Colour, and Black & White.
Clicking and dragging the white bar within each control lets you make adjustments, although if you hover the mouse cursor over each you"ll see an Auto button appear. This attempts to auto-adjust to the best settings based on the image data, as well as the Histogram graph shown above. Hovering the mouse cursor over the control shows a down arrow that, when clicked, reveals more fine-grained options - under the Light slider you"ll see additional sliders for Exposure, Highlights, Shadows and so on.
There"s also a new tool in macOS Sierra, Brilliance. This tool, according to Apple, brightens shadows, pulls back highlights and reveals hidden details in an image.
Clicking the Add button at the top right lets you reveal even more tools including some to sharpen the image, remove noise, and add a vignette effect. Perhaps the most useful for those used to Aperture or other pro-level tools is the Levels tool. Drag the handles beneath the levels histogram to adjust the darkest, lightest and mid-points of the image.
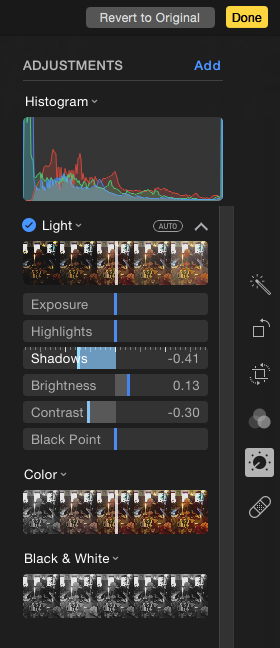
Clicking the down arrow alongside each control"s heading shows finer-grained controls
Advanced editing tricks in Photos
Right-clicking on the image lets you copy to the clipboard the current set of edits you"ve made, and you can then paste them onto a different image in the same way by right-clicking. This is useful if you find yourself correcting many images with a similar low-light fault, for example.
Perhaps one of the best advanced tricks for using Photos is to hold down Alt (Option on some keyboards) while using any of the tools. Doing so while adjusting the cropping box will cause it to resize in a different way, for example, and doing so whilst adjusting the rotation dial will decrease the severity of your drag. Just give it a try!
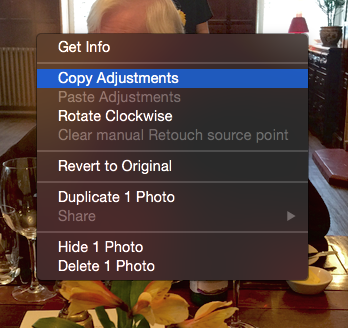
Edits made on one image and be copied and then “pasted” onto a different image - just right-click and select the option
Using the new People feature
Click on the People album, listed in the left sidebar under albums, to see a grid of the faces Photos has identified. Double-click on on face to see the photographs associated with it. To name a face, hover over it and click "Add Name".
People is good at identifying faces, but it"s a long way from perfect and there will be many faces in your photos not shown here. To add one, click on "Add People" and then choose someone from the grid that"s displayed. (Pro tip: you can select multiple people by Cmd-clicking. They will then all be added to the People album.)
If you have lots of versions of the same person in the People album, you can Cmd-click them, then Ctrl- or right-click on one image and select Merge x People, where x is the number of faces you"ve clicked. All the photos identified in the different versions of the face will then be grouped and identified as the same person.
To set favourite People, Cmd-click the ones you want and drag them into the favourites section at the top of the album.To hide someone in the People album, right-click and select Hide this Person.
You can set a "key" face (the one that"s displayed on the from of a person"s album) by double-clicking on the person, right-clicking on the the photo you want to use and selecting Make Key Photo.
To tell Photos that a person it"s identified in a photo isn"t in that photo, right-click on the photo and select "xxx is not in this photo" where "xxx" is the person"s name. To tell Photos a person is in a photo when it hasn"t recognised that, right-click on the photo, select Get Info and click the "+" next to the faces that have been identified. Drag the circle that appears on the photo over the face and start typing the person"s name. When the dropdown list of names appears, select the one you want.
Creating a Slideshow
A brilliant new feature of Photos for Mac is the Projects tab that lets you create print products, manufactured by Apple itself, as well as slideshows that you can export as HD movie files.
To create a new project, select the images you want to use via the Photos tab - you"ll need to hold down Cmd or Shift to select multiple images - then click the plus button at the top right of the Photos program window and select the type of project you want. Once created, any new project will subsequently be listed when you click the Projects tab.
A slideshow is perhaps the simplest kind of project because it doesn"t involve buying from Apple and the results are immediate.
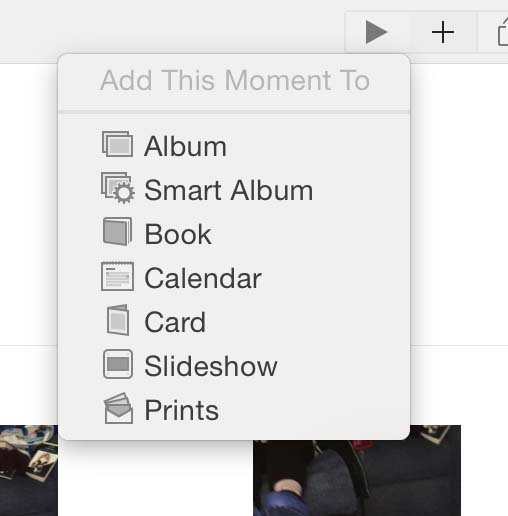
Slideshow projects can be created by clicking the plus button at the top right of Photos" program window
The first choice upon choosing to create a slideshow is to give it a name. Anything will do, although this text will appear within the opening frames of the slideshow. Instead of creating a new slideshow, you can also choose via this dialog box to add the photos to a slideshow you"ve already created, selectable from the Slideshow dropdown list.
The layout of Photos" slideshow construction window is pretty simple - the photos are listed along the bottom, while dominating the screen is a preview of the slideshow. Clicking the Preview button will start it playing within the Photos window.
At the right of the program window are three icons that let you choose the Theme, Music, and Duration. When any of them are clicked a slide-out panel will appear showing options.
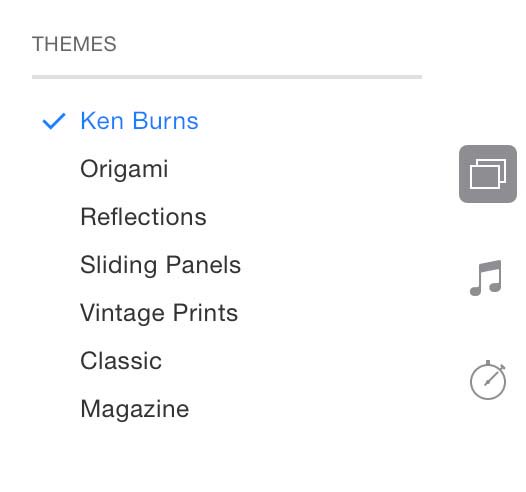
The icons to the right of the slideshow preview allow you to configure various aspects, such as its theme
Choosing a slideshow theme in Photos for Mac
Six slideshow themes are available. These not only add interest to a slideshow via motion effects but also let you make better use of photos that might be shot in portrait mode, or other aspect ratios - the individual frames of some slideshows involve multiple photographs better disposed to portrait shots, for example.
The themes are as follows:
Ken Burns: Each photo displayed is either slowly zoomed into, or zoomed out of (a technique pioneered by documentary maker Ken Burns). You can set the start and end zoom points in each photo by selecting it within the thumbnails at the bottom of the program window, and clicking the square icon the bottom left of the large preview above. Selecting either the start or end icon will show a zoom slider.
Origami: Photos in the slideshow seem to fold into view from the side of the screen.
Reflections: Photos appear to be sitting on a shiny surface that reflects their contents.
Sliding Panels: Photos slide into and out of view - from the sides, top, bottom and out from the middle of the screen.
Vintage Prints: Photos are shown as a series of virtual photographic prints, as if stacked on top of each other. A similar effect to that in the Ken Burns slideshow is used to zoom slowly in and out in order to add interest although no control is offered over the zoom effect.
Classic: The traditional slideshow in which individual photos fill the screen, and briefly crossfade into each other.
Magazine: Somewhat similar to the Origami and Sliding Panels except the transition between slideshow frames is quicker and there"s a more dynamic feel to match a supposed magazine layout.
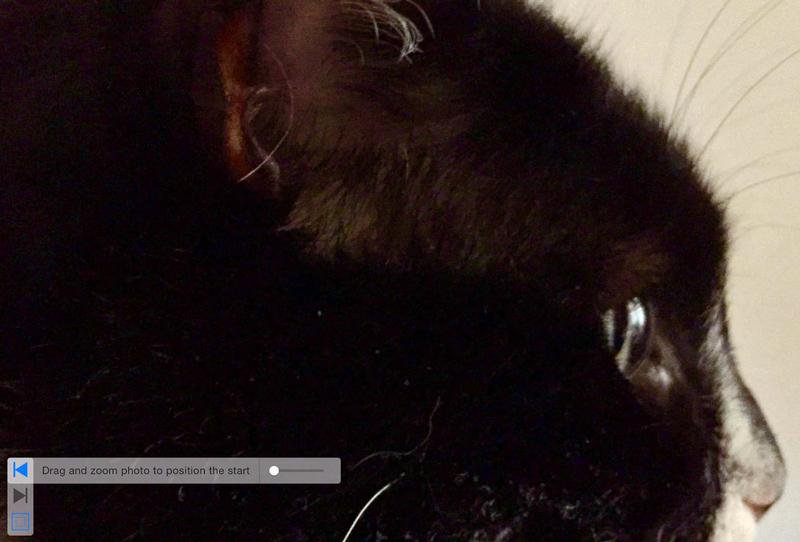
The Ken Burns theme zooms in and out of photos slowly, and you can set the start and end zoom points using the slider controls
In most themes the thumbnails at the bottom show how the photos will be arranged when two or more appear in a single slideshow frame, and clicking and dragging individual photos within the thumbnails will rearrange their order. Clicking and dragging photos within the large preview above will allow you to centre each individual picture within its frame in the slideshow.
Pro tip: The title of the slideshow can be edited by clicking it in the first frame of the large preview, and the font can also be changed by tapping Cmd+T to bring up the fonts palette. Unfortunately, although the palette includes controls for change the text colour and shadow, these don"t appear to have any bearing on the text.

The text in any on-screen captions in a slideshow can be modified by bringing up the Fonts palette - just hit Cmd+T
Adding text to a slideshow in Photos for Mac
In addition to the title text, which is added automatically based on what you type, you can also add individual captions to each image. This is done by clicking the plus button at the right of the thumbnail listing and typing into the text box. Unfortunately, the text box is fixed and can"t be moved around.
Changing a slideshow"s theme and duration in Photos for Mac
Each slideshow has a unique piece of music that plays while it runs, but you can choose your own song from your iTunes library by clicking the Music icon at the right-hand side and expanding the Music Library heading. You can also select Theme Songs from the dropdown list to mix and match any of the seven theme songs with your slideshow.
The Duration control works in concert with the music (if you"ll pardon the pun) because you can make the slideshow last as long as the music, or choose set times for each frame.
Exporting a slideshow as a movie in Photos for Mac
As you progress creating your slideshow it"ll automatically be saved under the Projects tab but you can also choose to export it as a QuickTime (MP4) movie file, playable on all Apple devices and most modern computers/handhelds. Three resolution options are available: Standard Definition (640x480), High Resolution 720p (1280x720), and High Resolution 1080p (1980x1080).
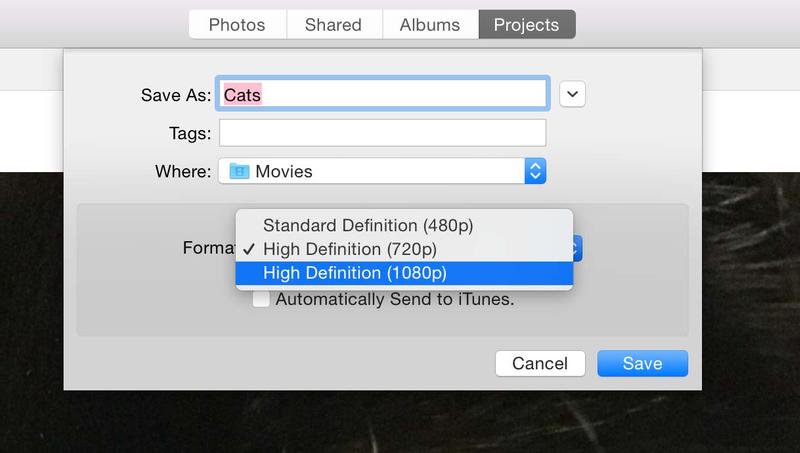
Slideshows can be exported as movie files in a range of formats, but be aware that you"ll end up with large files if choosing High Definition 1080p!
Live Photos
Introduced with the iPhone 6s range, Live Photos is an option within the Camera app that augments snapshots by niftily recording a second or two of movie footage before and after the shutter is tapped. It"s saved as a single image file that looks like any other, including syncing via iCloud.
To view the Live Photo"s movie component you simply tap and hold the photo within the Photos app on the iPhone, iPad or Apple Watch.
When viewing a Live Photo"s thumbnail within the main photos listing or an album view of Photos on your Mac hover the mouse cursor over it to start the Live Photo playback. After clicking to open the photo you"ll need to hover the mouse cursor over the Live icon at the bottom left to trigger playback.
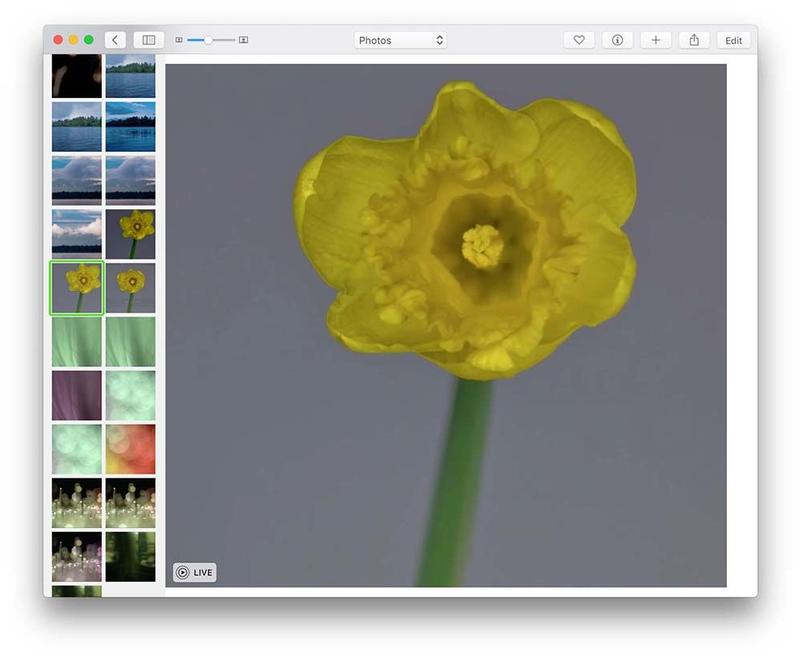
To trigger a Live Photo you"ll need to hover the mouse cursor over the Live Photo icon at the bottom left of the image
Photos in macOS Sierra allows you to edit Live Photos - short video clips that grab a second and a half of audio and video before and after you press the shutter button.
In previous versions of Photos, editing a Live Photo meant converting it to a still image, but no more. To edit a Live Photo, double-click on it and select the editing tool as normal. If you want to turn off the Live Photo and make it a still image, click the yellow circle to the right of the location and time and date information.
Live Photos also become regular image files should they be copied out of Photos to a Finder window or the desktop.
Turn a live photo into a Gif
There"s a new Media Types folder in Photos for High Sierra which makes it easy to find your videos, selfies, Depth Effect images, Panoramas, Time Lapse, Slow-mo, and Live Photos. A new feature in Photos in High Sierra is the ability to turn those Live Photos into a Gif-like repeating loop.
You can also manually change the Live Photo"s representative image to a different segment of the video, trim the Live Photos video, and, in addition to the new Gif-like Loop, you can set one of three other effects: a traditional live photo, a back-and-forth bouncing effect, or a Long Exposure image that mimics a photo taken with the shutter left open for a long time.
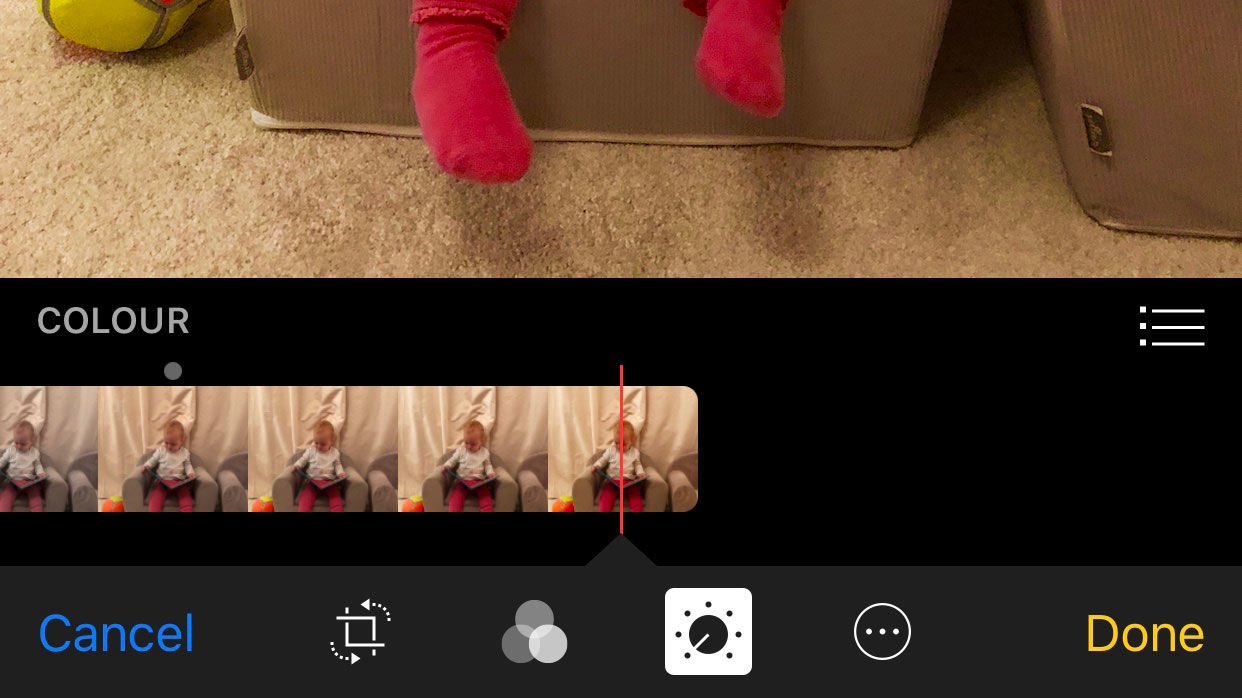
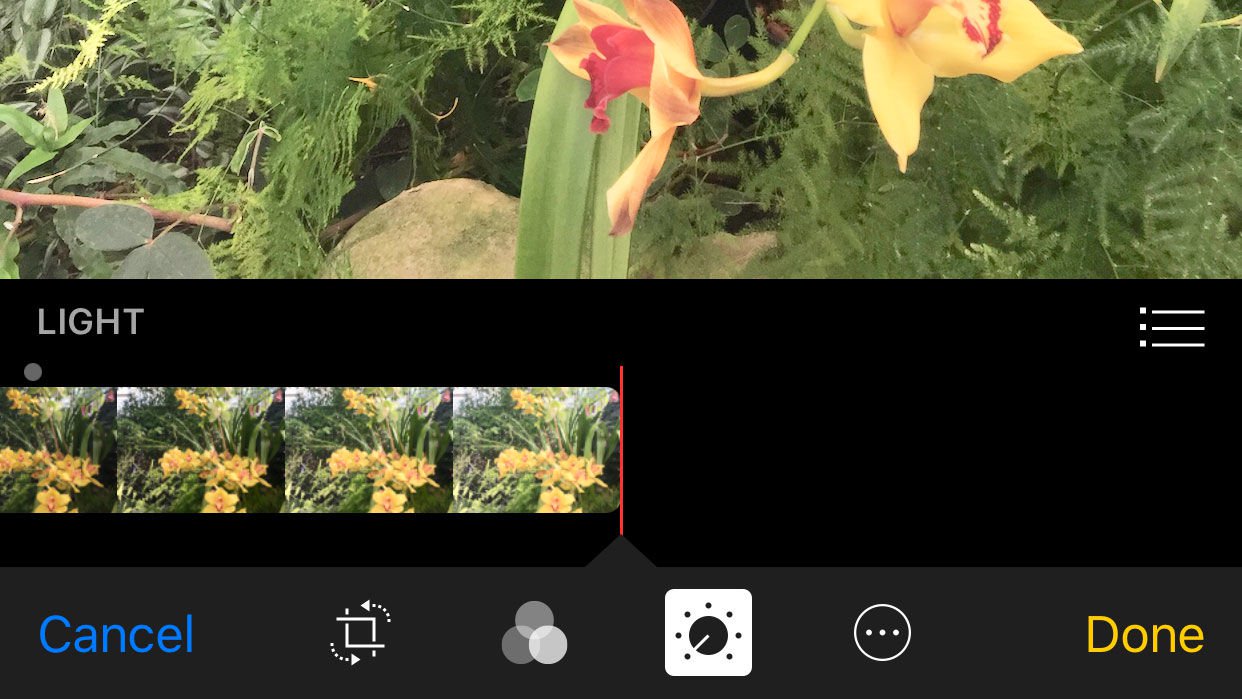
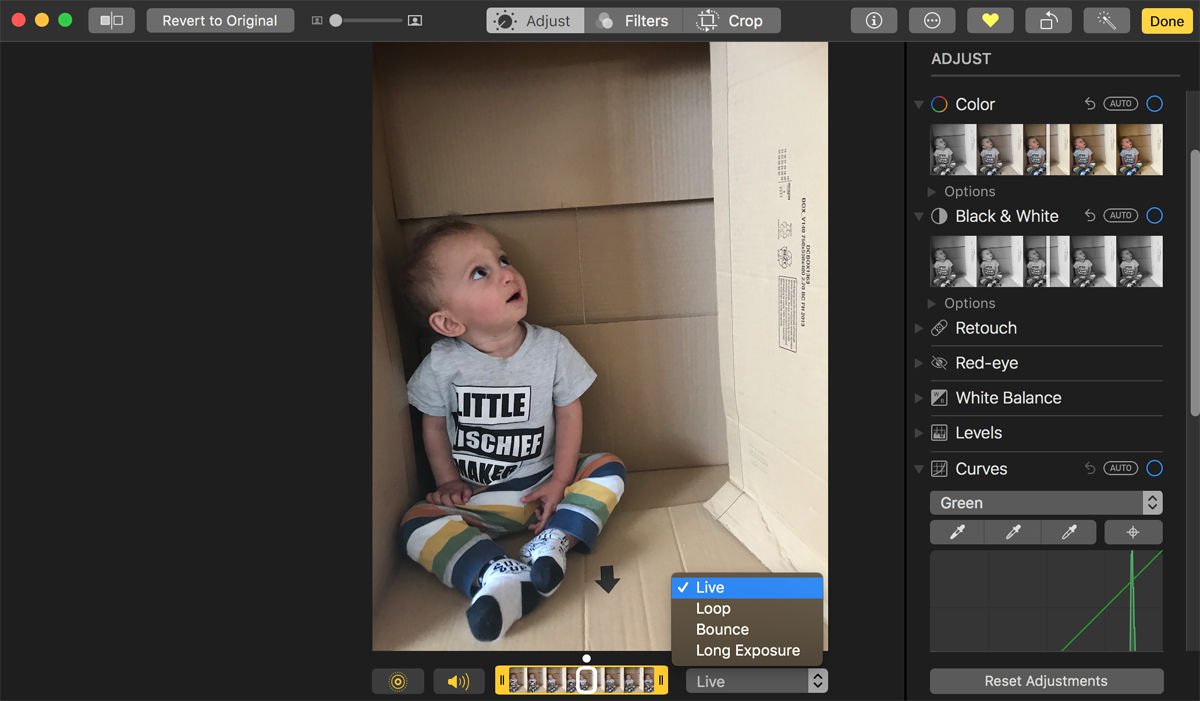
To turn a live photo into a looping "Gif", open your Live Photo in Edit mode. Below the photo you will see a slider (this allows you to change the still image associated with the Live Photo, as well as change the start and end points of the Live Photo).
Next to that is a dropdown box with the options: Live, Loop, Bounce and Long Exposure. Choose Loop. Immediately the image will start to loop. If you were hoping to change the start and end points unfortunately you can"t, but you can choose to turn the audio back on (it"s turned off by default in Loop mode).
The other similar option is Bounce. Where loop sort of fills in the gap between the different movements, in Bounce the sample is shorter and the one movement is repeated over and over. You cannot play audio in Bounce.
We have a complete guide to turning Live photos into Gifs here: How to make a GIF on iPhone.
Create a long exposure
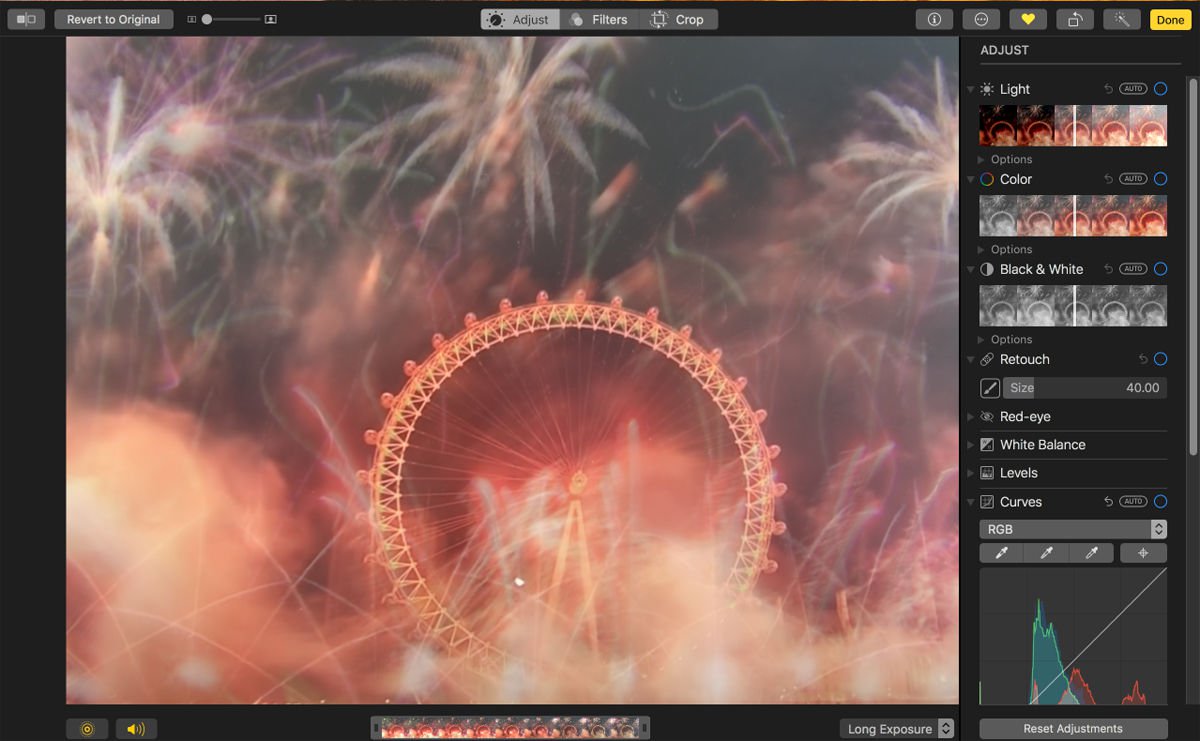
If you have a Live Photo of something like a waterfall or fireworks you can make a Long Exposure image from it.
Note: this image won"t be any good if you moved the camera. Ideally you want to keep the camera completely still when taking the live photo (as you would if you were taking a Long Exposure shot the traditional way.
As before, select the Live Photo, choose Edit and in the box beside the sliders choose Long Exposure.
We"d like the option to make a Long Exposure photo out of a Slow-Mo video. Live Photos by their nature aren"t really long enough to give a really good Long Exposure effect.
Extensions & plugins
Photos in El Capitan addressed the issue of a lack of extensive editing tools within the app by letting app developers create add-ons that appear under an Extensions heading when you click the Edit button while viewing a photo. Just look to the bottom of the tool list at the right of the screen and click the Extensions heading to make your choice.
Some developers have chosen to create dedicated extensions. A good example is Noiseless from MacPhun, that aims to improve images taken in the dark. Others developers, like the people behind the Pixelmator image editing app, let users access one or more functions from their app within Photos.
As with all OS X extensions those for Photos can be activated, deactivated and listed within System Preferences. Just click the Extensions icon and then the Photos entry in the list. Remove the tick alongside any you want to disable within Photos. Extensions are installed by either downloading the installation package directly from the developer"s website, as with any app, or by downloading offerings found within the Mac App Store.
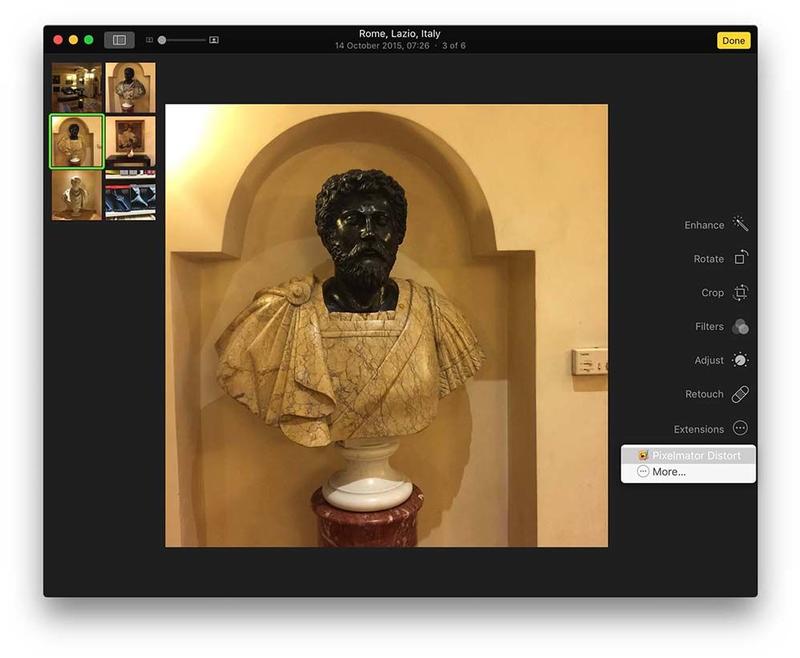
Extensions allow you to enhance the editing power of Photos using third-party add-ons
Unfortunately, the extensions used with Photos are incompatible with those used in other image editing apps such as Adobe Photoshop.
Using the Places feature
The latest version of Photos has an album called Places.
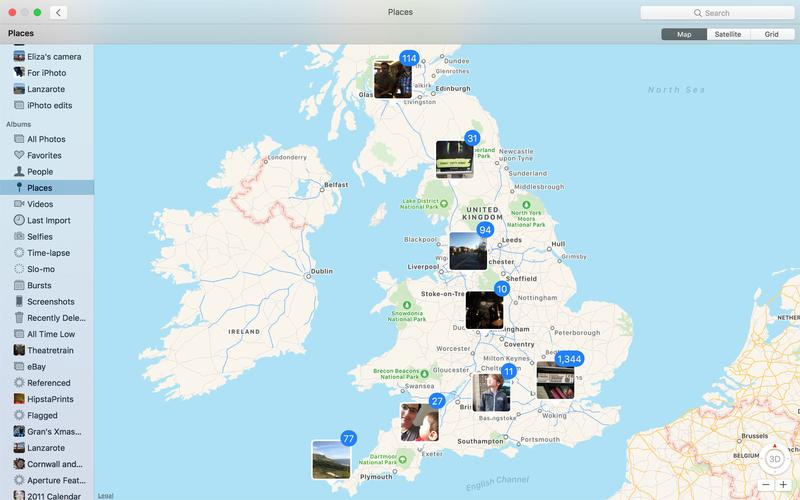
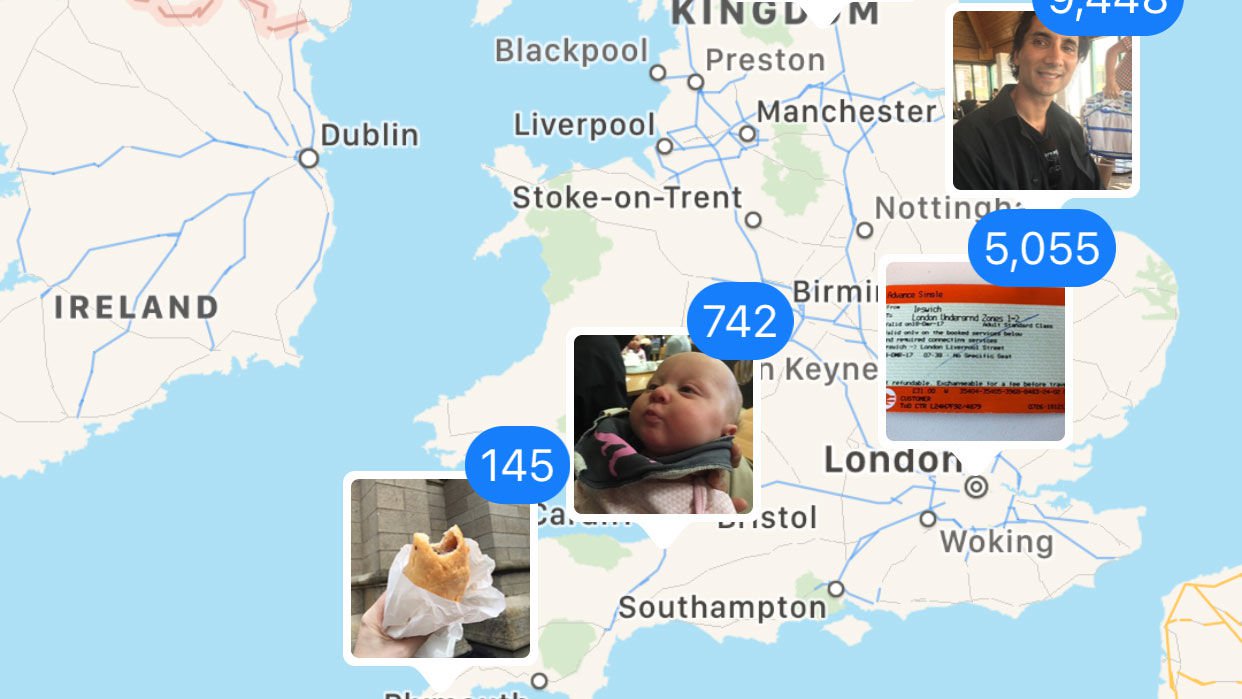
Click on it in the Albums list and you"ll see a map with thumbnail images in different locations and a number next to them. The location on the map is the location stored in the photo"s metadata (usually the place where it was taken) and the number is the number of images in Photos at that location. You can pinch and unpinch on a trackpad to zoom in and out or drag with two fingers to pan around the map. Double-click anywhere on the map to zoom in on a specific spot or click a photo to see all the photos at that location.
To change the location of a photo, right-click or Ctrl-click on it and choose Get Info. You"ll see a map with a red pin in it. Drag the red pin to a new location to change the Place with which the photo is associated. (Pro tip: you can change location for multiple photos at once by shift-selecting them and choosing Get Info, as long as they"re all in the same location.)]
Making memories
The Memories feature is new in macOS Sierra Photos. It groups together photos from an event which can be a location or date, or person, for example, and puts them together in a slideshow.
To see the Memories Photos has already created, click on Memories in the left sidebar, under Photos. Double-click on one and press the Play button in the toolbar. A dropdown menu will display options for themes. Choose one for the slideshow. You can also choose your own music by clicking the Music tab. When you"re ready, click Play Slideshow.
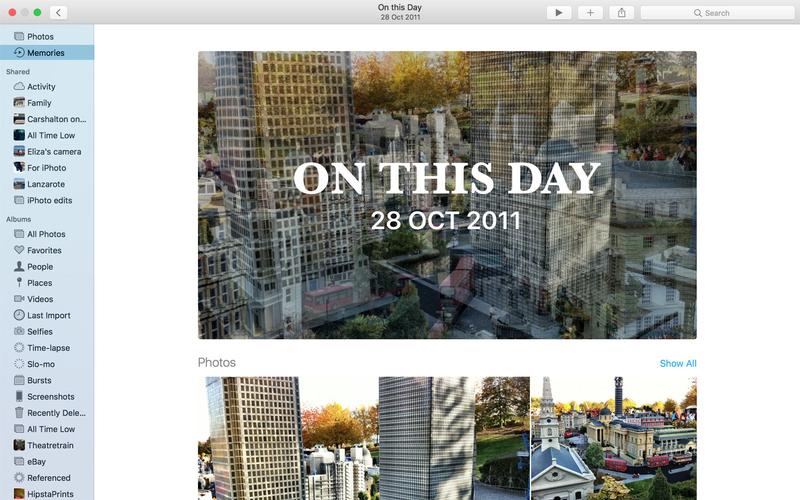
To create a new Memory, choose an album, open it and click Show as Memory in the toolbar. To delete a Memory, go to the Memories view, right-click on the one you want to remove, and click Delete Memory.
You can add photos to a Memory you"ve created by adding them to the album from which the Memory is created but the only way to remove an image from a memory is to hide or delete it, by right-clicking on it and selecting wither Hide or Delete.
The Memories feature learns what you like as you use it. You can train it by favouriting Memories, adding new ones, or removing those you don"t want.
Minor updates in Photos for macOS Sierra
Search has been significantly improved in macOS Sierra. Start typing a search term like, say "boat" and Photos will start showing you photos in your library that it thinks have boats in them. All the data crunching is down on your Mac, rather than on Apple"s servers, but it doesn"t seem to slow things down at all.
The introduction of Siri is macOS Sierra means that instead of typing a search term into the text box, you can click in the Dock or menu bar and ask it to search for you.
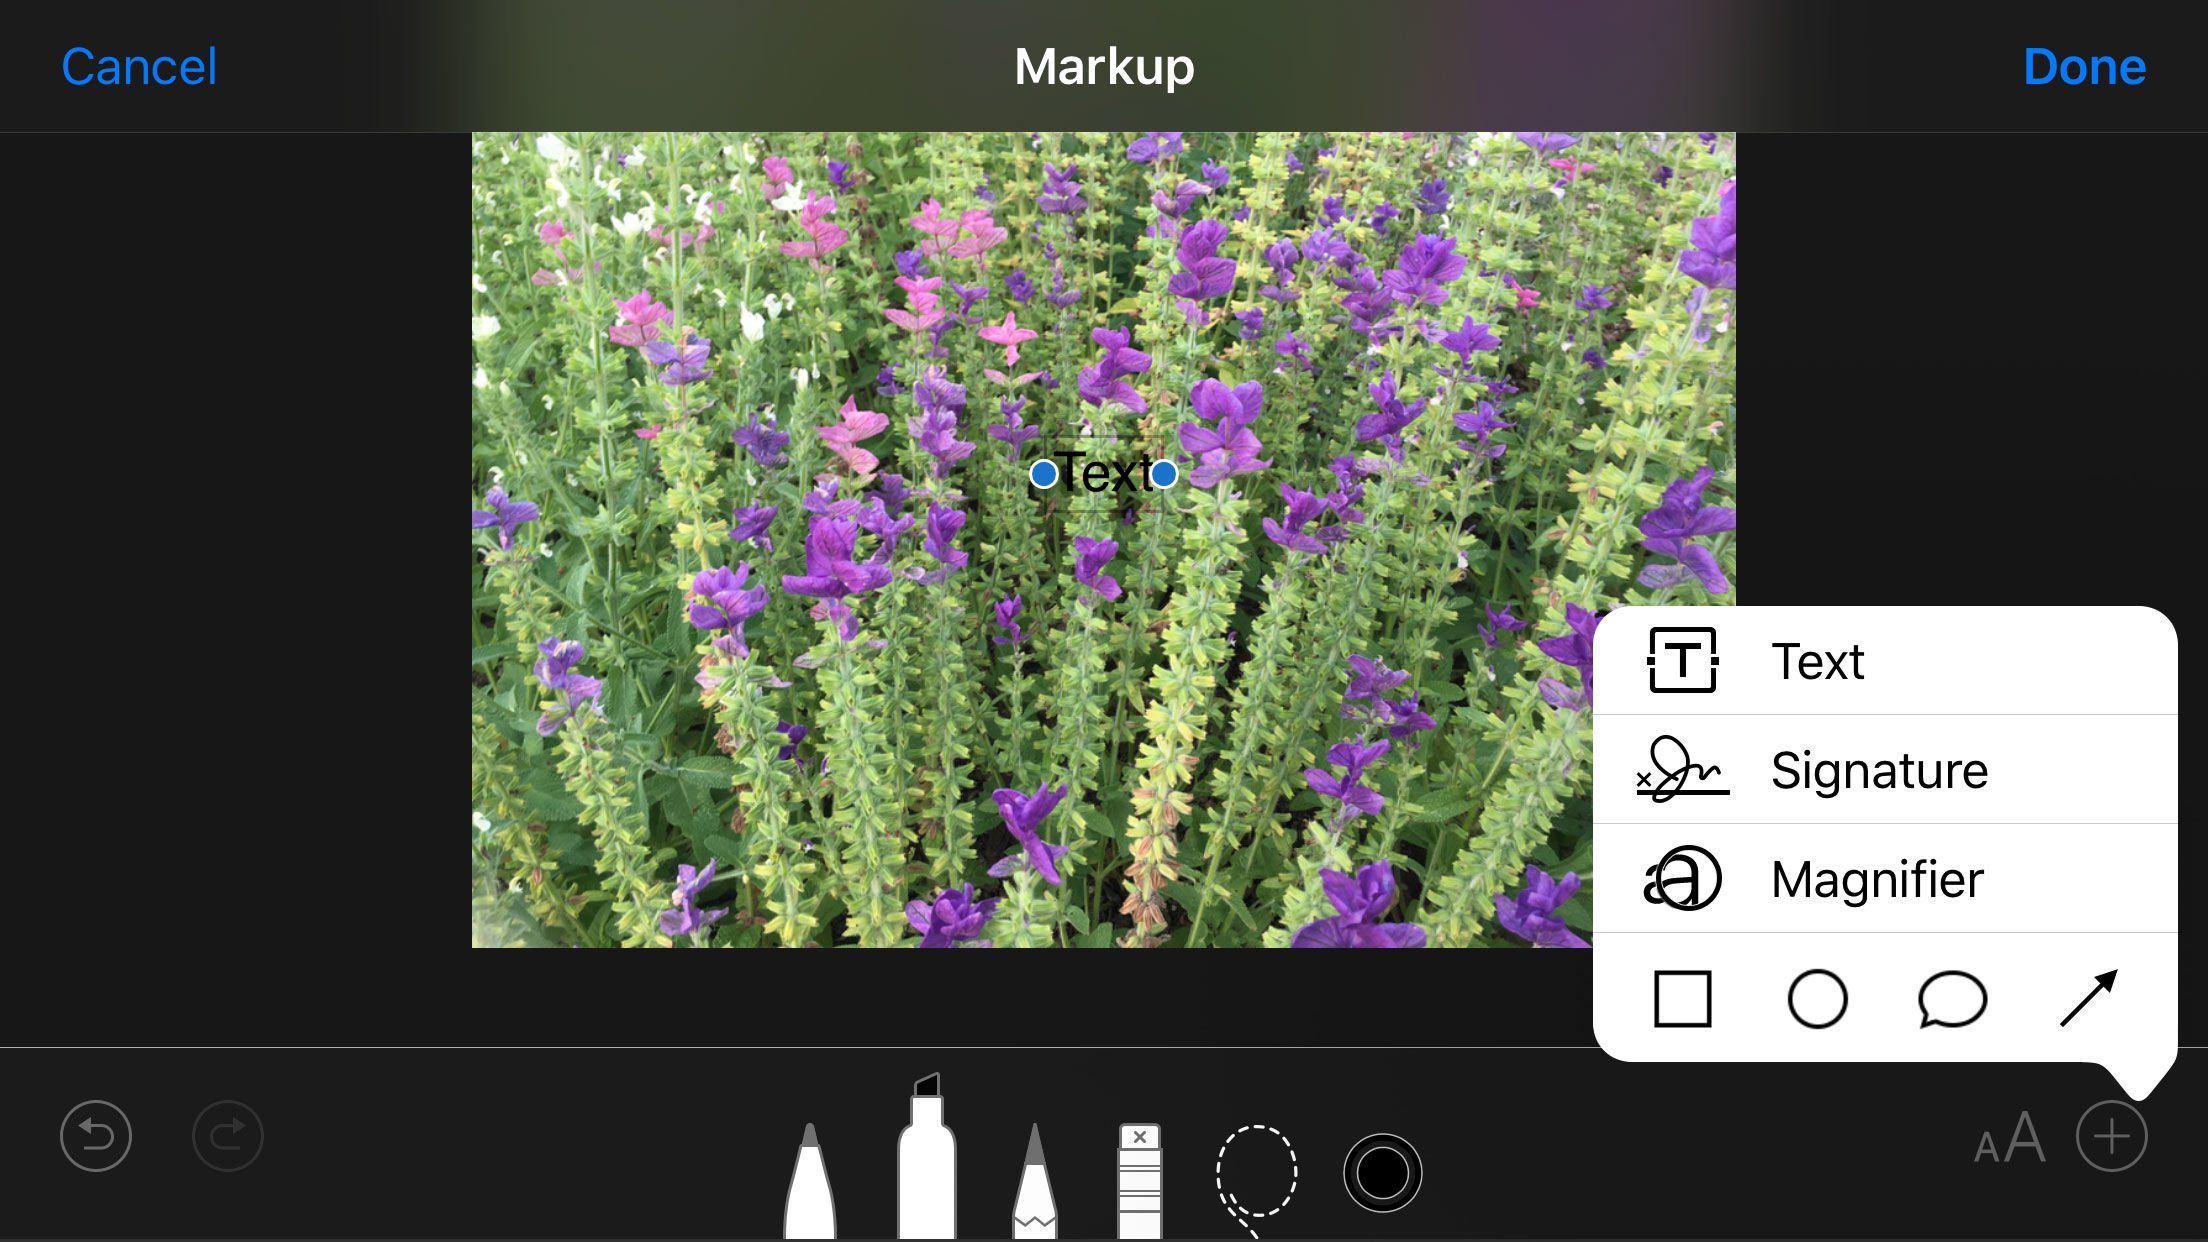
You can now markup photos in Photos, in the same way you markup PDFs or images in Preview. Open a photo and click the Edit button in the toolbar. At the bottom of the list of tools, you"ll see the Extensions option - a circle with three dots in it. Click on it, then click on Markup. You"ll now see the familiar markup tools along the top of the image allowing you to draw freehand, add shapes or a text box and change the colour and style of text and shapes.