The photos app on the iPhone is probably one of the ones you access most often. You use it to find, edit, store and share your photos but you can do so much more. In this tutorial we will help you master the Photos app so you can do much more, from rearranging and hiding photos, to adding captions, deleting duplicates and more.
If you are looking for tips to help you take better photos read: How to take photos on iPhone
How to edit the colour of photos on your iPhone
There are lots of editing tools available in the Photos app and a lot of third party tools that can be used with Photos on the iPhone.
You can crop, straighten, remove red eye, adjust lighting and contrast and more:
- Open Photos and select the image you wish to edit.
- Tap Edit and pick the filter or saturation tools from along the bottom.
- If you want to warm up an image for example, you could tap on icon that looks like three circles to be taken to the different filters, here you could choose Vivid Warm, for example.
- You can also adjust the colours, light and saturation. To change the colour saturation of an image tap the dial icon and pick Color. You can drag the slide up (or to the right depending on the orientation of your device) to add more colour to the image.
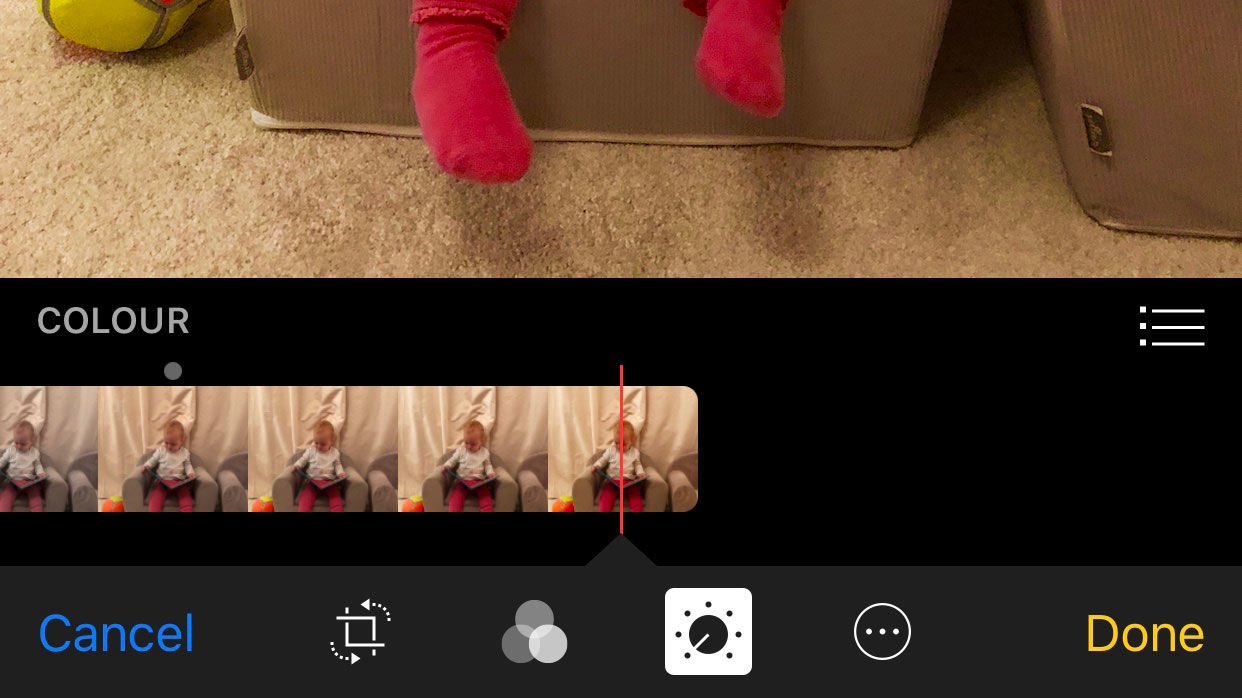
- Tap the three lines and you can see what the Saturation, Contrast and Cast levels are. To increase contrast, tap Contrast, then move that slide until you are happy. We were able to get a nice blue sky this way.
- Finally we looked at Cast and moved the slider until we were happy with the white of the clouds in our image
- If you hate your changes it"s easy to disgard them. Even an image that was edited can be reverted back to the original - just tap on Edit and Revert.
How to adjust the brightness of a photo taken on the iPhone
You can also adjust the Light levels. Options include Exposure, Highlights, Shadows, Brightness, Contrast and Black Point.
- Find the image you wish to edit. Tap Edit.
- Select the dial icon and pick Light.
- You could drag the slide up for a more ethereal feel to your image.
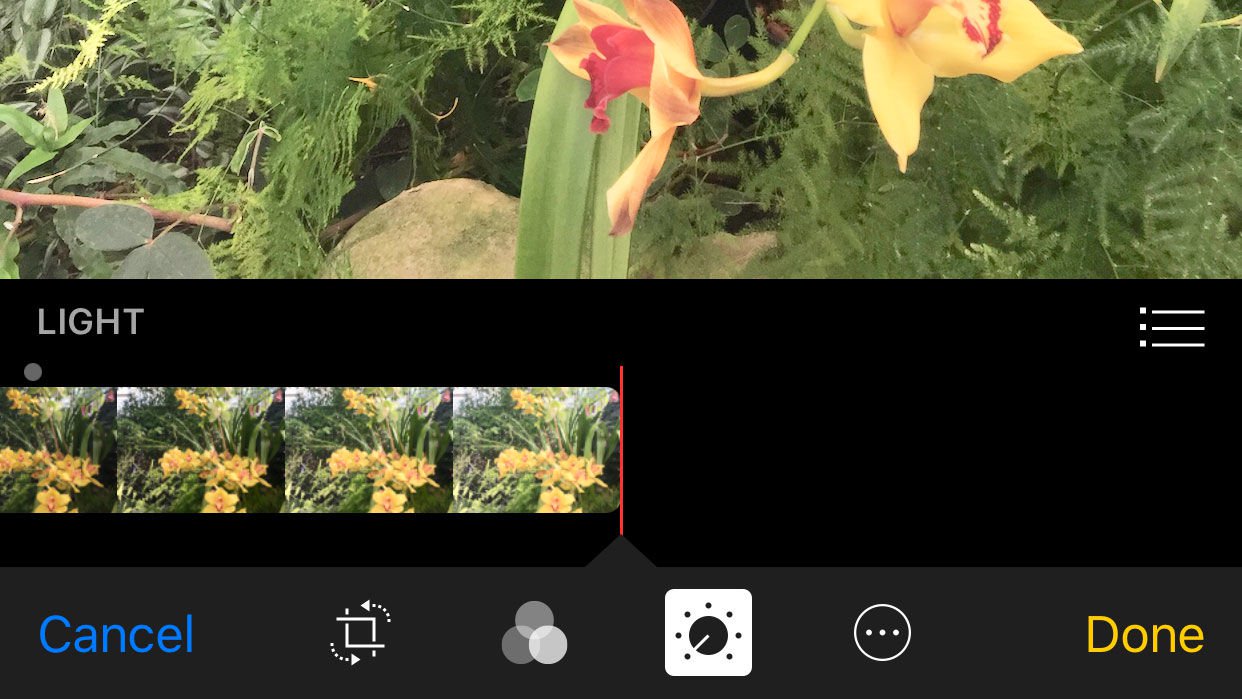
- Tap the three line icon to access the additional settings.
- Turn down Exposure to see more of the sky.
- Drag down Highlights to see more sky.
- Pull up Shadows to see more of what’s in the shade.
- Pull up Black Point to get deeper blacks.
How to crop and straighten photos on your iPhone
- If you want to straighten an image tap on the crop icon. Here you have options for quarterly rotations as well as a dial so you can adjust the rotation of the image more precisely.
- To crop an image you also need to tap on the crop icon, you then need to tap the icon on the right that looks like different shaped boxes.
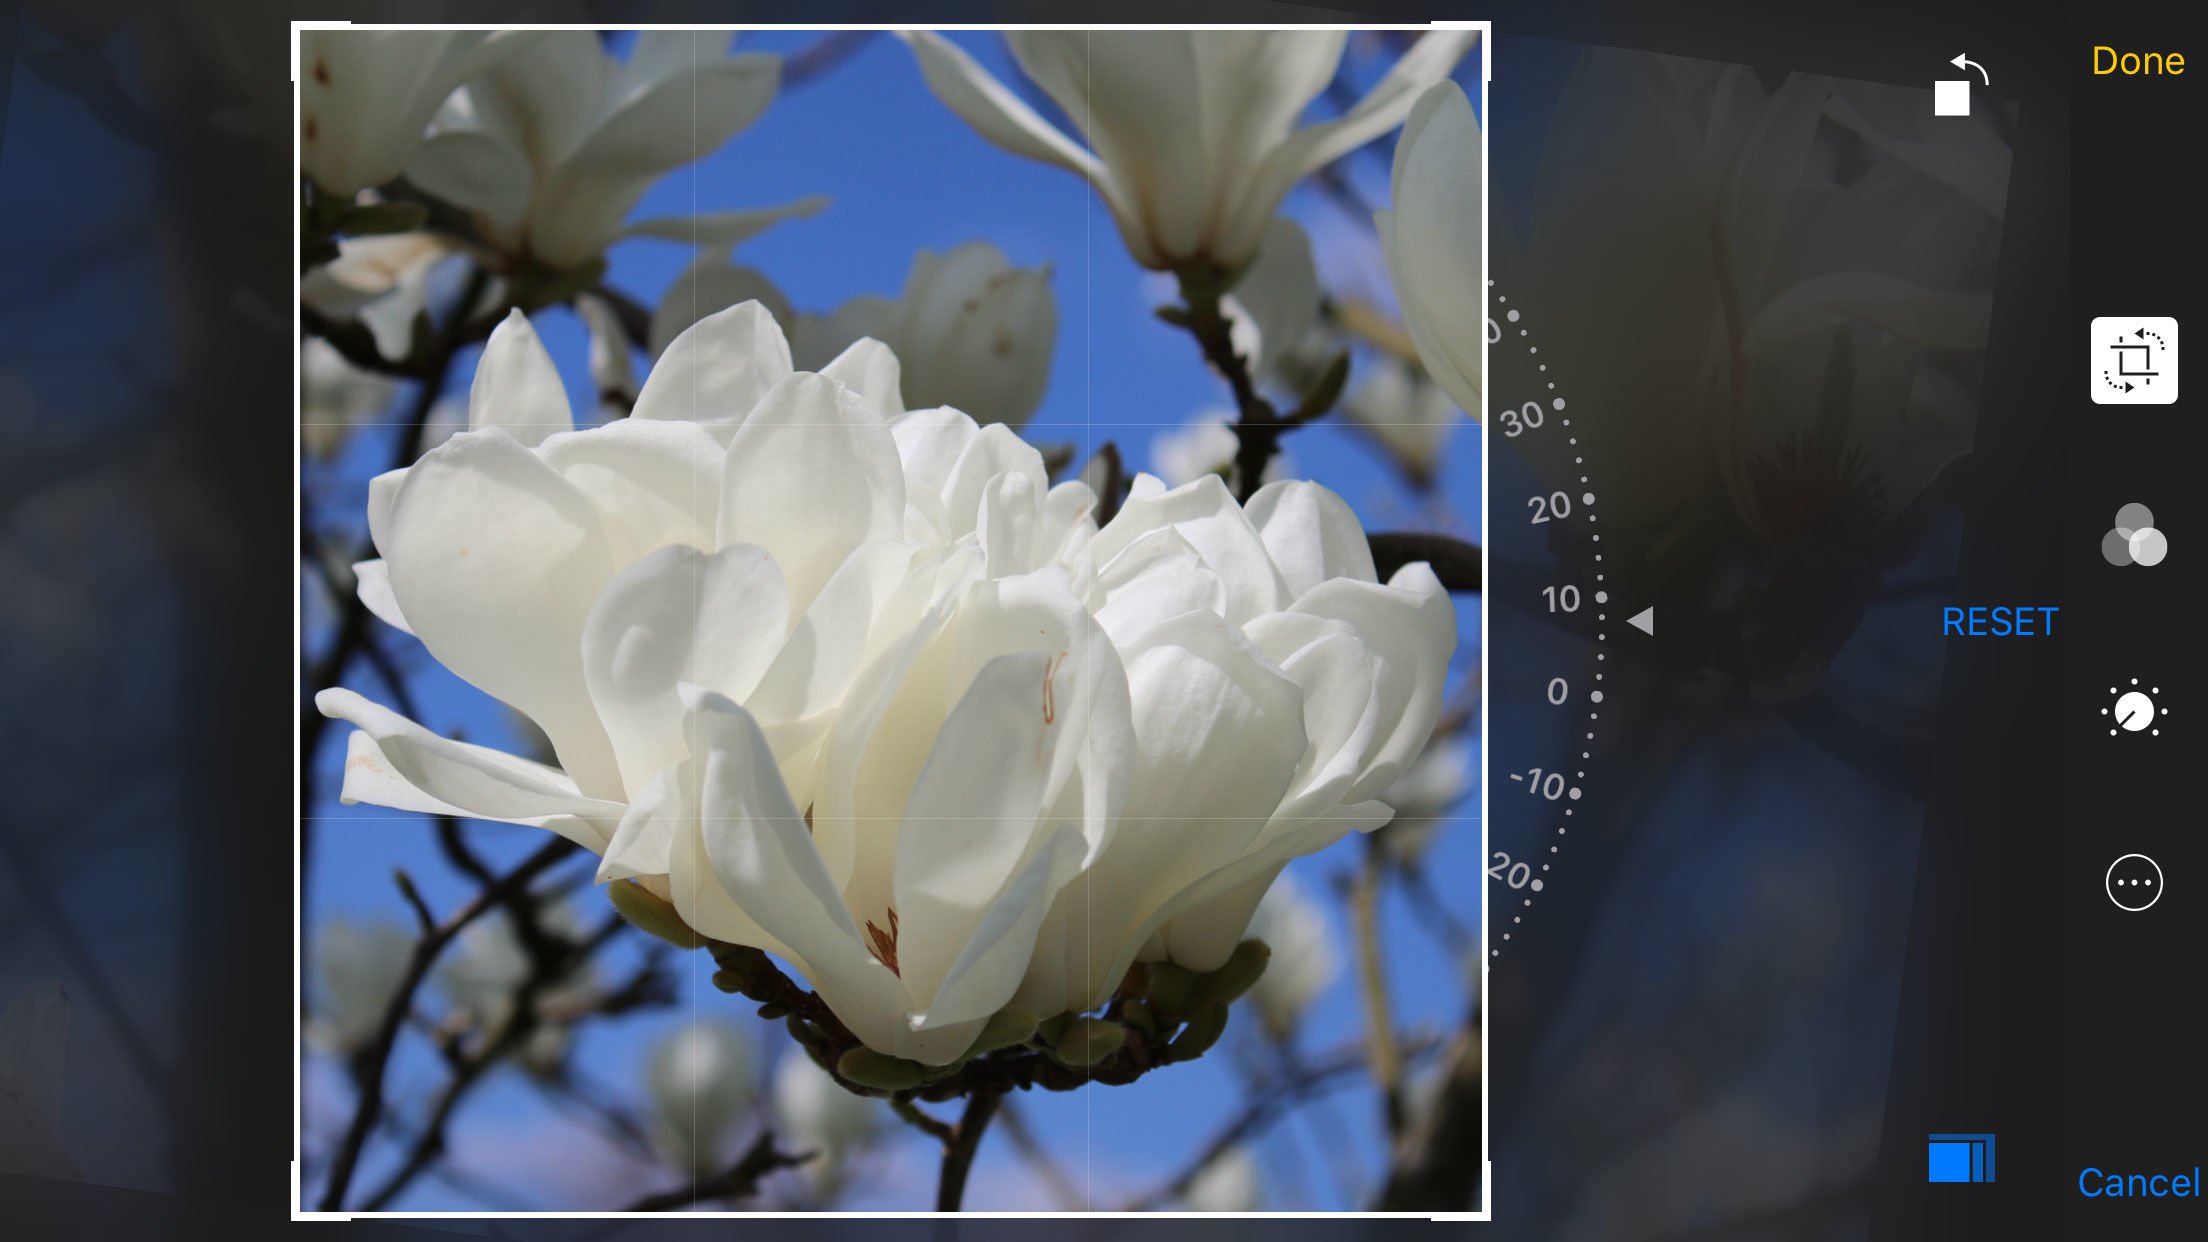
- Now you can pick the constraints of your crop.
- Tap Done when you are happy.
How to find a photo taken on your iPhone
Want to find a particular photo on your iPhone? There are a few ways you can do this...
If you know when you took the photo:
- Open Photos.
- Along the bottom you will see options for Photos, Memories, Shared, and Albums.
- If you took the photo recently choose Albums and then All Photos.
- Swipe up until you reach the bottom of the collection of photos. These will be your most recently taken images and hopefully you will see the one you want there.
- However, if the photo was taken a little while ago, there are various shortcuts you can try to find it quickly.
- If you have an idea of when the photo was take, e.g. July 2016, choose Photos from the bottom. This will probably land you in Moments view, you can then tap on Collections at the top to go back to a more condensed view, and then tap on Years at the top to go back another step to the year view.
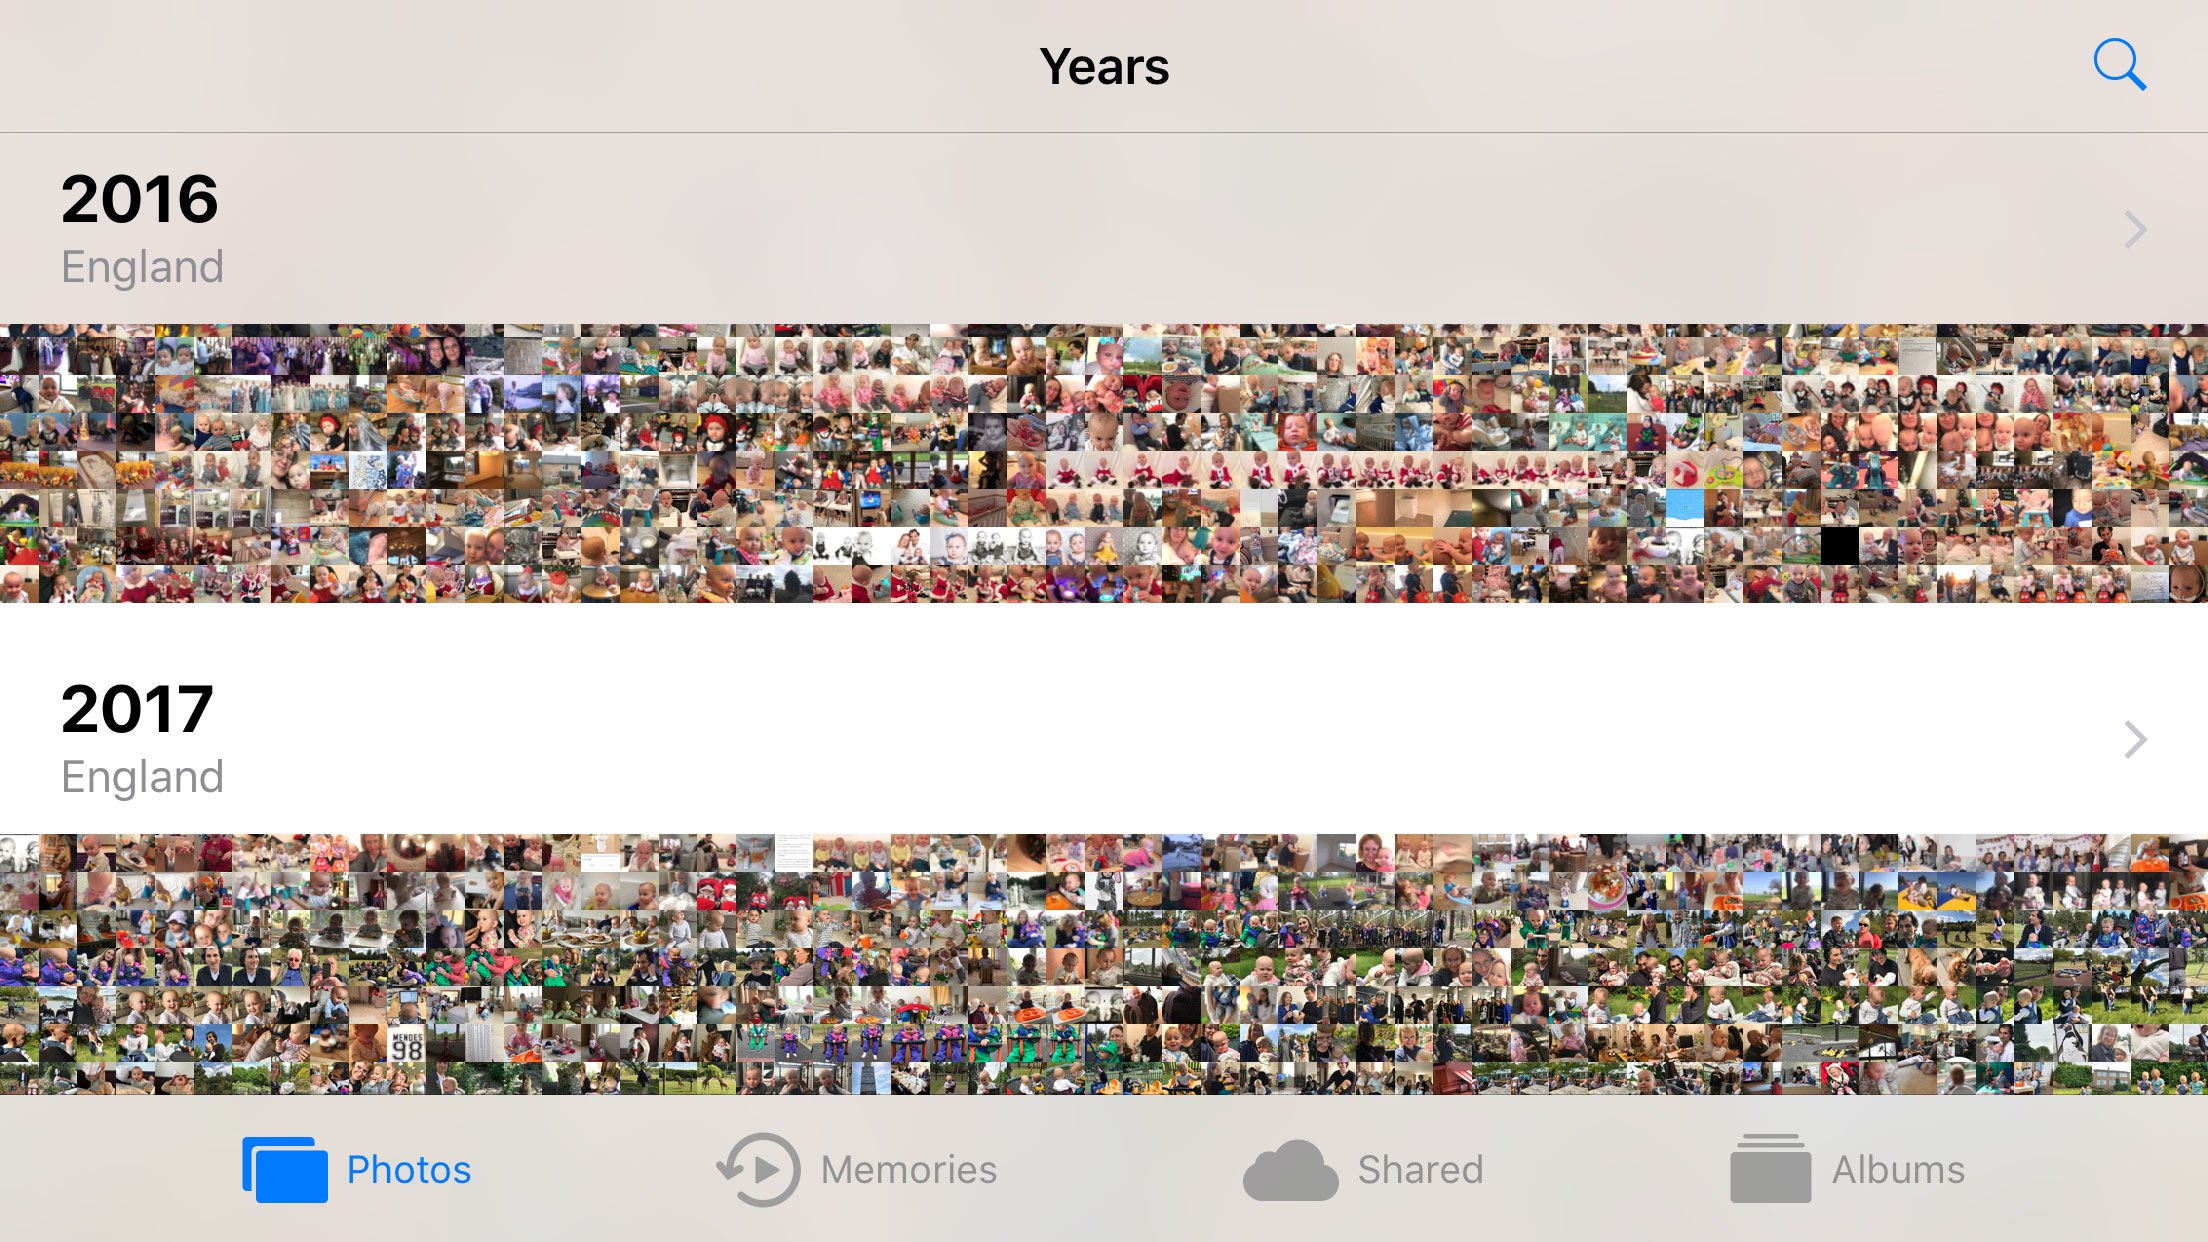
- When you are in Year view you will only see an overview of the photos you took, but tapping anywhere will take you to a less condensed view of that time so you can pinpoint the photo you are looking for. To skip to July 2016 tap somewhere around the middle of the 2016 section.
- You’ll now be back in Collections view, which shows you images in collections based on your location when you took them. You’ll see the dates those images were taken too. Swipe up or down until you find the relevant month.
- You’ll see a condensed selection of the photos you took around that time. Tap on one that looks promising to be taken to the Moments view, that shows you all your photos taken around that time. Now you just need to swipe until you find what you are looking for.
If you want to find a photo including a particular object:
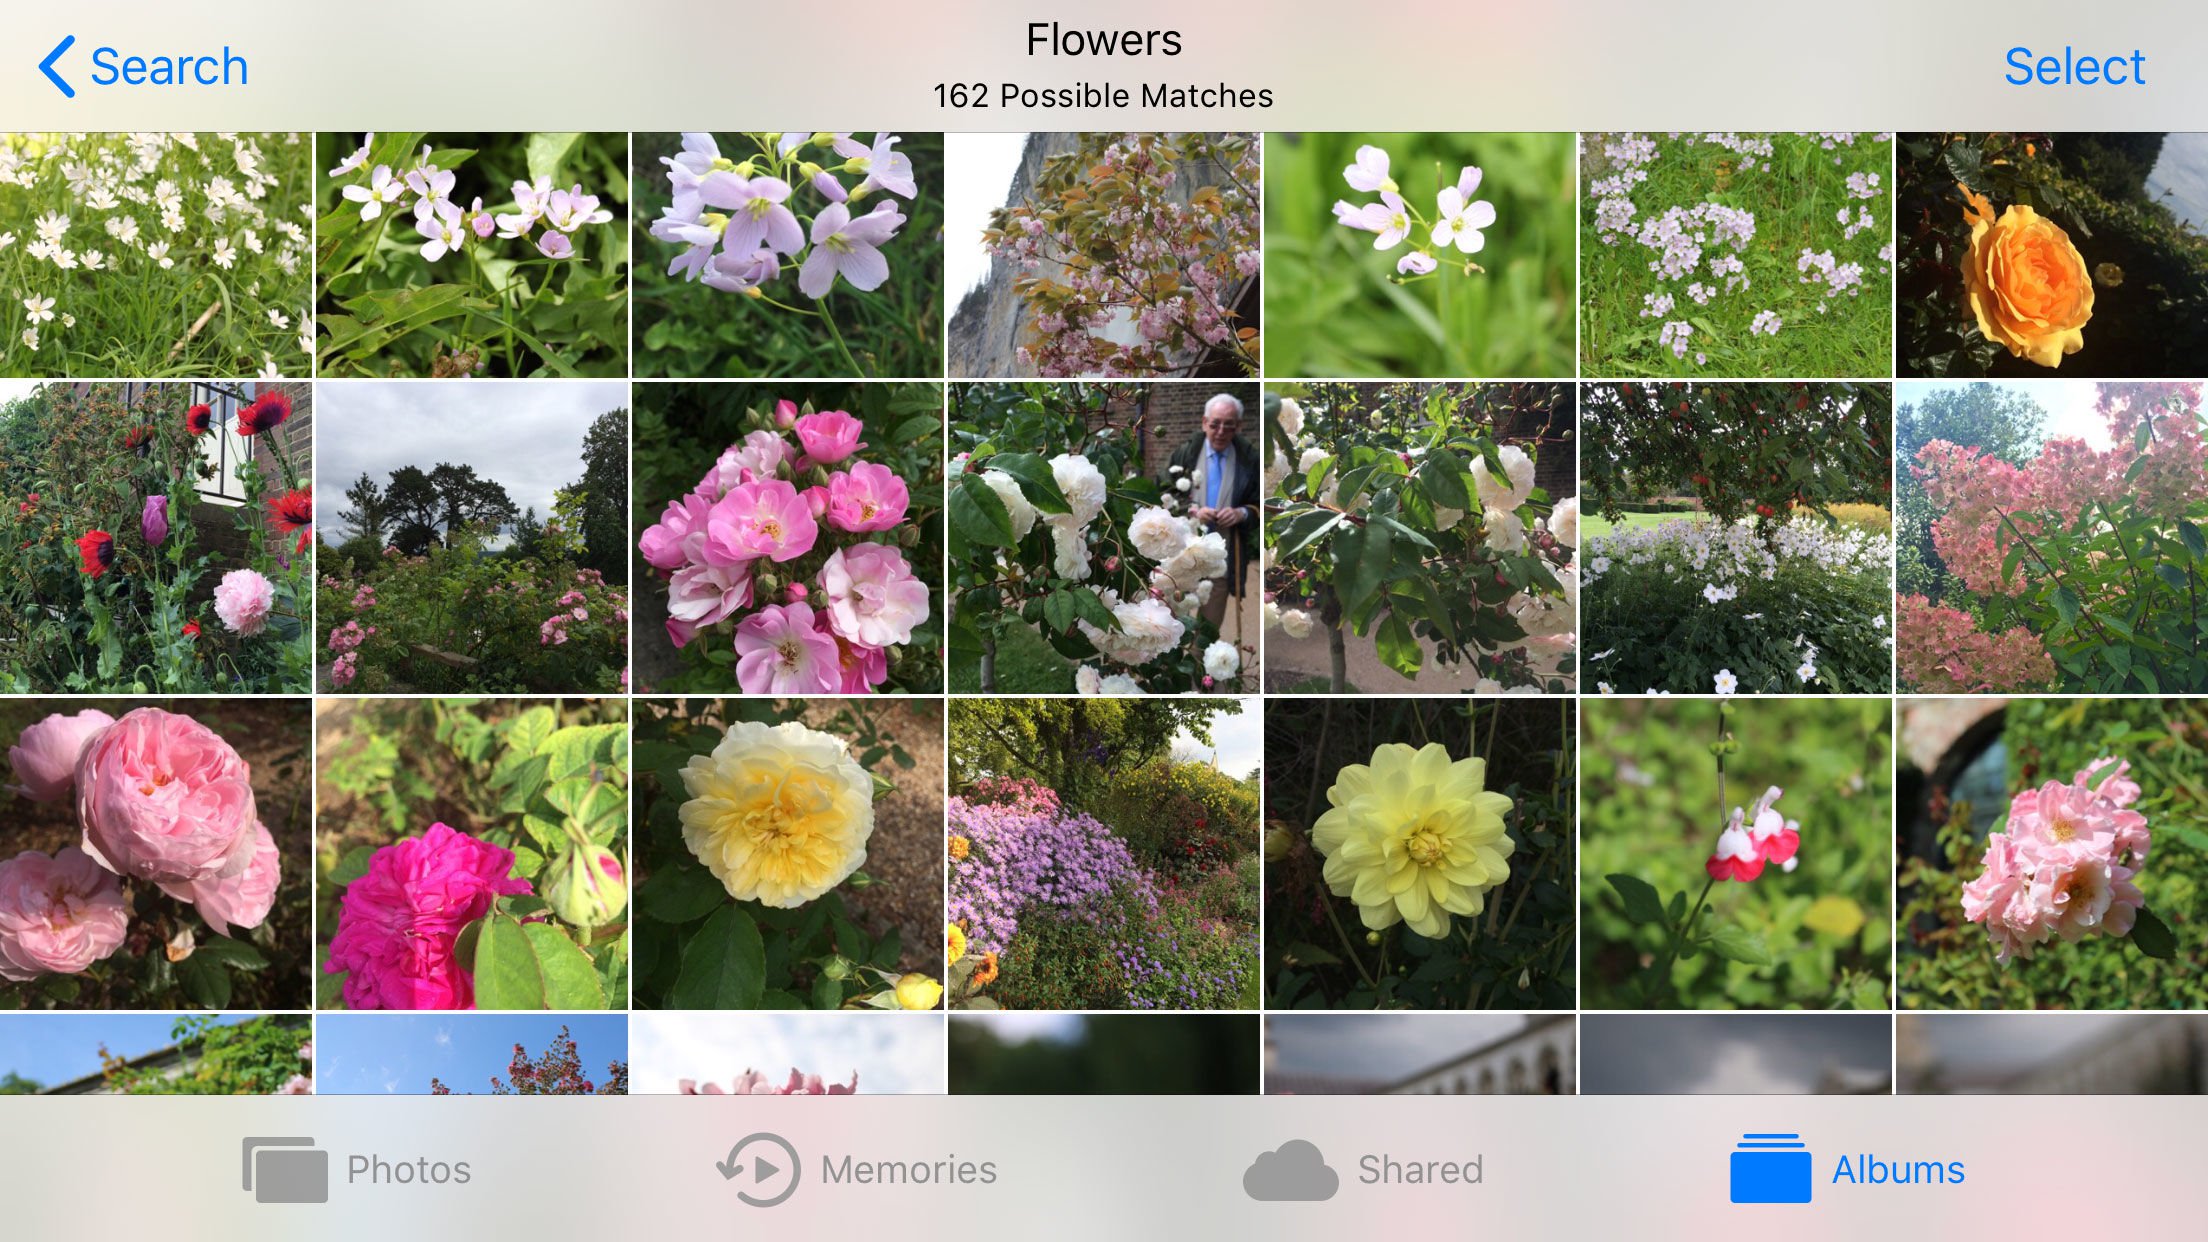
What if you wanted to find a photo you took of a peacock last year but you don’t have a clue when you took it? Luckily it’s really easy to find photos using Search.
- Tap on the magnifying glass in the top right and type your search term, e.g. Peacock.
- This should identify all your photos which include Peacocks, although we found that it missed some.
- You can also search for everything from birthday cake and cardboard box to wedding and zoo.
How to find a photo taken at a particular location
If you know where you took the photo then there is an easy way to search for it by location. Here"s how:
- Tap on Albums at the bottom and then scroll down to Places.
- A map will load up showing groups of photos associated with an area. (If you don’t see the Map view, tap on the Map tab).
- You can zoom out to see the whole of the UK, or which ever country it is you took the photos in.
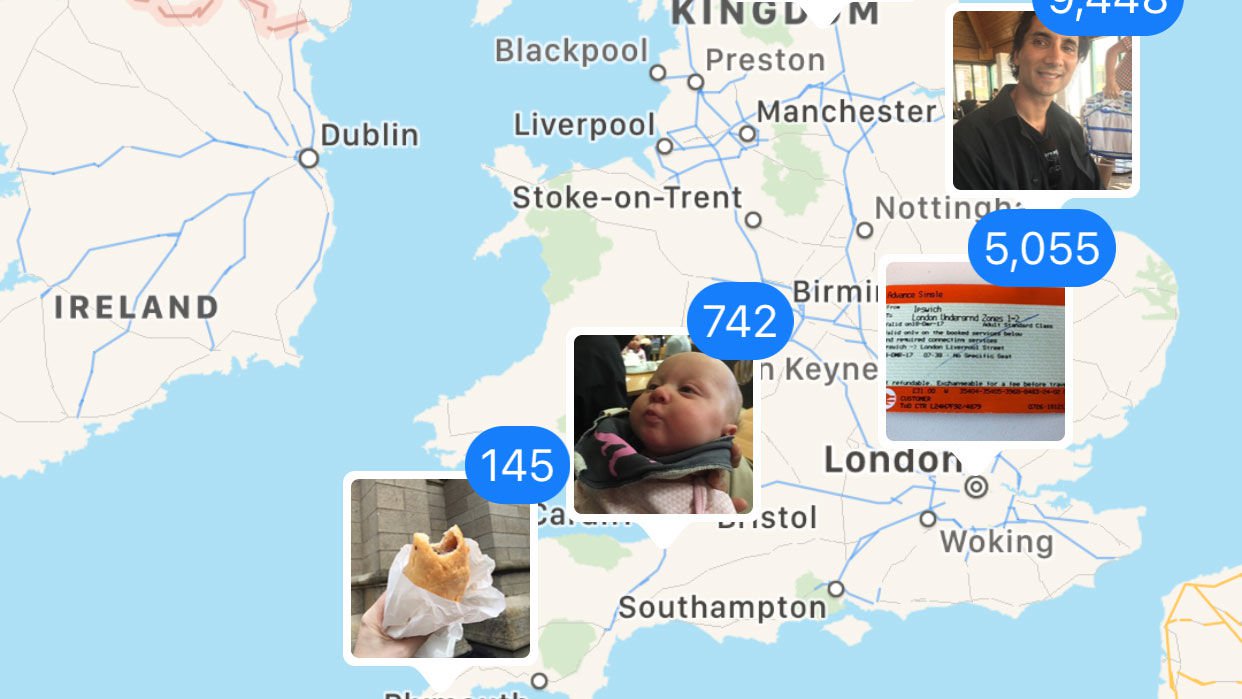
- Double tap roughly where the photos were taken to zoom in a bit, and then a bit more, until you are focused on the area.
- Now you should easily be able to find the photos you took when you were there.
- Tap on a photo in the Map view to be taken to the Grid view, which shows you thumbnails of all the photos taken at the precise location.
How to find a person in a photo
This is a little more tricky as it involves some set up and if you have a lot of photos of that person it may be like finding a needle in a haystack. But if you just have a few photos of someone it could be easy to find the one you are looking for.
- From the Album view choose People.
- Photos will automatically have selected a few people and grouped some photos together that it thinks are of that person.
- Beware, it doesn’t always get it right - for the face identification to work you need to help it by telling it when it has got it wrong. It gets more accurate the more photos it correctly identifies.
- If one of the People your iPhone has already categorised is the one you are looking for it may have already have found the photo you are after. Tap on the thumbnail of that person’s face.
- You’ll see a slideshow playing at the top with some of the photos and videos that have that person in them (find out how to make these Memories slideshows here).
- Underneath that, next to where it says Photos, tap on Show More, to see all the photos it has identified so far.
- The way Photos identifies people is that if you identify someone at a particular place on a particular day, it will study all the photos from that time and identify the same person in those photos. If Photos hasn’t identified the person at the event you were interested in - say their wedding - all you should need to do is confirm that person in a few more photos.
- To do so, scroll down until you see Confirm Additional Photos. You may only have to identify them in a small number of photos because once you have told Photos that the person was at a particular event it will automatically look for that face at that event.
- Once you have identified a person you can search for them by name.
How do you arrange photos into Albums on iPhone
To make it easier to find photos in the future you can arrange them into albums.
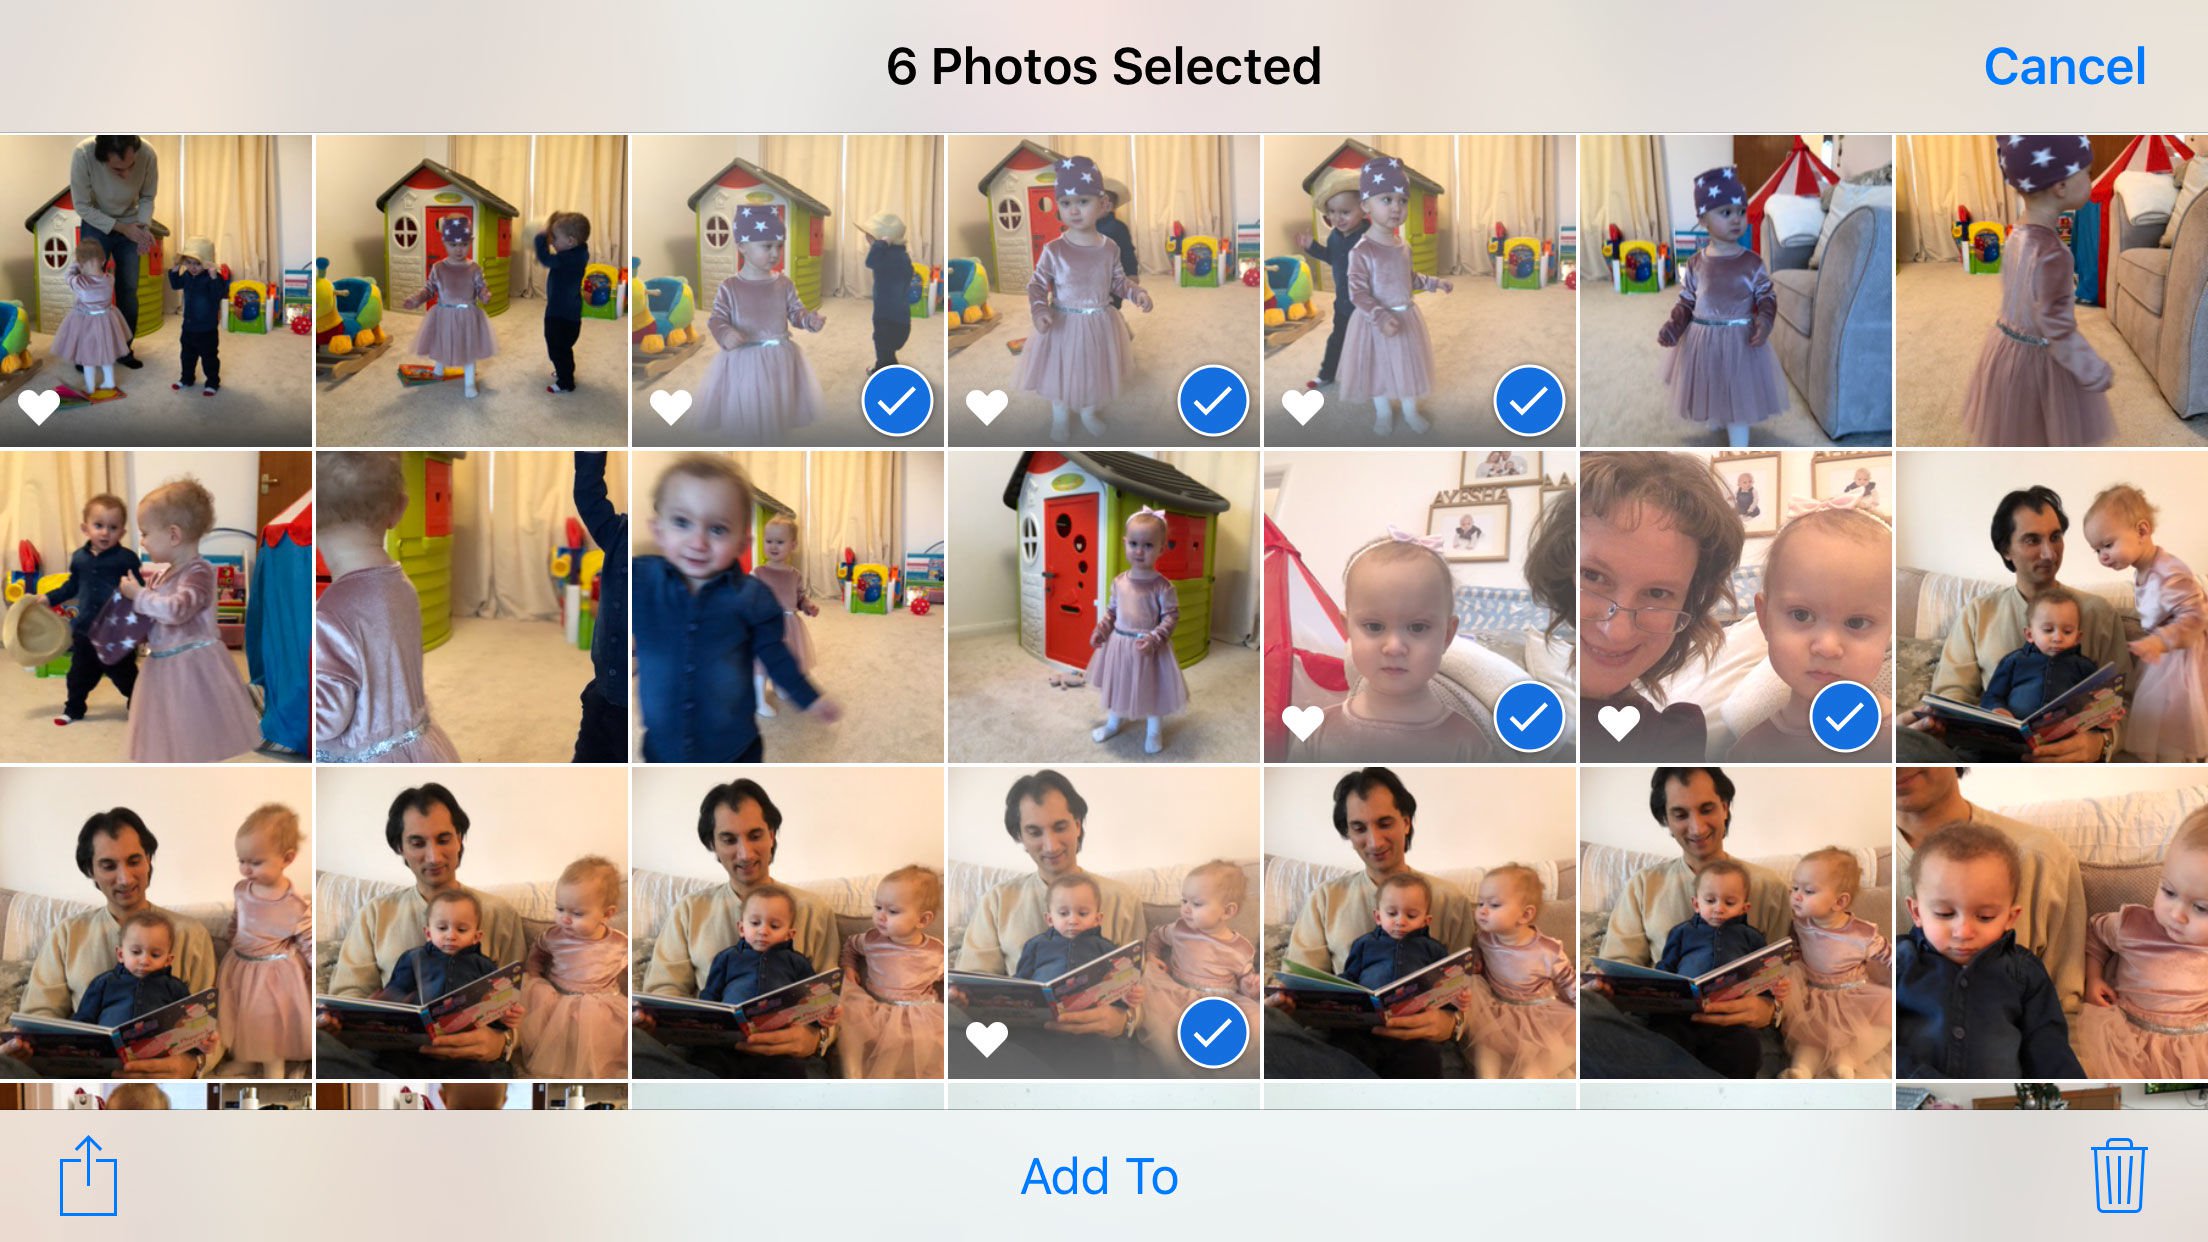
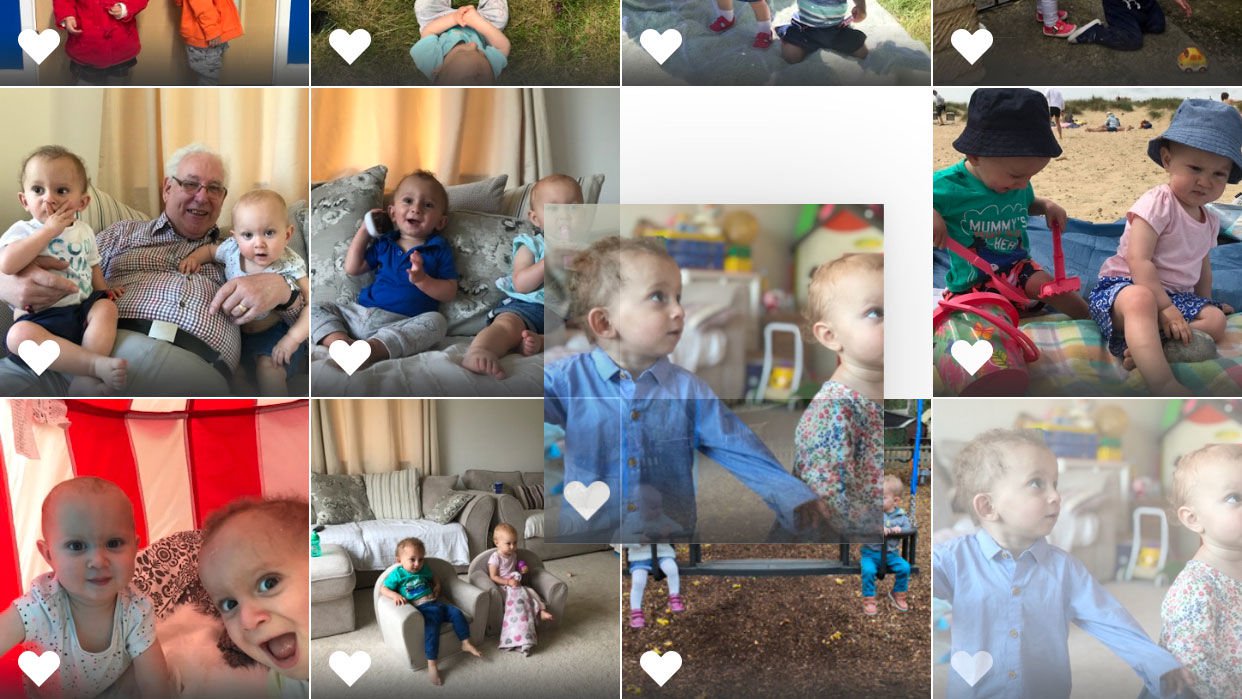
Before making an album we often review the collection of photos in our All Photos album, Favouriting the ones we would like to add to the album.
- Swipe through the photos tapping on the heart symbol when you see one you like.
- Once you have finished Favouriting it’s easy to select the ones you want to add to the album, go to the Album view and tap on Select at the top.
- Now tap on all the ones you had Favourited (there will be a heart symbol on them).
- You can tap on individual photos, or swipe across to select multiple.
- Tap on any you select by accident to deselect them.
- Then at the bottom of the page tap on Add To.
- You can either add them to an existing album, just swipe down the page until you see it, or you can create a new album.
- If you want a new album tap New Album, and give it a name.
- Click on Albums at the top and then swipe down until you find the new album you just created. Your images will be there.
- When you open your Album you can tap on the arrow at the top to see a slideshow.
How to change the order of photos on iPhone?
- If having created your album you aren’t so keen on the order of the photos it is possible to move them around.
- Open the album and then gently press and hold an image until it starts to float (if you press too hard the image will open in a preview window, your want to press to the first not second level).
- Once the image enlarges very slightly you will be able to drag it into a new position. Once you are happy with its location let go of it.
How to change the order of albums on iPhone
Changing the order of albums can be done in a similar way:
- On the Albums page, scroll down to My Albums.
- In the top right tap on Edit.
- All your albums will have a red circle with a line through it. Press gently on that photo until it pops out a bit, then drag it to the new position.
- Let go when you have the Album in the preferred location.
- Note, you cannot move albums into the section above where Apple’s standard albums sit.
How to hide photos on the iPhone
Lots of people want to know if it’s possible to delete photos from All Photos without also deleting them from an album.
Unfortunately, it’s not possible to do that - if you delete from All Photos you delete from everywhere (including iCloud if if was taken on that device and you share photos to all your devices using iCloud Photo Library).
However, there is a way to keep private photos private:
- Open All Photos and select the photo or photos you want to hide.
- Now tap on the share icon (the square with an arrow coming out of it).
- Along the bottom you will see various options to Copy, Print, Slideshow, Add to Album… and if you keep swiping: Hide. Tap Hide.
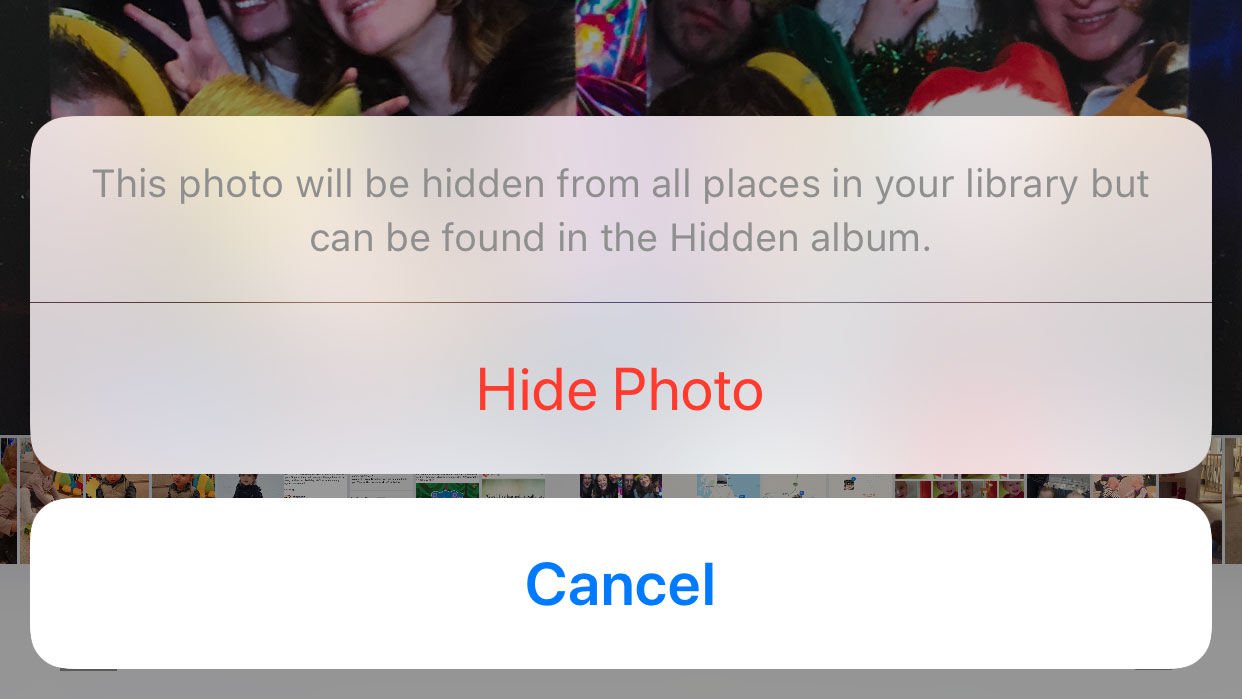
- You will see a dialog saying that the photo will be hidden from all places in your library but can be found in the Hidden album. Tap Hide Photo.
- The photo will disappear from view.
- To see the photo again go to the albums page and scroll down until you see the Hidden folder. Tap on that to open it and you will see any of your hidden photos.
How do you combine photos on iPhone?
Lots of people want to combine photos into a collage.
Unfortunately it’s not possible to do this using iPhoto, but you can use a separate app to combine photos.
There are lots of free apps available on the App Store that help you create collages of photos. One popular option is Pic Collage, we’ve also used PE Foto.
- To create a college in Pic Collage, download and open the app.
- Choose Grids.
- Tap on OK if the app asks whether it can access your photos.
- Tap on the photos you wish to add to the collage to select them.
- In the top left you’ll see an indicator of how many images you have chosen. Tap on that when you are finished.
- You will now see a grid with your images. In the tip corner are two guides that indicate you can drag to make the space given to that image bigger. Drag it until you are happy
- Tap on another image to change the size of that picture.
- When you are happy, tap on Done.
- Then tap Save to Library (or you can share directly to your social network of choice).
- You can also add some fun stickers to your collage, some of which are free.
- Once you are happy with your design tap on the Share icon to save it to your photo library.
How do I add a caption to a photo?
It is possible to add text to a picture in iPhoto using the Markup function - although you may prefer to use a separate app which will offer you more creative options.
- To use Markup, open the image you wish to add text to and tap Edit.
- Tap on the circle with three dots in it.
- Choose Markup.
- Tap on the + and choose Text.
- A text box will appear and you can enter the caption.
- Tap on the AA icon to choose your font and font size.
- Tap on the text box and the keyboard will appear. You can type your text in.
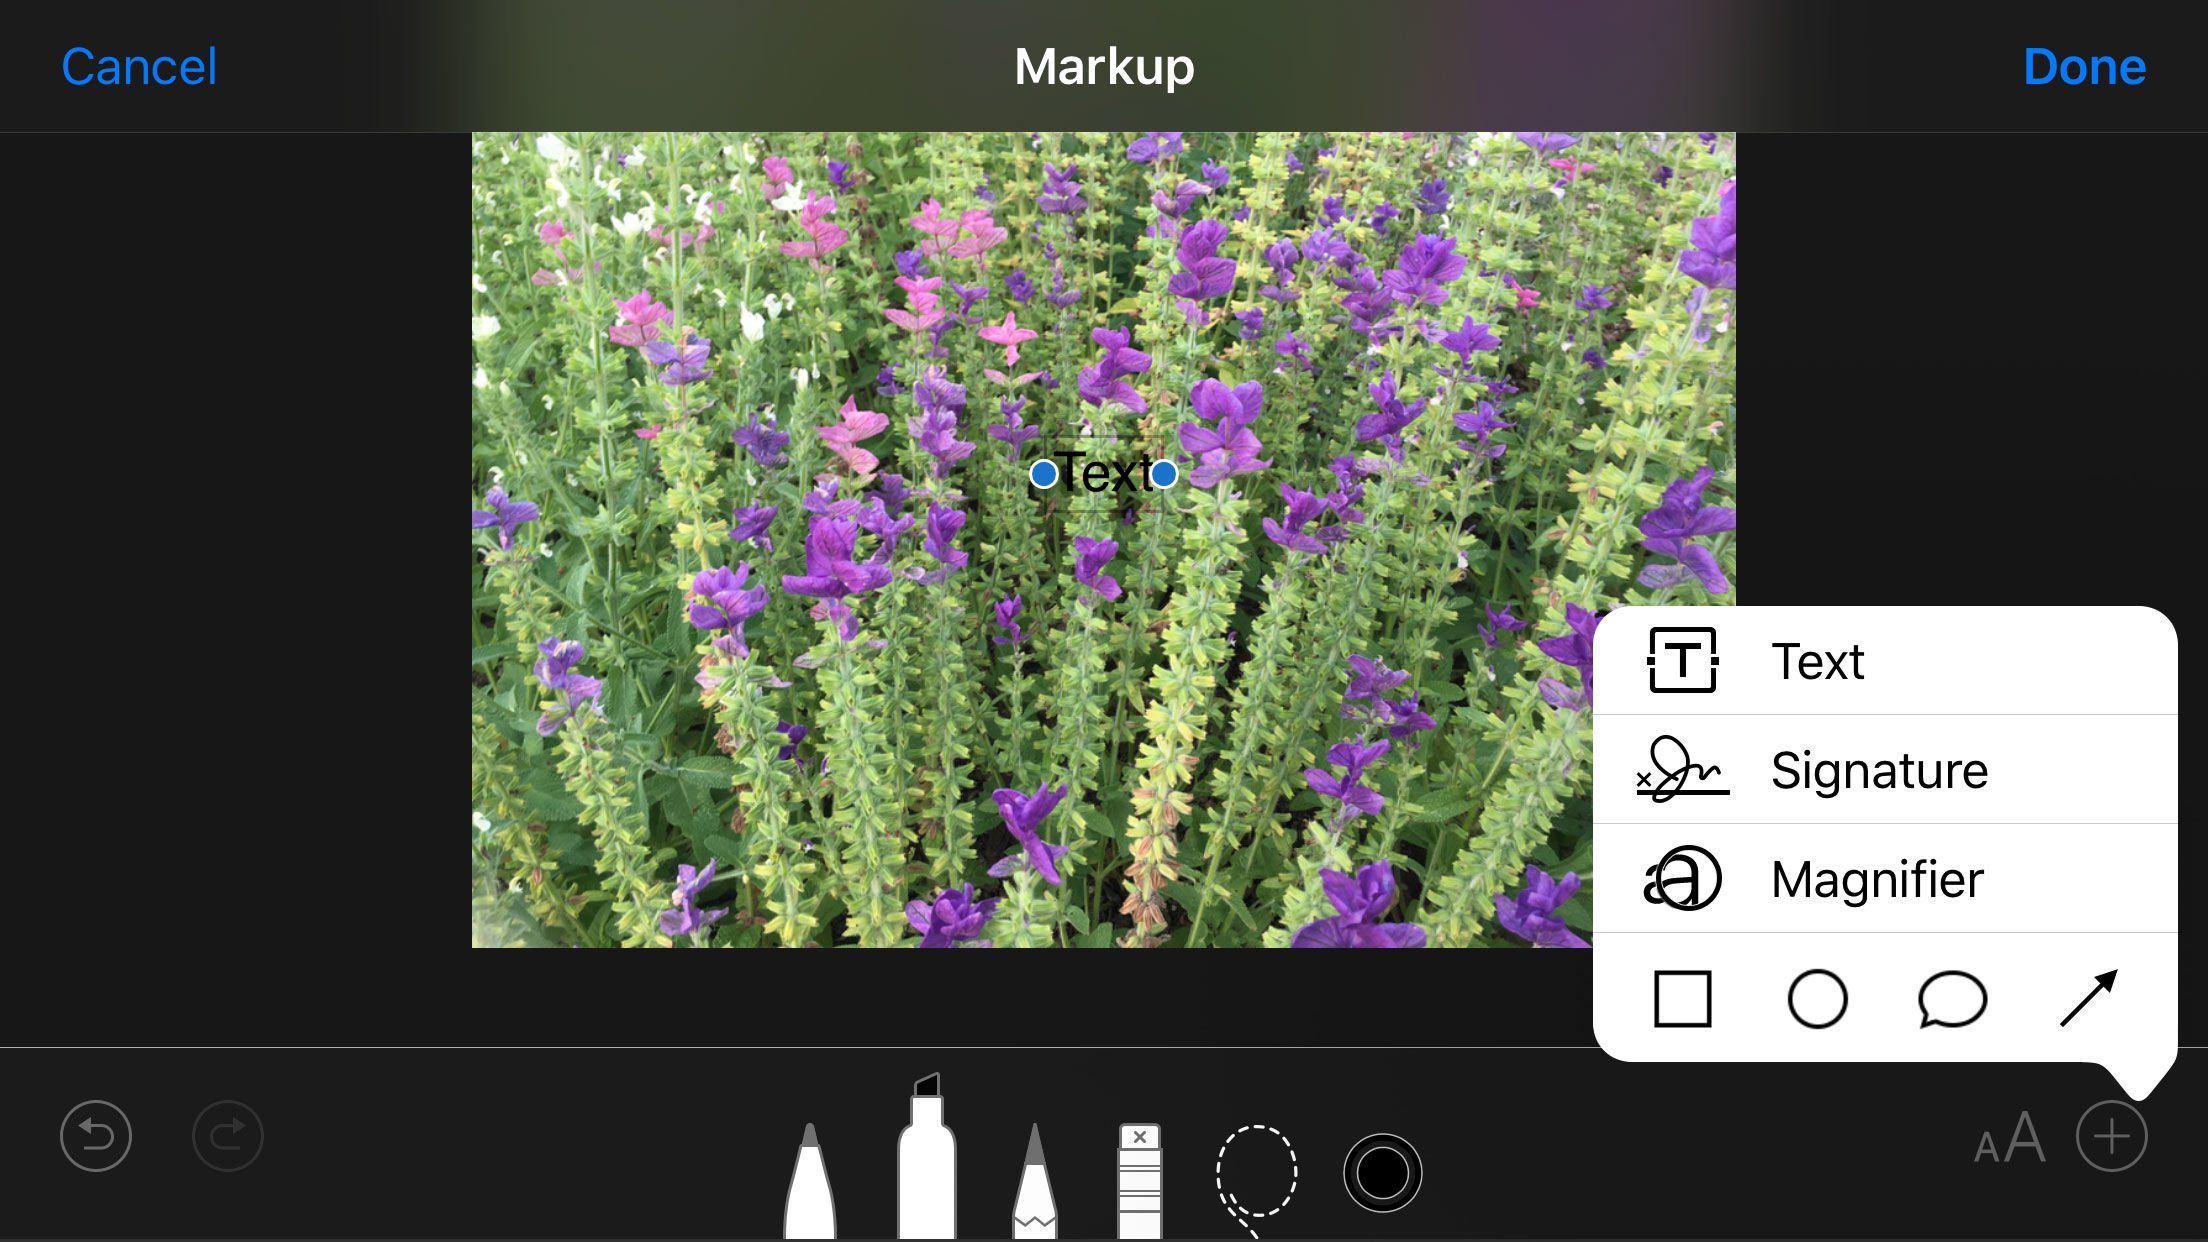
- You can change the size of the bounding box so that the text fits, and then move it to where you want it to appear.
- Tap on Done when you are happy with the position.
There are a lot more creative options for adding captions in Pic Collage:
- Open the Pic Collage app and choose your picture from your photo library.
- Tap on the green tick to open it in Pic Collage.
- Tap on the image and then tap on Text from the options below.
- To change the size of the type press and drag on the double sided arrow.
- You can also change the position and rotate the text the same way.
- When you are down save to your photo library or share to your social network.
How to delete photos on the iPhone
If you decide to delete a few not so good photos, you can do so, but if you were hoping to make some space, you may be surprised when it doesn"t make any difference.
This is because the act of deleting a photo doesn"t actually delete a photo! When a photo is deleted it moves to the Recently Deleted folder where it remains for 30 days unless you go to the folder and delete it from there.
So to delete a photo you need to do the following:
- Tap on select.
- Tap on the photo(s) you want to delete.
- Tap on the waste paper basket.
- Tap on Delete Photo (despite the warning that it will be deleted from iCloud).
- Tap on Albums.
- Scroll down the page to Recently Deleted.
- Tap on Recently Deleted and then choose Delete All.
Of course this means that if you delete an image from your device it’s not immediately removed. You have 30 days in which to change your mind. This is good because if you then decide you were wrong to delete it you can go to the Recently Deleted folder, open the image and select Recover.
How to delete duplicate photos on the iPhone
It can be frustrating when you take a photo but keep your hand on the shutter for a fraction too long and discover there are ten or more very similar shots. This is due to Apple"s Burst mode, which is a great feature if you are photographing children or animals (since it maximises your chance of getting a good shot). However, it can be frustraiting if you don"t have a lot of space on your iPhone and you want to delete these duplicate images.
- You can find all your Burst mode photos in an album, so to start go to Albums.
- Find the Bursts album and tap on it.
- Tap on a cover image of a set of bursts that you wish to sift through.
- At the bottom of the image tap on Select...
- Now you can select a Favourite if you want to keep one of the images. Just swipe through and tick any you want to keep by tapping on the circle in the bottom right of the image.
- Tap on Done.
- Now choose to Keep Only 1 Favourite (or more, depending on how many you are keeping).
How to delete photos from my iPhone but keep them in iCloud
If you are trying to make space on your iPhone you may think that deleting photos might be a good idea - especially if you pay for iCloud Photo Library and assume that your photos are backed up there.
Unfortunately photos aren’t backed up. If you delete them from the device you took them on then they will be deleted from all the devices that share your iCloud Photo Library access.
If you want to learn how to back up your iPhone photos read this.
No comments:
Post a Comment