Curving text around a simple shape in Adobe Photoshop is a handy skill to know. For instance, you might want to create a circular logo with some text that surrounds it. Or a quick mockup of a rubber stamp.
Just remember that wrapping text along a circular path is different from warping text in Photoshop — the latter tends to deform the text. However, both are used for some fantastic text manipulation and both are good to know.
This tutorial’s screenshots are from Photoshop CC 2018.
How to Type Text in a Circle in Photoshop
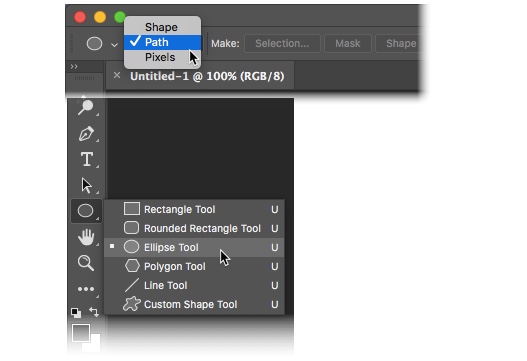
- Select the Ellipse tool. Change the type to Path.

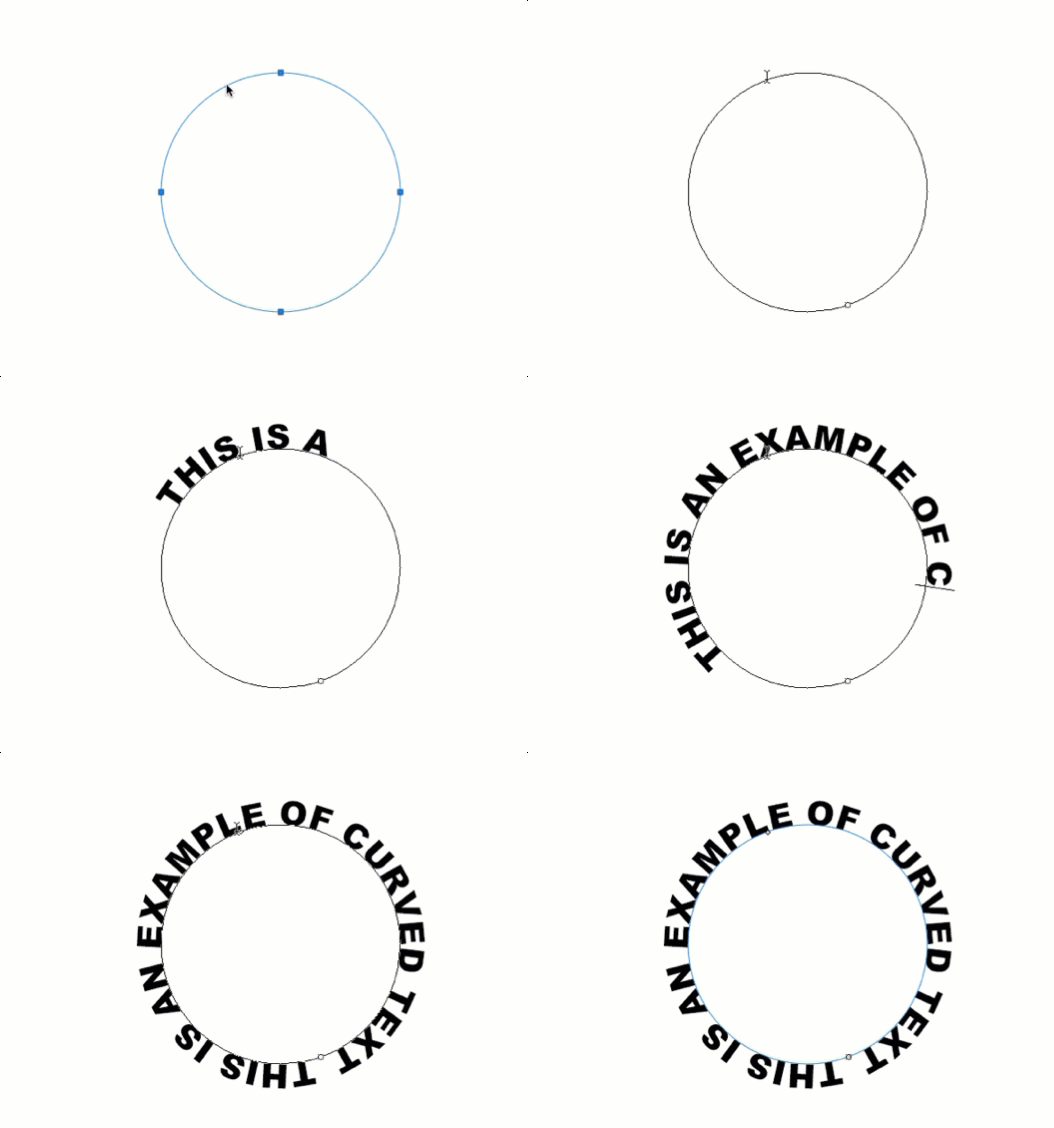
- Drag and draw to make a circle on your document. Press the Shift key as you drag to make a perfect circle.
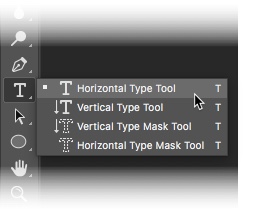
- Select the Horizontal Type tool. From the Options bar select the font attributes like the style, size, and color of the text.

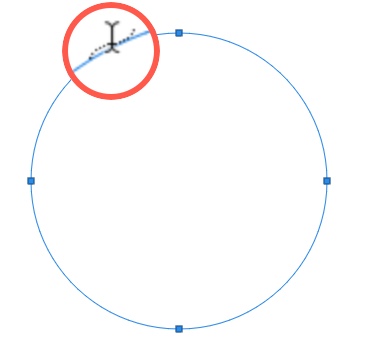
- The type tool is represented by a cursor in the shape of an “I” beam inside a dotted square. Move the cursor over the edge of the shape. The “I” beam changes to an “I” beam with a wavy line that resembles a sin curve.

- Click on the shape border in the spot where you want to start adding text. As you type, the text curves around the shape. Click the checkmark on the Options bar to finalize the text.

- To change the position of the circular text, select the Path Selection tool from the Tools panel. Drag the cursor outside the circle and over the text to rotate it to a new position. Drag the cursor inside the circle to flip the text and rotate the text inside the shape.
This is an example of the basic steps you need to follow to type circular text. But don’t let your creativity stop here. You can create a path of any shape or use the Pen tool and follow the same steps to create interesting text shapes. Try it with a custom shape (For e.g. a heart) and see what you can come up with.
Have you used this feature before? How do you prefer to create a curved type along a path?
No comments:
Post a Comment